Sunday, August 30, 2009

It's Party Time


apps, originally uploaded by Kim De.

Bo and I hosted a party Saturday night to celebrate his 20 years in the US. His food choice: Mexican!

We started the evening with chips, salsa and guacamole, and a shrimp cocktail with a smoky sauce. After drinks, snacks and lots of visiting, we moved on to dinner.


While Bo grilled the flank steak, I heated up the side dishes. Corn tortillas, cilantro and jalapeños were set out to go with the steak while Drunken Beans from Moosewood, Spicy Slaw from Rick Bayless and a white rice rounded out the dinner. I have to admit, my plan to photograph the dinner before we ate it was forgotten with the flurry of activity, so you will have to use your imagination with read the recipes to virtually taste everything!

The beans are a favorite of mine, and did not disappoint this time either. The slaw was quite spicy, so the guests were split on the heat factor. (Me, I love spicy food). It was very good, however, when placed in a taco!


Rounding out the evening was, again, Died and Went to Heaven Cake, with glasses of bubbly champagne to toast Bo – altho I have to admit, I feel we were really toasting MY good fortune that he chose the United States as his home.


Drunken Beans (Adapted from Moosewood New Classics)

1 tablespoon vegetable oil
1 cup chopped onions
2 garlic cloves, minced or pressed
1 teaspoon salt
1 teaspoon ground cumin
12 ounces amber beer
2 teaspoons brown sugar, packed
1 cups cooked pinto beans (15-ounce can, rinsed and drained)
1 cups canned tomatoes with juice, chopped (14.5-ounce can) NOTE: I dont care for the 1:1 ratio of beans to tomatoes, as I like the beans to be the star, so I add all the juice from the can with half of the tomatoes.
2-3 teaspoons chipotle adobo sauce NOTE: I chop one canned chipotle pepper and add a tiny bit of the sauce
2 teaspoons soy sauce

Heat the oil in an 8- or 9- inch frying pan. Add the onions, garlic, and salt and saute on medium-high heat until the onions are translucent, about 10 minutes. Dust the onions with the cumin and continue to cook stirring continuously, for another minute or two.


Stir in the beer, brown sugar, pinto beans, tomatoes, adobo sauce, and soy sauce. Bring to a boil then reduce the heat and simmer gently, uncovered, for about 20 minutes to allow the flavors to mingle and the alcohol to mellow. Stir occasionally.
Ladle into small bowls and serve.

Spicy Slaw (Adapted from Rick Bayless)

1 small head green cabbage, cored and shredded, about 6 cups
1 cup shredded red cabbage
½ of a small white onion, chopped and rinsed
1 cup roasted corn (I roasted the kernels in a dry frying pan)
½ cup chopped cilantro
2/3-1 cup mayonnaise
1 T cider vinegar
2-4 T hot sauce NOTE: I used Hector's Chocolate Habenero sauce from Chorizo, a favorite restaurant of ours in Asheville NC. I only used 1T, as this sauce is potent!
Salt to taste

Mix all vegetables in a large bowl. Mix mayonnaise, vinegar and hot sauce. Start by adding 1/3 of the dressing, sit for 15-30 minutes then taste, adding as much dressing as you want. I only ended up using ½ of the dressing recipe.


Smoky Grilled Tomato Cocktail Sauce (Adapted from Bobby Flay)


6 plum tomatoes or 4 beefsteak tomatoes, halved
Olive oil
Salt and freshly ground black pepper
1 teaspoon honey
1 chipotle in adobo or 1 tablespoon chipotle hot sauce
3 heaping tablespoons prepared horseradish
Dash Worcestershire sauce
Juice of 1/2 lime
Chopped cilantro leaves
Grilled large shrimp

Heat grill to high.


Brush tomatoes with oil and season with salt and pepper. Grill until slightly charred and soft. Place tomatoes, honey, chipotle, horseradish, Worcestershire, lime juice, cilantro, salt and pepper and a touch of olive oil in food processor and process until slightly smooth. Serve with shrimp.

Friday, August 28, 2009

An experimental pizza


canadian bacon pineapple za, originally uploaded by Kim De.

An exciting thing happened Thursday night. Bo told me that he remembered that is was pizza night and got excited! - Remember, this is the boy who DOESNT LIKE PIZZA! He has, however, decided he likes mine, and likes them so much that he looks forward to a pizza dinner!

Thursday's offering was a variation on the pineapple/canadian bacon pizza. I am usually not a fan of pineapple on a pizza, but Bo likes it, so I wanted to make it for him. I was thinking that roasted poblanos might add a touch of heat as well as the smoky flavor to tie in with the canadian bacon - then it hit me. If I was going to roast the pepper and quickly grill the bacon, why not also grill the pineapple!

To construct, I decided to put a thin layer of marinara on the homemade crust before laying down the thin slices of poblano pepper, roasted and peeled. I wanted that to be the highlight, so only one chunk of char-grilled pineapple and one square of bacon was placed between the peppers. Then a few small slices of fresh mozzarella were placed on top before sliding the pizza into a 550 degree oven. 7 minutes later it was ready to come out and after a brief rest, it was ready for slicing.


Bo enjoyed his favorite flavors of pepper, canadian bacon and pineapple together and I was able to handle the pineapple because of the char flavor, and meat because I love my husband. :)

Thursday, August 27, 2009

Who you calling obsessive? (OR Mac 'n'Cheese the sequel)


Fav mac and cheese, originally uploaded by Kim De.

Staring at last nights macaroni and cheese in the fridge and knowing that I was serving it to a girlfriend for lunch, I began to think of ways to doctor it. I could make an additional cheese sauce and mix it in – no, that may make it even more gummy. I could add more milk when reheating – no, then it loses its cheese flavor. I could, could ... just make the one I KNOW I like so I will feel better.

No, I dont have a problem!

The recipe I have come to rely on for years is from Betty Crocker. I dont know for a fact that it is the same recipe my grandma used, but I know it comes out similar and since I take liberties with the recipe anyway (After all, I AM me), it is the base I use.

I'm sure grandma used colby cheese, I use sharp cheddar. I KNOW she used more butter, and am positive she didnt use whole wheat pasta. Notice the corkscrew pasta used both days – this is only because I didnt currently have macaroni. I am very loyal to that shape for this dish. I also normally use yellow cheddar, but white was in the fridge, so that was a slight variation this time.

Note the crunchy looking macaroni? Now THAT is macaroni and cheese!


The verdict after lunch? This is my go-to recipe now and forever (or until I get that new recipe itch...)

So, without any further ado, Kim's Favorite Macaroni and Cheese.

Kim's Favorite Macaroni and Cheese (Adapted from Betty Crocker)

2 cups uncooked whole wheat elbow macaroni (7 ounces)
2 Tbs butter or margarine
1/4 cup all-purpose flour
1/2 tsp salt
1/4 tsp pepper
1/4 tsp ground mustard
1/4 tsp Worcestershire sauce
1 1/2 cups milk
6 oz cubed Cheddar cheese

Heat oven to 350ºF.

Cook macaroni for 6 minutes then drain

While macaroni is cooking, melt butter in 3-quart saucepan over low heat. Stir in flour, salt, pepper, mustard and Worcestershire sauce. Cook over medium low heat, stirring constantly, until mixture is smooth and bubbly; remove from heat. Stir in milk. Heat to boiling, stirring constantly. Boil and stir 1 minute.

Gently stir macaroni into white sauce. Add most of cubed cheese and pour into a greased 2-quart casserole. Put the rest of the cubes on top Bake uncovered 30-45 minutes or until bubbly.

Wednesday, August 26, 2009

Macaroni and Cheese experiment


Mac n cheese, originally uploaded by Kim De.

This week you wont see much of me - lots of "make up as I go along" cooking coupled with some dinner plans make for a "low recipe/low blogging" week.

I did cook something for dinner Tuesday night. I made my favorite broccoli salad (blogged here) with some grilled chicken and macaroni and cheese.

When will I learn? I am a girl who wants her grandma's baked macaroni and cheese. Cheese diced not shredded; cheese added separate from the white sauce; crunchy on top from a good time in the oven. As much as I love this combination, every once in a while I decide its time to try something new. The recipe looks interesting, it came from a good source, so it must be good, right? Well taste is in the eye of the beholder (or something like that) and I need the old fashioned baked mac 'n' cheese.

This recipe was easy to make, and the final product had flavor, but it was creamy with a cheese sauce and no crunch on top. Not what my mouth needs. I do think a touch of butter (even just 1T) would have helped it be a bit creamier and less "gummy", but even then, it would not be my go-to comfort food.

If you or your family like stove-top macaroni and cheese, you should give this one a go (but add 1T butter to the flour before slowly adding the milk) . If you ever do, let me know your thoughts.

And dont worry. I will make the baked kind soon enough!

Stovetop Whole Wheat Macaroni and Cheese (Adapted from Whole Foods)

8 ounces dry whole wheat elbow macaroni
1 cup nonfat milk
2 tablespoons whole wheat pastry flour
1 teaspoon dry mustard
Cayenne to taste (optional)
1 cup shredded sharp cheddar cheese
1/4 cup shredded parmesan cheese
Salt and pepper to taste

Bring a large pot of salted water to a boil. Add macaroni and cook until al dente, 10 to 12 minutes. Drain well. (NOTE I dont like my pasta done this much – I start checking it after 7 minutes)

Meanwhile, whisk together milk, flour, mustard and cayenne in a large saucepan until completely blended then cook over medium heat, stirring constantly, until thickened, 6 to 8 minutes. Add cheeses and stir gently until melted, then add drained pasta to sauce. Season with salt and pepper, stir well and serve hot.

Monday, August 24, 2009

A few foodie moments


reuben, originally uploaded by Kim De.

I have been out of pocket for several days. We took a trip to Cincinnati for the ATP tennis tournaments. I love to explore a city for what food offerings I can find, and this trip made no exception.

The picture above is from our night in Louisville. We ate at an Irish Pub in a touristy area called Fourth Street Live. You see a reuben with a side of chips with curry. We discovered two things about chips and curry:

1. Curry sauce doesnt belong on french fries; and
2. An Irish Pub should never serve curry anything to an Indian boy :)

Friday I dropped Bo off at the tournaments and headed into downtown Cincinnati. I had been looking forward to visiting the Findlay Market. I LOVE seeing how cities set up their markets. This one was great. One stop shopping for produce, seafood, wines...you name it is was there.


The weather was great, especially for August! After a pass around the shops, I stopped at Angelina Fine Italian Foods for lunch, which I was able to eat outdoors. Please forgive the picture, taken with my phone, as it really doesnt do the sandwich justice.


After spending quite some time perusing the menu, I landed on one of their paninis. It was a salty pancetta, and a sharp brie with slices of tart apple pressed between a homemade baguette. I can tell you I would not have ever thought of putting those flavors together, but now that I have experienced them, I will be doing a replication.

My dream, a foodie weekend. Bo's dream, a tennis weekend. I had to include a final shot of Roger Federrer playing tennis.

Tuesday, August 18, 2009

This is going to be a long one...


cam - pre bake, originally uploaded by Kim De.

Once upon a time there women who lived close together and would see each other from time to time. Eventually, some of the women moved away and it was harder for gatherings to take place. (Dont go away, here comes the exciting climax!) One night their schedules allowed them to all gather for dinner. Dinner was had, and then blogged. The End.

Ok, so you may have guessed I had company for dinner Tuesday night. The result? Lots of recipes and reviews for you!!

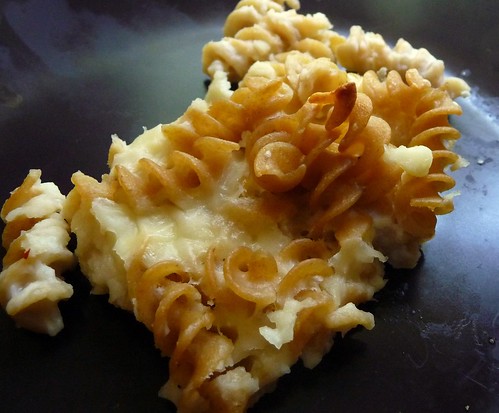
The top picture you are seeing belongs to the un-baked Cannelloni with Spinach Goat Cheese, Walnuts and Roasted Garlic Tomato Sauce from Field of Greens. I have heard nothing but great things about this recipe, and besides it is from the famed Greens Restaurant in San Francisco, so what could be wrong? Not much! It was pretty good, although I would have liked a but more “umph” in the flavor department. It was a labor intensive dish, but was easily made in sections over a few days, so really didnt seem that difficult!

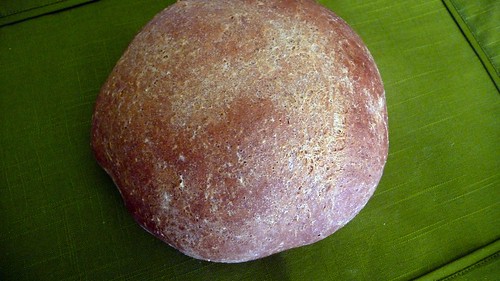
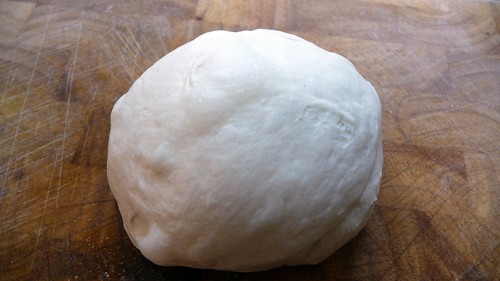
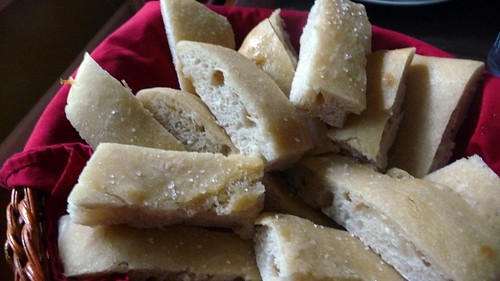
Next up was Rustic Sourdough Focaccia from Lora Brody. My new obsession with sourdough and bread making led me naturally to this recipe. As written, the dough was very wet (even more because of the rain outside), and it never set up the way it was supposed to (ya know, so you can make dimples in it) The sourdough tang was prominent but it didnt puff up and the crust was chewy, not normal for a focaccia. My guests, however, loved it, so that is what matters to me!


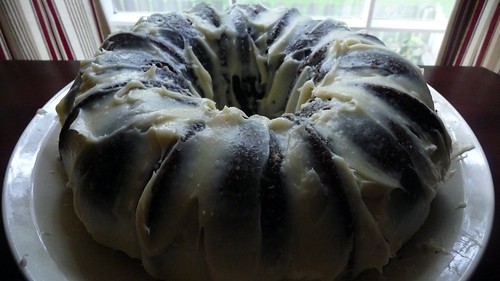
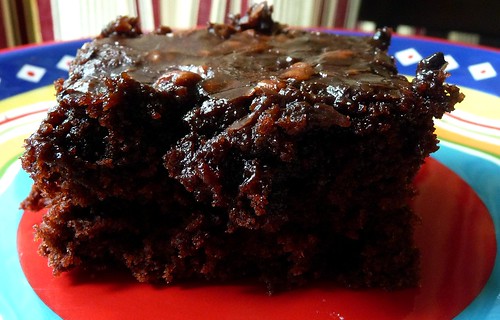
The grand finale was Eating Well's Died and Went to Heaven Cake.

Lemme tell you, the name does not lie. This cake is so dark and moist from the addition of strong brewed coffee. I replaced the frosting in the recipe with a cream cheese frosting, and I think I will continue to do that. This cake was a HUGE hit, as it has been every time I have served it!

It was a great evening with great friends and wonderful recipes!


Cannelloni with Spinash, Goat Cheese, Walnuts and Roasted Garlic-Tomato Sauce (Adapted From Field of Greens)
NOTE: I doubled the sauce on this recipe. Also, I used manicotti shells instead of pasta sheets

Roasted Garlic-Tomato Sauce:
1 head garlic
1 Tablespoon extra virgin olive oil
2 pounds fresh tomatoes, peeled and seeded, about 3 cups, or 3 cups canned tomatoes with juice
1/2 small onion, diced, about 1/2 cup
salt and pepper
1/4 cup dry sherry
1 bay leaf

The Filling:
1 1/2 teaspoons extra virgin olive oil (cooking spray)
1/2 medium red onion, diced, about 1 cup
salt and pepper
4 cloves garlic, finely chopped
1 large bunches of spinach, stems removed and leaves washed, about 16 cups
3/4 teaspoon minced lemon zest
1/3 cup walnut pieces, roasted
1/4 cup chopped fresh herbs, such as marjoram, thyme, chives, and parsley
1/2 pound ricotta cheese, about 2/3 cup (2% cottage cheese)
1 egg, beaten
2 ounces Parmesan cheese, grated, about 2/3 cup (10 TBSP)
2 ounces Montrachet cheese, or other creamy, mild goat cheese
2 fresh pasta sheets, about 10 ounces

THE SAUCE: Preheat the oven to 375. Rub the garlic with a little olive oil, place it on a baking sheet and roast until very soft, 30 to 35 minutes. When garlic is cool, slice off the top of the bulb and squeeze the cloves out of the skin. Puree them with the tomatoes in a blender or food processor.

Heat 1 teaspoon of olive oil in a saucepan and add the onion, 1/2 teaspoon salt, and a few pinches of pepper; saute over medium heat for 5 minutes. When the onion is soft, add the sherry and bay leaf and simmer for 1 or 2 minutes, until pan is nearly dry. Add the tomato-garlic puree and 1/4 teaspoon salt and simmer, uncovered, over low heat for 30 minutes. (TIP: Add up to 1 teaspoon sugar after simmering sauce to balance the flavor if the sauce is acidic).

THE FILLING: Heat 1 tablespoon of the olive oil in a large skillet. Add the onions, 1/2 teaspoon salt, and a few pinches of pepper; saute over medium heat for about 5 minutes, until the onions begin to release their juices. Add half the garlic and saute until the onions are soft, 2 to 3 minutes. Transfer onions to a bowl.

Heat the remaining teaspoon olive oil in a large skillet and quickly wilt the spinach over medium-high heat with 1/2 teaspoon salt, a few pinches of pepper, and the remaining garlic. Remove the spinach from the heat, drain, and cool. Squeeze out the excess moisture a handful at a time, then coarsely chop.

Add the spinach to the onions along with the lemon zest and walnuts. Set aside half the fresh herbs to sprinkle on top after baking and add the rest to the spinach-onion mixture.

Place the ricotta in a bowl and stir in the egg. Set aside half the Parmesan cheese to sprinkle over the cannelloni; add the rest to the ricotta with 1/4 teaspoon salt and 1/8 teaspoon pepper. Combine the spinach and onions with the ricotta mixture, then crumble in the goat cheese. Season with salt and pepper to taste.

ASSEMBLING THE CANNELLONI: Cut the pasta sheets into 12 4-inch squares (or comparable size to accomodate the size of the pasta sheets).

Preheat the oven to 350. Lay the pasta squares on a work surface and spread 1/4 cup of the filling along the edge of each square. Roll loosely; the filling will expand during baking.

Ladle 1 1/2 cups tomato sauce into the bottom of a 9-by-13-inch baking dish. Place the cannelloni close together in the dish, seam side down, and ladle the remaining sauce over them. Use a pastry brush to spread the sauce evenly, particularly on the ends, making sure the pasta is covered with sauce.

Cover and bake for 20-25 minutes. Sprinkle the cannelloni with the reserved Parmesan and fresh herbs just before serving.


Rustic Sourdough Focaccia (Adapted from (Pizza, Focaccia, Flat and Filled Breads from your Bread Machine - Perfect Every Time)
NOTE: I do not own a bread machine, so this was done by hand

For the dough:
1/2 teaspoon yeast
3 cups all-purpose flour -- plus 1 tablespoon
1 1/2 teaspoons coarse salt
1 cup sourdough starter
1 1/2 cups water -- plus up to an additional 1/4 cup if necessary to make a very wet dough that does not form a discrete ball

To finish the focaccia:
2 tablespoons olive oil
1 teaspoon coarse salt

Place all dough ingredients, except the tablespoon of flour, in the machine, program for Dough or Manual and press Start. After the first 3 to 4 minutes of kneading, add more water if necessary to form a very wet dough that barely holds its shape and does not leave the bottom of the pan.

At the end of the final cycle, remove the pan from the machine or remove the dough to a lightly oiled bowl. Sprinkle the top of the dough with the 1 tablespoon flour, cover the top of the pan or bowl with plastic wrap, and place it in the refrigerator. Refrigerate at least 12 hours and up to 18 hours.

Place the dough on a lightly floured work surface. Punch it down and form it into an 11-inch disk, then place it on a baking sheet or pizza pan or wooden paddle that has been lightly sprinkled with cornmeal. Cover the dough with a clean towel and place it back in the refrigerator for 4 hours. At the end of that time, take it out of the refrigerator and leave it, still covered, at room temperature until it rises to almost double in bulk. This may take up to 2 hours.

Preheat the oven to 475 degrees with the rack or a pizza stone or tiles in the center position. Just before baking, lightly press your fingertips into the dough to make gentle indentations in the surface. Drizzle with the olive oil and sprinkle with salt. Slide the pan into the oven, or slide the dough onto the pizza stone and bake for 18-22 minutes, or until the top is crusty and a rich golden brown color. Eat hot, warm, or at room temperature. This focaccia is best eaten the day it is made.


Died-and-Went-to-Heaven Chocolate Cake (Eating Well)


Cake
1 ¾ cups all-purpose white flour
1 cup white sugar
¾ cup unsweetened Dutch-process cocoa powder
1 ½ teaspoons baking soda
1 ½ teaspoons baking powder
1 teaspoon salt
1 ¼ cups buttermilk
1 cup packed light brown sugar
2 large eggs, lightly beaten
¼ cup canola oil
2 teaspoon pure vanilla extract
1 cup hot strong black coffee

Icing
1 cup confectioners' sugar
½ teaspoon pure vanilla extract
1-2 tablespoons buttermilk or low-fat milk

Preheat oven to 350°F. Lightly oil a 12-cup Bundt pan or coat it with nonstick cooking spray. Dust the pan with flour, invert and shake out the excess.

In a large mixing bowl, whisk together flour, white sugar, cocoa powder, baking soda, baking powder and salt. Add buttermilk, brown sugar, eggs, oil and vanilla; beat with an electric mixer on medium speed for 2 minutes. Whisk in hot coffee until completely incorporated. (The batter will be quite thin.)

Pour the batter into the prepared pan. Bake for 45 to 55 minutes, or until a cake tester inserted in the center comes out clean. Cool the cake in the pan on a rack for 10 minutes; remove from the pan and let cool completely.

To make icing: In a small bowl, whisk together confectioners' sugar, vanilla and enough of the buttermilk or milk to make a thick but pourable icing. Set the cake on a serving plate and drizzle the icing over the top.

Pizza on an off night


jal/ranch, originally uploaded by Kim De.

We are out of town part of this week, so we are switching things up a bit. I was craving pizza tonight and I knew the best way to break it to Bo - jalapenos!

I have been looking for a reason to make a pizza with my homemade ranch dressing and spicy jalapenos seemed the perfect contrast for the coolness of the ranch. Oh, one last thing - I grilled it

I started off by pulling our new favorite pizza dough out of the freezer. After it thawed, it was easy to poke and punch it into a slightly round shape. Now this pizza ended up being a collaboration. My plan was to round out the veggies with tomatoes but when Bo suggested red peppers, it made so much sense to roast them to finish things off. A light sprinkling of mozzarella and provolone cheeses held everything together while helping the ranch keep things cool.

We both loved the mix of flavors on this pie and will be using this one again!


Jalapeno Ranch Pizza

Pizza dough pushed or rolled into an 8-inch circle
1/2-1/3 cup of your favorite Ranch Dressing (or to taste)
1/2 large red pepper, roasted, peeled, seeded and julienned
8-10 pickled japapeno slices (or more to taste)
1/2-3/4 cup shredded italian cheeses ( any mix you choose: mozarella, provolone, parmesan)

Prepare or purchase the crust of your choice. Roll the dough into approximately 8 inches and put in the refrigerator on parchment paper or foil with cornmeal to firm up prior to grilling.

Roast the pepper then steam in a paper bag for 15-30 minutes. Rinse under water to remove the peel, then seed and julienne. Blot the pickled jalapeno slices in between paper towels.

Pre-heat the grill on high for at least 15 minutes. Spray with non-stick spray then slide the dough into the hot grates. (Tip: Use a peel coated with cornmeal, or on have on a cookie sheet then flip over on to the grate.) Grill 5-10 minutes or until the underside is light brown. Remove from the grill, flipping over so the grilled side is facing you.

Spoon the ranch dressing over the grilled side of the crust, spreading around. Sprinkle approximately 1/2 cup cheese over the dressing, then place the red peppers on top. Scatter the jalapenos between the pepper slices and finish off with the final 1/4 cup of cheese. Turn the grill down to low and place the pizza back on, long enough to finish the bottom and melt the cheese. Remove and let rest for 5 minutes prior to slicing.

Saturday, August 15, 2009

Kim's Vegetable Tart


tart 1, originally uploaded by Kim De.

Since I made my first tart here, I have been hooked. I have purchased two tart pans and have even gone as far as to combine two recipes to make the tart you see on this page.

Several weeks ago I made Savory Carrot and Tarragon Tart. The flavor was so amazing that I decided to adapt it to a larger tart pan and different vegetables.

I used the original crust recipe, but changed the proportions of ingredients. In place of the tarragon I added fresh chopped basil. Strips of nutty swiss were laid on the crust before the addition of the onions and tomatoes. I shredded a sharp white cheddar right into the yogurt and egg mixture just before pouring into the pre-baked crust. The experiment went well and it was a hit with Bo and our friends.

The changes I would make? I couldnt taste the cheeses - any of them. Next time I will save the calories and leave them out. (If you know me, you know how hard that was to say). I also think the addition of mushrooms to the tomatoes would be amazing. Dont be intimidated by tarts - try one!


Vegetable Tart (Adapted from Eating Well)

For the crust

1 1/2 cup all-purpose flour
3/4 cup whole-wheat flour
1/8 cup fresh basil leaves, chopped
1/2 tsp salt
4 Tbs cold unsalted butter, cut into chunks
1/4 cup extra-virgin olive oil
1/4 cup plain yogurt

For the filling

2 Tbs extra-virgin olive
1 cup chopped red onion
1 lb tomatoes or any vegetable (i.e zucchini, broccoli, mushrooms etc.)
2 Tbs dry sherry, divided
1/8-1/4 cup Dijon mustard
2 large eggs
1/2 cup milk
1/2 cup plain yogurt
1/4 cup fresh basil, chopped
salt and fresh ground black pepper

To prepare the crust:

Preheat oven to 350 degrees.

In a food processor, add flours, basil and 1/2 teaspoon salt - pulse to combine. Add butter, one piece at a time, pulsing once after each addition. Pour in oil and yogurt - pulse just until combined (it should be crumbly). Scoop the crumbles into an 11" tart pan lightly coated with nonstick spray - evenly press the dough over the bottom and up the sides to form a crust. Place into the oven and bake until the crust is just set, but has not taken on any color, about 15 minutes. Remove and place pan on a wire rack to cool

To prepare the filling:

In a large skillet, heat oil over medium. Stir in onions - cook until tender, about 5 minutes. If using zucchini or mushrooms, add with 1 tablespoon sherry - cook, stirring, for 2 minutes. Remove from the heat. If using broccoli, steam until just cooked, about two minutes.

Add mustard onto the bottom of the crust and spread to form a thin layer. Start with 1/8 cup, adding more until your crust is covered. Cover the mustard evenly with the onion and whatever vegetables you used. Tomatoes should be laid down in a large circle around the outside edge, then brought in until crust is covered.

In a medium bowl, whisk together eggs, milk, yogurt, basil and remaining 1 tablespoon sherry - season with salt and fresh ground black pepper. Set tart pan onto a baking sheet - pour the egg mixture over vegetables. Place pan into the oven and bake until the center is set and the edges are golden brown, about 40 to 45 minutes. Remove and place pan on a wire rack to cool for at least 15 minutes before serving.

Friday, August 14, 2009

Pasta night


shrimp pasta, originally uploaded by Kim De.

We love when pasta night comes around. Pasta is one of my favorite things to cook - It lends itself to music and a glass of wine. Tonight it was our newly acquired Born to Run CD (we have tickets to the Boss in November, so this may be a recurring theme!).

I am trying to get more broccoli in our meals and with the shrimp in it for my seafood fanatic, plus the low cal creamy sauce, this recipe seemed to fit the bill.

The most time consuming part of this dish was chopping the fresh broccoli (which could be taken out all together if frozen broccoli was used.). Once the ingredients were laid out, the dish came together in 15 minutes. It was full of flavor, Bo loved it, and it was healthy. Seems like the perfect meal!


Shrimp, Broccoli, and Sun-Dried Tomatoes with Pasta (Adapted from Cooking Light)

1/2 cup sun-dried tomatoes, packed without oil
1/2 cup boiling water
3 cups whole wheat corkscrew pasta
1 1/2 cups chopped broccoli
Cooking spray
1 garlic clove, minced
1 pound large shrimp, peeled and deveined
1/2 cup white wine
1/2 cup (4 ounces) 1/3-less-fat cream cheese
1/4 cup chopped fresh basil
1/4 cup (1 ounce) grated fresh Parmesan cheese
2 teaspoons fresh lemon juice

Place tomatoes and boiling water in a bowl. Cover and let stand 30 minutes or until tender; drain and chop.

While tomatoes steep, cook pasta according to package directions, omitting salt and fat. Drain.

Steam broccoli with a teaspoon of water in the microwave for 2 minutes or until crisp-tender. Set aside.

Heat a large nonstick skillet over medium-high heat. Coat pan with cooking spray. Add garlic to pan; sauté 30 seconds. Add shrimp; cook 4 minutes. Add wine and cream cheese, stirring to combine; bring to a boil. Reduce heat, and simmer 2 minutes. Add tomatoes, broccoli, and basil; stir well. Cook 2 minutes or until thoroughly heated, stirring frequently. Remove from heat. Stir in pasta, Parmesan cheese, and juice. Serve immediately.

Thursday, August 13, 2009

No clever title available


brioche finale, originally uploaded by Kim De.


All my creativity has been poured into this bread, so no catchy title today. Brioche Filled With Chocolate Ganache. Honestly, the name says it all.

Now the fun part is this is from a book called Artisan Bread in Five Minutes a Day. The brioche dough makes enough for 4 different pastries (several besides my choice are included in the book). It can be frozen until needed, which makes it a great choice if you bake a lot.

The dough was made yesterday and put in the refrigerator. Like all doughs I am making in the month of August, it was quite sticky (humid) and was difficult to work with. I have confidence if made again in a dryer month, it wouldnt be so sticky. After the ganache was made (I melted the chocolate in the microwave), the dough was rolled out so the chocolate could be spread on top.


The dough and chocolate are then rolled up and put into a bread pan for a final rise. I didnt try very hard to make the dough fit evenly as it was sticking to every surface it came into contact with.


The final step was baking. After it cooled I gently sliced it. The sticky tacky dough was worth the effort, as the final product was as flaky as a slice from a pastry shop. I recommend this bread!


Brioche dough (Artisan Bread in Five Minutes a Day)

(makes about 4 loaves)

1 1/2 cups lukewarm water
1 1/2 tablespoons granulated yeast (2 packets)
1 1/2 tablespoons kosher salt
8 large eggs, lightly beaten
1/2 cup honey (this is my all time favorite!)
1 1/2 cups (3 sticks) unsalted butter, melted
7 1/2 cups unbleached all-purpose flour

Mix the yeast, salt, eggs honey and melted butter with the water in a 5-quart bowl, or lidded (not airtight) food container.

Mix in the flour, using a spoon until all of the flour is incorporated.

Cover (not airtight), and allow to sit at room temperature for about two hours.

The dough can be used as soon as it is chilled. This dough is way too sticky to use after the initial rise, but once it is chilled it is very easy to handle. The dough can be stored in the refrigerator for up to 5 days. After that you can freeze the dough.


Brioche Filled with Chocolate Ganache (Artisan Bread in Five Minutes a Day)

1 pound of the pre-made brioche dough.
4 ounces bittersweet chocolate, finely chopped (Valrhona or equivalent)
2 tablespoons melted butter
4 teaspoons unsweetened cocoa powder
1 tablespoon rum
5 tablespoons corn syrup NOTE: I used honey
1 egg white, lightly beaten with 1 tablespoon water
Granulated sugar for sprinkling on top


Melt the chocolate over low heat or in the microwave until smooth. Remove from heat, add the butter, and stir until incorporated.

Stir together the cocoa powder and rum, then add the corn syrup and mix until smooth. Add to the chocolate mixture.

Lightly butter a 9x4x3-inch loaf pan (non-stick is fine). Take the 1-pound piece of dough, dust with flour, and shape into a ball by stretching the surface of the dough around to the bottom on all four sides, until the top surface is smooth and taut. Roll out the ball into a 1/4-inch thick rectangle, dusting with flour as needed.

Spread 1/2 cup of the ganache evenly over the rectangle, leaving a 1-inch border all around. Starting at the short end, roll up the dough, sealing the bare edges as you roll.

Gently tuck the loose ends underneath, elongate into an oval, and drop into the prepared pan. Allow to rest for 1 hour and 40 minutes.

Preheat the oven to 350 degrees F. Using a pastry brush, paint the top crust with the egg white wash, then sprinkle with the granulated sugar.

Bake the loaf for about 45 minutes, or until the top is golden brown and the sugar caramelizes. Remove from the pan and cool slightly; drizzle the remaining ganache over the top crust.

Cool completely before slicing.

Wednesday, August 12, 2009

Finally, the garden has produced!


P1000757, originally uploaded by Kim De.

I saw something exciting out the window yesterday - a hint of red. Yes, my garden finally had produced tomatoes. How many you ask? You are looking at them...

Last night was soup night again. We wanted to try another cheddar ale soup to compare it with this one from last week. To make it purely scientific and unbiased, I pulled out a small amount of last weeks soup from the freezer and heated it up for comparison.

Our thoughts: The Butternut Squash and Ale Soup was a bit richer (possibly from the squash, but very likely from the cream). Last nights soup, Cheddar-Ale Soup, was a bit thinner, but had a great flavor, with less fat and calories as the creaminess comes from potatoes with a flour milk mixture. I would like to try making this recipe but adding the squash to see how they meld. There just arent enough days in the week for all the new recipes!

Cheddar-Ale Soup (adapted from Eating Well)

1 tablespoon canola oil
1 large onion, chopped
1 12-ounce bottle beer, preferably ale
2 1/4 pounds Yukon Gold potatoes, cut into quarters and boiled until tender then peeled (about 15 minutes).
1 14-ounce can vegetable broth or reduced-sodium chicken broth
1 cup water
2 ½ cups nonfat or low-fat milk
¼ cup all-purpose flour
1 ½ cups shredded sharp Cheddar cheese, divided NOTE: I used an extra sharp white cheddar
Chopped chives

Quarter the potatoes and add to water in a pan. Bring to a boil and cook for 15 minutes, or until tender. Cool slightly and pull off the peel.

Heat oil in a Dutch oven over medium heat. Add onion and cook, stirring, until softened, about 3 minutes. Add beer; bring to a boil and boil for 5 minutes. Add potatoes, broth and water; cover and return to a boil. Reduce the heat to maintain a simmer, and cook until the potatoes are tender, about 4 minutes. Remove from the heat and mash the potatoes with a potato masher to the desired consistency. NOTE: I used my hand blender for an almost totally creamy mixture

Whisk milk and flour in a bowl and add to the soup. Bring to a simmer over medium-high heat and cook, whisking occasionally, until thickened, about 3 minutes. Remove from the heat; stir in 1 1/4 cups Cheddar and stir until melted. Ladle the soup into bowls and garnish with the remaining 1/4 cup cheese and chopped chives.


Monday, August 10, 2009

Rye - Part Deaux


rye, originally uploaded by Kim De.

Fall cravings are in my mouth, and rye bread is what I need. With September comes the promise of crisp cool weather - and beginning in August I start to pretend it is here. Well here we are, almost half way through the humid month, and already on my 2nd rye.

This weekend was busy, with the beginning of the upcoming week even busier. That statement set up my excuse for not making the same rye as last week. It was amazing, it was rich in flavor, it was...a bit time consuming. So, to satisfy our taste buds and my schedule, I made Narsai's Light Rye Bread from The Bread Bible.

Now, I rarely meet a bread I dont like, and this loaf is no exception. But like wines and cheeses, there are subtle differences in quality between every bread recipe. While soft with a subtle taste, it is missing the "kick" and "tang" from the sourdough, and the caraway seeds blended in instead taping you on tongue and saying "here I am!"

Much of the flavor from this loaf comes from the molasses, while the softness comes from the gluten, used to break down the flour. I dont mean to sound as though I am complaining - I am not. I would imagine this will be pulled out again for busy weeks. But for most weeks, when rye is what I crave and I want flavor to dance on my tongue, Marylin's recipe it is!


Narsai's Light Rye Bread (Adapted from The Bread Bible)

NOTE: This recipe is written for a bread machine. I did not use one, instead letting the bread rise until doubled, deflating it, then shaping for a proofing rise before baking at 350 until the internal temperature was 185 (approx 30 minutes)

1 cup water
3 T molasses
2 T vegetable oil
2 cups bread flour
3/4 cup medium rye flour
5 t gluten
1 T caraway seeds
1 t grated orange zest
1 t salt
2 t bread machine yeast

Place the ingredients in the bread machine according to manufacture's instructions. Set crust for light, program for basic bread cycle and press start.

After the baking cycle ends, remove the bread immediately from the machine to the cooling rack. Cool to room temperature before slicing.

Saturday, August 8, 2009

A lovely company dinner


broc, originally uploaded by Kim De.

Last night some friends came for dinner. It was a great time - I LOVE company!!!!

We did a grilled dinner; simple but full of flavor. I rubbed some chicken with a barbeque rub and marinated it in beer and garlic. A sauce was made to compliment this - smoky and a touch spicy - with beer, vinegar, ketchup and brown sugar as well as some spices. My friend brought her famous tomato tart (PLEASE dont retire this Shannnon ;)) and we had a wonderful broccoli salad.

The broccoli salad is the main reason I am here today, since most of my dinner last night didnt involve a true recipe for blogging. This salad, however, deserves its own blog - in fact it deserves a standing ovation!!

I have been playing with broccoli salads all summer trying to find the right mix of vegetables (is it broccoli crowns or broccoli slaw) and the best sauce (is it mayonnaise, vinegar, yogurt, or a combo). Well last night I found it. This is now the base for every other broccoli salad I will make in the future. Ahhhhh now I can rest easy! Shredded carrots, sharp cheddar and toasted pepitas join the florets and dressing in this version. However, take those out and the choices are endless: raisins with crumbled bacon and sunflower seeds; diced tart apple and dried cranberries; add diced chicken for a full meal - really anything that strikes your fancy.


Now that I have raved and salivated all over your computer about the broccoli, I must make a mention about our pre-dinner snack. I put out fruit and cheese with Pumpkin-Walnut Focaccia with Gruyère. This recipe from Cooking Light has been made by many of my friends from their bulletin boards and I read several reviews before deciding to try it. I agree with what I read: This isnt a true focaccia. The texture is that of a fluffy flatbread and was very nice, but the word "focaccia" is misleading.

The addition of pumpkin added a lovely color and a slightly sweet flavor. Based on reviews, I added more cheese to the dough and I still couldnt taste it. If made again , I would leave out "inner" cheese and just add it to the top. The only other change I made was to leave out the walnuts as it was for company and not everyone appreciates nuts. I think it is a nice bread for soup or a snack, but with so many other recipes to try, I'm not sure I will try it again.


Broccoli-Cheddar Salad with Toasted Pepitas (Adapted from Veg Times)

1/2 cup mayonnaise
1/2 cup plain yogurt
2 Tbs apple cider vinegar
1 Tbs granulated sugar
4 cups broccoli florets cut into 1/2" pieces
3/4 cup grated carrots
1/2 cup finely diced red onion
4 oz shredded Cheddar
salt and fresh ground pepper
1/3 cup toasted pepitas

In a large bowl, whisk together mayonnaise, yogurt, vinegar and sugar. In a separate bowl toss together broccoli, carrots, onion and Cheddar. To the veggies add the dressing, mixing well to combine. NOTE: I never like the amount of dressing called for in these recipes. I started by adding only 1/2, letting it sit for a couple of hours, then added more as needed. I probably ended up using 2/3 of this.

Season to taste with salt and fresh ground pepper. Cover the bowl and place in the refrigerator to chill at least 2 to 3 hours, or over night. Scatter the top with the pepitas right before serving.


Pumpkin-Walnut Focaccia with Gruyère(Adapted from CL)

3/4 cup warm water (100° to 110°)
1/3 cup packed brown sugar
1 package dry yeast (about 2 1/4 teaspoons)
3 1/2 cups bread flour, divided (I used closer to 4 cups as it was too sticky)
3 Tbs butter, melted
1 cup mashed pumpkin
1 tsp salt
1/4 tsp ground nutmeg
1 cup grated Gruyère cheese, divided
1/3 cup coarsely chopped walnuts

Combine water, sugar, and yeast in a large bowl; let stand 5 minutes. Lightly spoon flour into dry measuring cups; level with a knife. Add 1 cup flour and butter to yeast mixture; stir just until combined. Cover and let rise in a warm place (85°), free from drafts, 30 minutes.

Add pumpkin, salt, and nutmeg to flour mixture; stir until well combined. Add 2 1/4 cups flour and about 2/3 of cheese; stir until a soft dough forms.

Turn dough out onto a floured surface. Knead until smooth and elastic (about 8 minutes); add enough of remaining flour, to prevent dough from sticking to hands (maybe 1/2-3/4 c- dough will feel tacky).

Place dough in a large bowl coated with cooking spray, turning to coat top. Cover and let rise in a warm place (85°), free from drafts, 1 hour or until doubled in size. (Press two fingers into dough. If indentation remains, dough has risen enough.) Punch dough down; cover and let rest 5 minutes. Divide dough in half; shape each half into an 8-inch circle. Place dough circles on a parchment covered baking sheet. Sprinkle remaining cheese and nuts evenly over dough circles; press lightly to adhere. Lightly coat dough circles with cooking spray; cover and let rise 20 minutes (dough will not double in size).

Preheat oven to 350

Uncover dough; bake at 350° for 30 minutes or until loaves are browned on the bottom and cheese melts (shield loaves with foil to prevent overbrowning, if necessary). Cool on a wire rack.

Friday, August 7, 2009

A very chocolaty day!


Tx sht ck, originally uploaded by Kim De.

MY OVEN IS BACK!!! Repaired and ready to use, I baked the biscotti I had prepared yesterday, and made a cake for company.

The Texas Sheet Cake is one that I have been made before. The cinnamon in the cake perfectly enhances the chocolate flavor. The icing is too sweet for my taste, but I solved that problem by using only half the icing recipe. My guests liked it, and I sent several pieces home with them.


The biscotti is one I got from the Food Network website courtesy of Gale Grand. Chocolate Almond Biscotti was perfect with afternoon coffee. It was dark and chocolaty and not too sweet. I am anxious to see how it will freeze.

Texas Sheet Cake (Adapted from Cooking Light)

Cooking spray
2 tsp all-purpose flour
2 cups all-purpose flour (about 9 ounces)
2 cups granulated sugar
1 tsp baking soda
1 tsp ground cinnamon
1/4 tsp salt
3/4 cup water
1/2 cup butter
1/2 cup unsweetened cocoa, divided
1/2 cup low-fat buttermilk
1 Tbs vanilla extract, divided
2 large eggs
6 Tbs butter
1/3 cup fat-free milk
3 cups powdered sugar
1/4 cup chopped pecans, toasted

Preheat oven to 375°.

Coat a 13 x 9-inch pan with cooking spray, and dust with 2 teaspoons flour. Set aside.

Lightly spoon 2 cups flour into dry measuring cups; level with a knife. Combine 2 cups flour and next 4 ingredients (through salt) in a large bowl, stirring well with a whisk. Combine 3/4 cup water, 1/2 cup butter, and 1/4 cup cocoa in a small saucepan; bring to a boil, stirring frequently. Add to flour mixture. Beat at medium speed with an electric mixer until well blended. Add buttermilk, 1 teaspoon vanilla, and eggs; beat well. Pour batter into the prepared pan. Bake at 375° for 22 minutes or until a wooden pick inserted in center comes out clean. Place on a wire rack.

Combine 6 tablespoons butter, fat-free milk, and remaining 1/4 cup cocoa in a saucepan; bring to a boil, stirring constantly. Remove from heat. Gradually stir in powdered sugar and remaining 2 teaspoons vanilla. Spread over hot cake. Sprinkle cake with pecans. Cool completely on wire rack.


Chocolate Almond Biscotti (Adapted from Food Network)
Recipe courtesy of Gale Gand

2 cups flour
1 cup sugar
1/3 cup cocoa powder
1 teaspoon baking soda
1/4 teaspoon salt
2 eggs
2 egg whites
3/4 teaspoon vanilla extract
2/3 cup whole almonds, toasted
1/3 cup chocolate chips

In a standing mixer with a paddle attachment combine flour, sugar, cocoa powder, baking soda and salt. Mix together eggs, egg whites and vanilla extract. Gradually add egg mixture to flour mixture blending on low. Toss almonds with chocolate chips then add to flour mixture and blend just until combined.

On a well floured surface roll dough into 2 logs, 2 inches in diameter. Place on a greased sheet pan and brush with beaten egg. Bake at 350 degrees until light golden brown, about 30-35 minutes. Allow logs to cool 15 minutes then cut into slices on the bias. Place slices on a greased sheet pan and bake in a 350 degree oven until toasted, about 15-20 minutes. Cool. Store in an airtight container.

Thursday, August 6, 2009

Cocktail Hour


Snrse, originally uploaded by Kim De.

My oven died!!! I had beautiful biscotti all prepped to bake, then blog, but the cooking gods were having fun at my expense today. So what so you do when your day gets messed up? Make a cocktail, of course!

In reality I had planned to make this drink anyway. It was blogged earlier in the week by my friend Terri on her blog, A Girl in the South and had some of my favorite drink ingredients in it: Cranberry juice and tequila. Being a Cosmo and Cape Cod girl (cranberry and vodka), but also having a love for tequila, it seemed a perfect choice to mix things up!

I didnt have and "margarita" tequila in house so I pulled my "sipping stuff" out of the freezer.

Since my juice was the 100% juice kind, I was worried that 4 limes would be too much, so I cut that in half. Also, with the juice having no sweetener, a touch of triple sec or simple syrup is called for. Otherwise, mix, drink and have a fiesta!


West-Texas Sunrise

6 oz Cranberry Juice
6 oz Tequila
Juice of 4 limes
Crushed Ice

Put all the ingredients in a shaker. Shake well and pour into wine
glasses.


Recipe Source: Any Bitch Can Drink

Tuesday, August 4, 2009

An OMG!!! meal


ale soup, originally uploaded by Kim De.

Sometimes recipes come along that makes you want to eat the entire thing in one setting - both of these recipes fit this profile!

First, the soup. This Butternut Squash and Ale Soup is originally from Food and Drink 2005, with changes made from my friends on the Cooking Light BB. The flavor in this soup is so incredibly intense that is was hard to stick to a proper serving. The nice thing is it isnt hard to make.

It calls for butternut squash, peeled and diced. I purchased some frozen pureed squash, just in case, but also wanted to try it with roasted squash. I bought a squash, sliced it open and roasted it for a hour, let it cool, then cubed it. What I discovered is by the time I added it to the other amazing flavors, the time involved in roasting was lost - so next time frozen stuff it is! I also added sliced carrots, simply because I wanted to boost the vegetable count for more of a one dish meal.

Now to the bread. This is one of the best breads to come out of my kitchen so far. The flavor is deep with the mixture of white, wheat and rye flavors melding together perfectly. The addition of a few caraway seeds reminds you this is a solid rye bread, with the tang from the sourdough pulling you in a different direction. Back and forth your taste buds go until you are in heaven! An amazing bread!

The bread recipe makes quite a lot of dough, so I made one boule and one traditional loaf.

I highly recommend both these recipes and they were given two thumbs and 5 stars by both of us!

Butternut Squash and Ale Soup (Adapted from Food & Drink)

1 Tbs olive oil
1 cup Spanish onions, finely diced
3 cups peeled, seeded, chopped butternut squash, -- pre roasted
3 carrots, sliced
4 cups chicken stock
2/3 cups half and half
3 cups sharp cheddar cheese, shredded
1 bottle Ale (I used an IPA)
Salt, freshly ground black pepper and cayenne

1. Heat oil over medium heat in a heavy-bottomed pot. Add onion and cook for 3 minutes or until transparent. Add butternut squash and carrots and cook for 5 minutes. Add chicken stock and bring to a boil. Let simmer for approximately 20 minutes or until squash and carrots very tender.

2. Puree soup in a blender or food processor until completely smooth. Add cream and return to a boil. Reduce heat to low and then, while whisking, add cheddar cheese and whisk until melted. Add ale to taste. Stir together and season with salt and pepper to taste.

3. Remove from heat and serve.

My Note: Next time use frozen pureed squash. Add green onions as a garnish.
My Note: Great with crusty rye bread and a few drops of tobascco.


Marilyn's Whole Wheat and Rye Sourdough Bread (A King Arthur recipe)

1 Tbs instant yeast
1 3/4 cups lukewarm milk
2 cups sourdough starter
1/4 cup packed dark brown sugar
2 tsp salt
1 Tbs caraway seeds
1 cup white rye flour
1 cup King Arthur Traditional Whole Wheat Flour
3 1/2 cups King Arthur Unbleached All-Purpose Flour

1. Combine the yeast, milk, the sourdough starter, sugar, salt, and seeds. Stir in the rye flour and beat until the batter is smooth. Add the whole wheat flour, then the unbleached all-purpose flour, a cup at a time, stirring well after each addition. When the dough has formed a shaggy mass, turn it out onto a lightly floured counter.

2. Knead the dough and add just as much flour as you need to keep the dough from sticking to the counter. The dough should be a little tacky, but not sticky. Place the dough in a greased bowl. Cover with a damp towel or plastic wrap and let rise until it has doubled in bulk, about 1 1/2 to 2 hours.

3. Gently deflate the dough and place it on a lightly floured counter. Shape as desired; you can make one huge loaf, three normal loaves, four mini loaves, or about 24 rolls. You can also reserve a small amount of dough and roll it into long, thin strips that can be snipped with scissors to form a stalk of wheat to decorate the top of each loaf.

4. Cover the loaves and let them rise for about 45 to 60 minutes, or until they're puffy. Bake them in a preheated 400°F oven for about 25 minutes, or until the bread is nicely browned and sounds hollow when thumped on the bottom. Remove from the oven, and cool on a rack.

Recipe Source: King Arthur

Sunday, August 2, 2009

Godfather Weekend Cont'd


Fet alf, originally uploaded by Kim De.

Now in my mind, this movie called for baked ziti or lasagna, but Bo loves his seafood, so...

Starting in the afternoon, I though we might need a snack. I decided on biscotti, something I have never made before. I didnt want a sweet snack, I thought something more savory was in order. After an extensive search, I found a recipe on Culinary in the Desert that I thought might fit the bill. It is called Pepperoni Biscotti. I followed the recipe to a T - almost. Instead of pepperoni, I used prisciutto di parma since I had some for our lunchtime pannini.


These biscotti are good - a nice snack. Not something I would want with my coffee, but they were fun. The mixture was crumbly as noted in the recipe, but it wasnt difficult to form the logs. These arent the crunchy cookies you may be used to - they are a bit softer - but very good.


Now on to the main event. Seafood Fettuccine. Wow. That is all. Wow. Yes, this could have been thicker, but it is a recipe from Cooking Light so half -n -half was used in place of heavy cream. I can deal with thinner if I can have my beloved alfredo sauce one to two times a year.

While the pasta is boiling, green onions and garlic are sauteed in butter before shrimp and sea scallops are added. The cream is poured in along with the crab, salt and pepper. When the mixture has thickened a bit, parmesan cheese is stirred in before everything is mixed with the hot pasta (I used penne).

Like I mentioned, the sauce was a bit thin, but the flavor was amazing and I didnt feel the guilt associated with a traditional alfredo. What did Bo think? Major thumbs up!

It was so good, I needed to show you the picture again!


Pepperoni Biscotti (Adapted from BH&G and Culinary in the Desert)

6 tablespoons butter, softened
4 garlic cloves, minced
1 tablespoon sugar
1 teaspoon baking powder
1 teaspoon Italian seasoning
1 1/2 ounces fresh grated Parmesan cheese, divided
1 large egg
1 tablespoon milk
1 cup all-purpose flour
1/2 cup whole wheat pastry flour
1/2 cup chopped pepperoni
1/4 cup finely chopped red sweet pepper
2 tablespoons finely chopped onion
2 tablespoons chopped fresh parsley

Preheat oven to 350

In a large mixing bowl, add butter and beat on medium for 30 seconds. Add garlic, sugar, baking powder, Italian seasoning and 1 ounce (about 1/4 cup) Parmesan cheese. Mix until completely combined. Beat in egg and milk. Mix in as much flour as you can with the mixer, then use a wooden spoon to stir in remaining flour, pepperoni, red sweet pepper, onion, and parsley - it should be fairly dry.

Scoop the dough out onto a lightly floured surface and knead the dough a few times until it holds together. Divide the dough in half and shape each into a 9" x 1 1/2" roll. Scatter the counter with the remaining Parmesan cheese and roll each dough back and forth to coat them with the cheese. Place the dough on to a parchment lined baking sheet and flatten slightly.

Bake until the top feels firm to the touch, about 20 to 25 minutes. Remove and let cool on the baking sheet for about 35-45 minutes.

If you turned the oven off, reheat it to 325 degrees. Cut each roll diagonally into generous 1/2" slices. Place the slices back onto the cookie sheet and bake for 10 minutes - turn the biscotti over and continue to bake until they have started to crisp up, about another 10 to 12 minutes. Remove and place the biscotti on a wire rack to cool.


Seafood Fettuccine (Adapted from Cooking Light)

1 1/2 tablespoons butter
1 cup chopped green onions
4 garlic cloves, minced
1 pound medium shrimp, peeled
1 pound sea scallops
2 cups half-and-half
1/2 teaspoon salt
1/4 teaspoon black pepper
1/2 pound lump crabmeat, shell pieces removed
3/4 cup (3 ounces) grated fresh Parmesan cheese, divided
8 cups hot cooked fettuccine (about 1 pound uncooked pasta)
1/4 cup chopped fresh parsley

Melt butter in a 12-inch nonstick skillet over medium-high heat. Add onions and garlic; sauté 1 minute or until tender. Add shrimp and scallops; sauté 3 minutes or until done. Reduce heat to medium-low.

Add half-and-half, salt, pepper, and crabmeat; cook 3 minutes or until thoroughly heated, stirring constantly (do not boil). Gradually sprinkle 1/2 cup cheese over seafood mixture, stirring constantly; cook 1 minute, stirring constantly. Remove from heat. Combine pasta and seafood mixture in a large bowl. Top each serving with 1 1/2 teaspoons cheese and 1 1/2 teaspoons parsley.

Saturday, August 1, 2009

The Godfather weekend


Reinhart finished, originally uploaded by Kim De.

For Christmas I purchased The Godfather trilogy on Blu-Ray for Bo. Last week, we set up our new BluRay player (ps it is august 1st). To celebrate, we have planned a Godfather weekend, complete with Italian food.

To kick it off, I made Pizza Napoletana Margherita from Peter Reinhart. I havent strayed from whole wheat pizza crust for many weeks, but was ready to try something different - and boy am I glad I did! This crust is easy to make, and has amazing flavor. I try so hard to only put whole grains in our bodies, but I may have to relax the rules for pizza nights!

This dough starts a day ahead of time mixing iced water with chilled flour, yeast and salt. After separating into balls, the dough is put into the refrigerator where is sits until ready to use. (Note: The rest of the balls have been put into the freezer for future use)

Last night I pulled the dough ball out of the fridge to let it come to room temperature. It had the perfect elasticity and was easy to work with, even cold.


Two hours later I started the shaping process, first pressing it into a round disk, then letting it rest before working on it again. When I felt it was the correct size, I covered it and left it to rest on the cornmeal covered peel while preheating the oven.


Just before baking I spread the crust with the evening's choice of ingredients. Wanting a simple pizza true to its Italian roots, we choose a simple tomato sauce from the freezer, a sprinkling of sea salt, a few slices of buffalo mozzarella and a handful of snipped basil. This was slid onto the hot baking stone and left to quickly bake. Five minutes later it was ready to be pulled back out for a very quick rest before being sliced and consumed.

We both loved this pizza, and both felt this crust may be our new favorite. Served with beer on our deck, it was a perfect Friday evening. Stay tuned for more Italian goodies...


Peter Reinhart's Napoletana Pizza Dough Recipe (Adapted from The Bread Baker's Apprentice)

4 1/2 cups (20.25 ounces) unbleached high-gluten,-- bread, or all-purpose flour, chilled
1 3/4 (.44 ounce) teaspoons salt
1 tsp (.11 ounce) instant yeast
1/4 cup (2 ounces) olive oil (optional) (I left this out)
1 3/4 cups (14 ounces) water, ice cold (40°F)
Semolina flour OR cornmeal for dusting

Stir together the flour, salt, and instant yeast in a 4-quart bowl (or in the bowl of an electric mixer). With a large metal spoon, stir in the oil and the cold water until the flour is all absorbed (or mix on low speed with the paddle attachment), If you are mixing by hand, repeatedly dip one of your hands or the metal spoon into cold water and use it, much like a dough hook, to work the dough vigorously into a smooth mass while rotating the bowl in a circular motion with the other hand. Reverse the circular motion a few times to develop the gluten further. Do this for 5 to 7 minutes, or until the dough is smooth and the ingredients are evenly distributed.

If you are using an electric mixer, switch to the dough hook and knead on medium speed for 5 to 7 minutes, or as long as it takes to create a smooth, sticky dough. The dough should clear the sides of the bowl but stick to the bottom of the bowl. If the dough is too wet and doesn't come off the sides of the bowl, sprinkle in some more flour just until it clears the sides. If it clears the bottom of the bowl, dribble in a tea- spoon or two of cold water. Let it rest 15 minutes, then knead another 1 minute. The finished dough will be springy, elastic, and sticky, not just tacky, and register 50 to 55F.

Sprinkle flour on the counter and transfer the dough to the counter. Prepare a sheet pan by lining it with baking parchment and misting the parchment with spray oil (or lightly oil the parchment). Using a metal dough scraper, cut the dough into 6 equal pieces (or larger if you are comfortable shaping large pizzas), You can dip the scraper into the water between cuts to keep the dough from sticking to it, Sprinkle flour over the dough. Make sure your hands are dry and then flour them. Lift each piece and gently round it into a ball. If the dough sticks to your hands, dip your hands into the flour again. Transfer the dough balls to the sheet pan, Mist the dough
generously with spray oil and slip the pan into a food-grade plastic bag.

Put the pan into the refrigerator overnight to rest the dough, or keep for up to 3 days. (Note: If you want to save some of the dough for future baking, you can store the dough balls in a zippered freezer bag. Dip each dough ball into a bowl that has a few tablespoons of oil in it, rolling the
dough in the oil, and then put each ball into a separate bag. You can place the bags into the freezer for up to 3 months. Transfer them to the refrigerator the day before you plan to make pizza.)

On the day you plan to make the pizza, remove the desired number of dough balls from the refrigerator 2 hours before making the pizza. Before letting the dough rest at room temperature for 2 hours, dust the counter with flour, and then mist the counter with spray oil. Place the dough balls on top of the floured counter and sprinkle them with flour; dust your hands with flour. Gently press the dough into flat disks about 1/2 inch thick and 5 inches in diameter. Sprinkle the dough with flour, mist it again with spray oil, and cover the dough loosely with plastic wrap or a food-grade plastic bag. Now let rest for 2 hours.

At least 45 minutes before making the pizza, place a baking stone either on the floor of the oven (for gas ovens), or on a rack in the lower third of the oven. Heat the oven as hot as possible, up to 800F (most home ovens will go only to 500 to 550F, but some will go higher). If you do not have a baking stone, you can use the back of a sheet pan, but do not preheat the pan.

Generously dust a peel or the back of a sheet pan with semolina flour or cornmeal. Make the pizzas one at a time. Dip your hands, including the backs of your hands and knuckles, in flour and lift 1 piece of dough by getting under it with a pastry scraper. Very gently lay the dough across your fists and carefully stretch it by bouncing the dough in a circular motion on your hands, carefully giving it a little stretch with each bounce. If it begins to stick to your hands, lay it down on the floured counter and reflour your hands, then continue shaping it. Once the dough has expanded outward, move to a full toss as shown on page 208. If you have trouble tossing the dough, or if the dough keeps springing back, let it rest for 5 to 20 minutes so the gluten can relax, and try again. You can also resort to using a rolling pin, though this isn't as effective as the toss method.

When the dough is stretched out to your satisfaction (about 9 to 12 inches in diameter for a 6-ounce piece of dough), lay it on the peel or pan, making sure there is enough semolina flour or cornmeal to allow it to slide. Lightly top it with sauce and then with your other top-pings, remembering that the best pizzas are topped with a less-is-more philosophy.

Slide the topped pizza onto the stone (or bake directly on the sheet pan) and close the door. Wait 2 minutes, then take a peek. If it needs to be rotated 180 degrees for even baking, do so. The pizza should take about 5 to 8 minutes to bake.

Remove the pizza from the oven and transfer to a cutting board. Wait 3 to 5 minutes before slicing and serving, to allow the cheese to set slightly.