Showing posts with label vegetarian. Show all posts

Tuesday, April 20, 2010

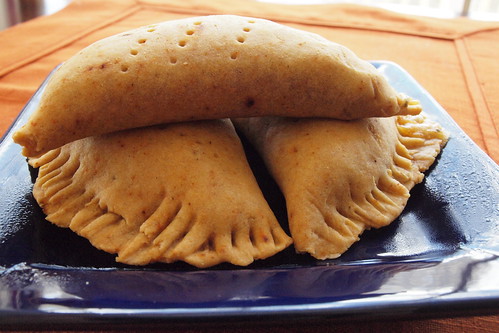
Corn and Poblano Empanadas


Empanadas are one of the foods I miss from Houston. You can find them in many grocery stores and bakeries, hot and fresh with many different fillings: meat, cheese or vegetables (especially pumpkin). I found a recipe that looked tasty yet easy to make, at least for someone who likes working with dough.

The key to these pastries is to not handle the dough too much or it will become tough. The chili powder lent a tiny amount of heat to the dough, but if you dont like any heat, leave it out. You wont miss it.

This is also a beautiful make ahead dish - I prepped the dough and filled it before covering with plastic wrap until I was ready to bake. I served these as a main dish, but they would make great apps for a party. Besides the make ahead component, they are great served at room temp as well as hot.

And the filling possibilities are endless - zucchini, chicken, chorizo, even pizza sauce and mushrooms - let your imagination guide you!


Have fun with them!

Corn and Poblano Empanadas (Adapted from Cooking Light)

3/4 cup all-purpose flour
3/4 cup masa harina
3/4 teaspoon salt, divided
1/2 teaspoon chili powder
1/2 cup water
2 tablespoons butter, cut into small pieces
2 poblano peppers
Cooking spray
2 garlic cloves, minced
1 1/2 cups fresh corn kernels (about 3 ears)
3/4 cup (3 ounces) shredded Oaxaca or mozzarella cheese
1 large egg white
1 tablespoon water

Preheat oven to 500°.

Lightly spoon flour into dry measuring cups; level with a knife. Combine flour, masa harina, 1/4 teaspoon salt, and chili powder in a food processor; pulse 3 times. Add water and butter; pulse until mixture forms a loose ball. Remove from processor; knead until ball completely forms. Divide dough into 8 equal portions. Shape each dough portion into a ball; flatten each ball into a 3-inch circle on a lightly floured surface. Cover and chill 30 minutes. (Stack dough portions between pieces of wax paper.)
Place poblanos on a foil-lined baking sheet. Bake at 500° for 20 minutes or until brown and blistered, turning once. Place in a zip-top plastic bag; seal. Let stand 15 minutes. Peel poblanos; cut in half lengthwise. Discard seeds and membranes, and finely chop. Place in a medium bowl.
Reduce oven temperature to 425°.
Heat a nonstick skillet coated with cooking spray over medium-high heat. Add garlic; sauté 30 seconds. Add 1/2 teaspoon salt and corn; sauté 3 minutes. Add to poblanos; let stand 5 minutes. Stir in cheese.
Roll each dough portion into a (5-inch) circle. Working with 1 circle at a time (cover remaining circles with a damp towel to prevent drying), spoon 3 level tablespoons corn filling into center of each circle. Moisten edges of dough with water; fold dough over filling. Press edges together with a fork or fingers to seal. Place empanadas on a large baking sheet coated with cooking spray. Combine egg white and 1 tablespoon water. Lightly coat tops of empanadas with egg mixture. Pierce top of dough with a fork. Bake at 425° for 20 minutes or until lightly browned.

Wednesday, February 3, 2010

Hot Pepper 'Za


hot pepper 'za, originally uploaded by Kim De.

Pizza is one of my favorite foods. When I was a single gal, I ate it frequently. My friend, Autumn, shortened it to 'Za and the zippy term has stuck.

Speaking of zippy...


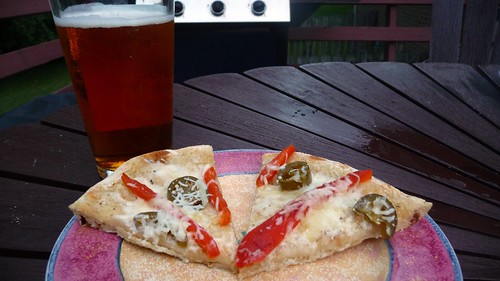
This "'za" was incredibly spicy! It was also amazing on flavor. Don't hesitate to try it, as you can very easily control the amount of heat.

Now the fun thing with this is I made it up so there is no formal recipe. I didn't measure the veggies, just added what I had prepared until it looked like enough.

Doesn't it look good?


It is! So without further ado, I present to you,

Hot Pepper 'Za

One recipe pizza dough (I used this recipe)
Poblano peppers, roasted and cut into strips
Jalapeno pepper, roasted and sliced (optional)
Red bell pepper, roasted and cut into strips
Red onion, sliced thin and pre-cooked (I sauteed with salt until soft)
Good quality white cheese, Monterey Jack, Sharp Provolone, etc, shredded


Roast the vegetables over a gas flame, or place on a baking sheet and broil, turning frequently, until all sides are charred. Place in a paper bag to steam for 5-15 minutes. Rub gently under cold water to "skin" most of the black pepper parts.

Preheat the oven to 550.

Press the pizza dough into the shape you wish to use. Slide it onto a cornmeal covered pizza peel or onto parchment paper. Let it rest about 5 minutes then press more until it is the desired size. (We make ours to a 8-9 inch round)

Sprinkle a small amount of cheese onto the dough. Begin to lay the poblano peppers in a pin-wheel shape around the dough. Lay the red bell peppers down next to them. Add as much or as little as looks good to you.

Sprinkle the red onion around the crust then lay the jalapeno slices over the top. Sprinkle with more cheese then place in the oven for 6-10 minutes (depending how hot your oven is). The cheese will be bubbly and the crust a light brown. Carefully remove and loet cool for 5-10 minutes before slicing.

Enjoy!

Thursday, January 14, 2010

Huevos Rancheros


Huevos Rancheros, originally uploaded by Kim De.

If you are looking for a meal that is quick and easy, warm and comforting, and will impress, look no further. And if like me you like the occasional breakfast for dinner...

Convincing Bo that it's ok to have eggs for your last meal has been a slow process. But with meals like this one he is warming up to the idea. Eggs, cooked soft with a simmer of salsa, homemade tortillas and soft refritos (re-fried beans) are the perfect Mexican "home cooking" and make a great comfort meal.

This recipe came from MY expert in Mexican food, Rick Bayless. I pulled it from his first book, Authentic Mexican. You can see a jar of store bought salsa in the background - that isnt something you see much in my house. Homemade salsa is so easy to make it is almost a sin to purchase it. If you catch yourself with a busy day, however, please promise me you will buy a high quality salsa. it can make all the difference to your meal!

Enough talking. On to the recipe.

Ranch-Style Eggs with Tomato Chile Sauce (Rick Bayless)
Heuvos Rancheros

About 2 cups Quick-Cooked Tomato-Chile Sauce (recipe to follow) or high quality store bought salsa
4 medium thick corn tortillas, set out to become a bit stale
1/4 cup vegetable oil
8 large eggs
Salt and Pepper
2 T crumbled Mexican queso fresco or cheese like feta or farmer's cheese
Chopped cilantro for garnish

Warm the sauce in a small saucepan over medium low heat, covered. Heat the oil in a large skillet over medium high. When quite hot, quick fry the tortillas one at a time 2-3 seconds per side, just to soften them. Drain on paper towels, wrap in foil and keep warm in a low oven. Reduce the heat in the skillet to medium low ans let it cook f or a few moments.

Break 4 eggs into the skillet and let them cook, slowly, sunnyside up. Sprinkle with salt and pepper then transfer the eggs to a baking sheet and keep them warm with the tortillas. Fry the remaining eggs to the pan and cook in the same fashion.

Set a tortilla on each of 4 warm plates. Top with 2 fried eggs then spoon the sauce over the tortillas and whites of the eggs, leaving the yolks exposed. Last, sprinkle the cheese and chopped cilantro.

Quick Cooked Tomato Sauce

1 1/2 lbs ripe tomatoes, boiled or roasted; OR one 28 oz can good quality canned tomatoes, chopped
Fresh hot green chiles to taste (roughly 3-5 serranos or 2-3 jalapenos), stemmed
1/2 small onion, chopped
1 large clove garlic, peeled and roughly chopped
1 T lard or vegetable oil
Salt

Roughly chop the tomato and place in a blender or food processor.

For a milder sauce, seed the chiles. Chop them to bits and add to the blender with the onion and garlic Process until pureed but retaining a little texture.

Heat the lard or oil in a medium large skillet over medium high. When it is hot enough to make a drop of the puree sizzle, add it all at once and stir consistently for about 5 minutes as the puree sears and cooks into a thicker more orange colored sauce. Season with salt and remove from the fire

Friday, January 8, 2010

Black Bean and Goat Cheese Tamale


tamale, originally uploaded by Kim De.

Having lived in Houston for several years, I was exposed to flavors, tastes and cuisines I hadn't experienced growing up in the Midwest. For all the things I didn't like about Houston, it was a foodie heaven and I miss that part of it.

Homemade tamales are a part of living in TX. Especially if you are an elementary school teacher (which I was). A holiday gift of tamales was always something to look forward to. I even made tamales one time at a party and it is something I have wanted to try again. If you think tamales are too difficult for you to make, take a look at the steps below.

Being me, I wanted to try something a bit different then the traditional meat-filled masa. So I combined a few recipes to come up with this one. Also against tradition was the way they were cooked - in the oven on top of a water filled broiler pan for a baked/steamed combo. More on that later.

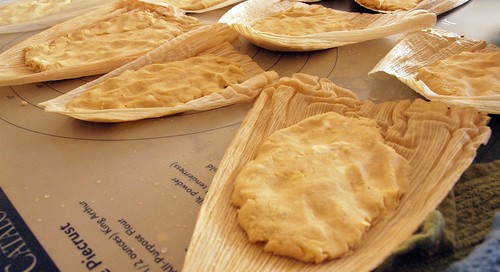
I started out making the dough then letting it rest a bit. I then patted it into the corn husks that had been soaked and drained. Kind of like playing with play-dough!

Next step was adding the filling. Trying to make things easier, I had prepared the filling the night before. I added a heaping table spoon down the side as instructed. After all the dough had been filled, I used the additional to add more. More can't be a bad thing!


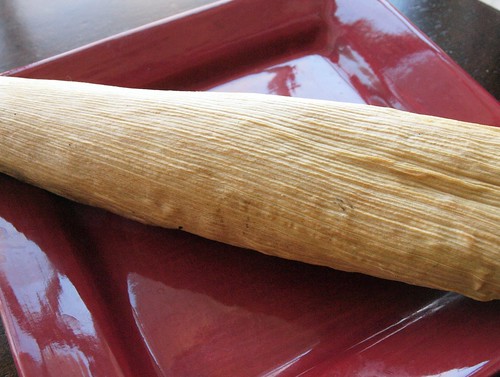
After that, things came together quickly. Using the husk, I folded the dough then tucked the corn envelope closed. They were added to the oven where they steamed/baked for almost an hour. I opened one up to cool and try. Tasty, however there is room for improvement.

The following are the things I learned about making tamales:

1. The filling should go down the middle. It would make a much prettier presentation
2. One heaping tablespoon of filling isn't quite enough.
3. Baking/Steaming tamales is easy, but it doesn't produce the same moist product.

I will be making tamales again. Bo really wants some with meat. I look forward to opening my Rick Bayless cookbook and using a more traditional recipe.

Basic Masa Dough (Adapted from Cooking Light)

2 cups fat-free, less-sodium chicken broth
1 1/2 cups fresh corn kernels (about 3 ears)
3 3/4 cups masa harina
1 1/2 tsp salt
1 1/2 tsp baking powder
1/4 cup chilled lard or shortening

Combine broth and corn in a blender; process until smooth.

Lightly spoon masa harina into dry measuring cups; level with a knife. Combine masa harina, salt, and baking powder, stirring well with a whisk.

Cut in lard with a pastry blender or two knives until mixture resembles coarse meal. Add broth mixture to masa mixture; stir until a soft dough forms.

Tips: Prepare this dough up to three days ahead, and refrigerate in an airtight container.


Black Bean and Goat Cheese Tamales (Adapted from Cooking Light)

16 dried corn husks
15 can black beans, mashed slightly
1/2 cup sliced green onions
1/4 cup fat-free sour cream
1/4 tsp salt
2 egg whites
1 (3-ounce) log goat cheese
3 oz low fat cream cheese
2 cups Basic Masa Dough (I used most of the dough)
2 cups hot water

Place corn husks in a large bowl; cover with water. Weight husks down with a can; soak 30 minutes. Drain husks.

Preheat oven to 450°.

Combine beans and next 6 ingredients (through cream cheese), stirring well to combine.

Working with one husk at a time, place 3 tablespoons or more of Basic Masa Dough in the center of husk about 1/2 inch from top of husk; press dough into a 4-inch-long by 3-inch-wide rectangle.

Spoon about 1 tablespoon (or more) cheese mixture down one side of dough. (NOTE: Try putting it down the middle) Using the corn husk as your guide, fold husk over tamale, being sure to cover filling with dough; fold over 1 more time. Fold bottom end of husk under. Place tamale, seam side down, on a damp towel covered with another damp towel. Repeat procedure with remaining husks, Basic Masa Dough, and filling. When all tamales are filled, remove them from the towels and place on the tray of a broiler pan.

Pour 2 cups hot water in the bottom of a broiler pan; top with prepared rack.

Steam tamales at 450° for 55 minutes, adding water as necessary to
maintain a depth of about 1/2 inch. Let tamales stand 10 minutes.

Thursday, December 10, 2009

Spinach Balls


Spinach Balls, originally uploaded by Kim De.

The famous spinach balls. Famous world wide. Well, famous on the CLBB (also know as the Cooking Light Bulletin Board). Named for the member who first shared them. For years this recipe has been passed around, questions asked, variations shared. I, in fact, have varied the original recipe a bit.

Anyway, this is the first in a long line of holiday yummies I will share with you. Great for a party. Freezes well. Serve hot or at room temp. Spicy mustard for dipping, a MUST!

Lindrusso's Spinach Balls

2 packages frozen chopped spinach -- (10-ounce),-- thawed and squeezed dry
1 cup firmly packed grated Parmesan cheese
1/4 cup butter -- melted
4 scallions -- chopped
3 beaten eggs
1 dash nutmeg

1-1 1/2 cups seasoned bread crumbs

Combine all ingredients in a large bowl - Add the bread crumbs last, starting with 1 cup and adding by 1/4 cup until moist. Shape into 1-inch balls. Cover and refrigerate or freeze until ready to bake.

Arrange spinach balls on an ungreased cookie sheet and bake 10 to 15 minutes at 350 or until browned. Serve with your favorite mustard for dipping.


Friday, November 20, 2009

Portobello Mushrooms with Chipotle (Tacos)


portobello tacos, originally uploaded by Kim De.

Wednesday I told Bo what we were having for Thursday's dinner as I frequently do. He made a face. He never does that. He loves to try new things! He said he wasnt sure how mushroom tacos sounded. I encouraged him to think of them like veggie fajitas and at least give them a try (I thought they sounded wonderful!)

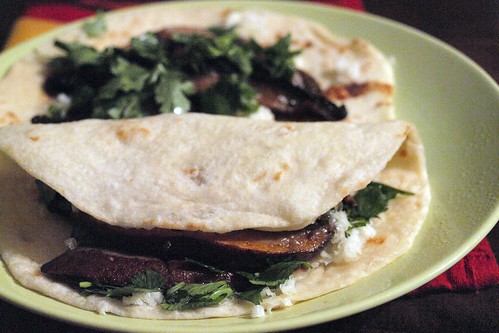
They were. His exact quote “You have outdone yourself honey!” These were amazing. Caramelizing the mushrooms instead of steaming them produces incredible flavor, then add a touch of smoky chipotle, cilantro and smoky cheese and it is a winner!

This is the first recipe from my new cookbook Tacos by Mark Miller. I did very little to change the recipe because it looked so good as written. So dont be like Bo and turn up your nose without trying these tacos!

Note: I used flour tortillas. They are not traditional for tacos, but I had purchased some homemade from a restaurant and it seemed a shame to let them go to waste!

Portobello Mushrooms with Chipotle (From Tacos)

1 lb portobello mushrooms (preferably small with fresh, closed gills)
NOTE: I used presliced this time
3 T (or more) unsalted (butter)
3 cloves garlic, minced
½ t kosher salt
Pinch freshly ground back pepper
2 t chipolte puree
NOTE: In my freezer always are pureed chipotles in adobo. I buy a small can, puree it, freeze it in teaspoonfuls on parchment paper, then put the frozen blobs in a freezer bag for numerous uses.
1 T freshly chopped cilantro leaves
1 cup finely grated smoked mozzarella or gouda.
NOTE: Cheddar, jack or other cheese can be used. However, if you have access to the smoked cheese and a hand grater, I highly recommend doing as the recipe states!
8 soft yellow corn tortillas
NOTE: Please get the best quality you can find. If you are lucky enough to be near a restaurant that makes their own (corn or flour), buy some. It will make all the difference. Trust me!
Garnish: Lightly toasted pine nuts or pumpkin seeds.

Remove the mushroom stems, chop them up and reserve. If any of the mushrooms were large, scrape off the gills with a spoon and reserve. Cut the caps into 1/4-inch-thick slices and reserve.

Preheat a heavy skillet large enough to hold the mushrooms in a single layer for about 2 minutes over medium-high heat. Melt the butter in the pan (half of the butter if cooking the mushrooms in two batches) then add the sliced mushroom caps, chopped stems, any reserved gills, minced garlic, salt and pepper, and sauté until golden brown and caramelized, 8-10 minutes. You may need to cook the mushrooms in batches to be sure they brown and not steam from overcrowding. Add more butter as the mushrooms cook, if necessary, as they have a tendency to absorb all the butter from the pan. (I did not need to add any more butter)

Remove from heat and mix in the chipotle puree.

To serve, lay the tortillas side by side, open face and overlapping on a platter. Divide the cheese first then the filling equally between the tortillas and top with the cilantro and pumpkin seeds. Grab, fold and eat right away.

Monday, October 12, 2009

Jalapeño Popper Mac 'n' Cheese


popper, originally uploaded by Kim De.

I love it when inspiration comes from another foodie blog. This happens frequently with this blog, Culinary in the Desert. Joe recently made macaroni and cheese. I know I have said in the past I am done with new recipes for this dish, but this looked too good to pass up.

Serrano and jalapeno peppers are sliced and diced then sauted with garlic before adding it to cooked pasta. A creamy sauce of milk and cream cheese is blended with the other ingredients, followed by a sprinkling of shredded cheese on the top before a quick run under the broiler.

Ok, I was wrong. I do have a reason to try other recipes for macaroni and cheese. This was a winner. Creamy with a quick peppery bite, this recipe will be made again. Next time with whole wheat penne, and more peppers. If you like the flavor of jalapeno poppers, you will like this!


Jalapeño Popper Mac 'n' Cheese (Adapted from Rachael Ray and Culinary in the Desert)

16 oz dry tube style pasta
2 tsp extra-virgin olive oil
3 jalapeño chiles, seeded, ribs removed -- and thinly sliced
2 serrano chiles, seeded, ribs removed -- and thinly sliced
2 garlic cloves, minced
1 1/2 cups milk
8 oz cream cheese, sliced into cubes
2 Tbs minced green onions
¼ cup shredded Mexican-blend cheese

In a large pot of boiling, salted water, add pasta and cook according to package directions. Drain and place back into the pot off heat.

Meanwhile, in a medium saucepan, heat oil over medium. Stir in jalapeños, serranos and garlic - cook until tender, about 5 minutes. Add to the pot with the drained pasta.

Preheat the broiler.

In the same saucepan, add milk, cream cheese and onion - heat over medium-low, stirring, until very smooth, about 5 minutes. Pour in to the pot with the pasta and season with salt and fresh ground black pepper, tossing well to coat. Scoop mixture into a casserole dish coated with cooking spray. Sprinkle with shredded cheese. Place under the broiler and bake until lightly browned on top, about 3 to 5 minutes.

Remove and let cool slightly before serving.

Tuesday, October 6, 2009

Black Bean Soup


P1010350, originally uploaded by Kim De.

I recently realized that I had Bobby Flay's Mesa Grill Cookbook, and that I had badly neglected it. I took it with me to read on my trip last week (yes, I read cookbooks like they are novels) and came to the conclusion that is was time to use it with a vengeance.

The first recipe I decided to try was Black Bean Soup. I have had a go-to recipe for several years and really hadnt bothered to try a new one. I figured, why mess with ease and flavor? Well now I am glad I stepped out of the comfort zone. This soup really isnt any more difficult, and the flavor is AMAZING! It is even better the next day when it becomes thicker and more like a chili. If you love bean soups at all, I highly recommend you try this one today!

Oh and to go with it, Mesa Grill's famous Blue Corn Muffins. Dont worry. You will see those tomorrow...

Black Bean Soup (Adapted from Bobby Flay)

1 tablespoon olive oil
1 medium carrot, peeled and coarsely chopped
1 medium Spanish onion, coarsely chopped
3 garlic cloves, coarsely chopped
1 cup red wine
3 jalapenos, chilies roasted, peeled and seeded
1 poblano chile, chilie roasted, peeled and seeded

3 cans black beans
4 cups low sodium chicken broth or water
2 tablespoons fresh lime juice
kosher salt
pepper, freshly ground

Heat olive in in a medium saucepan over medium heat. Add carrot, onion and garlic and cook for 5 minutes, or until onion is translucent. Add wine, bring to a boil and cook until reduced by half.

Reduce heat to medium and add beans, chilies and broth. Simmer for 30 minutes.
Remove from heat and add lime juice and salt and pepper to taste.

Using a blender or food processor, puree half of the soup and return it to the pot. Bring back to a simmer before serving.

Top with garnishes such as finely chopped red onion, coarsely chopped avocado, diced tomatoes and sour cream.

Friday, September 25, 2009

Penne with Vodka Sauce


vodka, originally uploaded by Kim De.

Last night's dinner is something I am semi-"famous" for. My friends have always loved when I make vodka sauce - and now I think I have hooked Bo too.

For its flavor and impressiveness, it is easy to make as you can start with jarred sauce, or the homemade stuff in your freezer as I did. I decided to experiment with the cream component. I had marscapone cheese left from another dish and used it with fabulous results. I think I may have liked it even better as it added a touch of sweetness.


Along with the pasta was Wilted Spinach with Garlic from Eating Well Magazine. Simple to make with bagged spinach, it was full of flavor and gave us another vegetable boost. Love warmer fall flavors! Now if fall weather would bother to show up...

Penne with Vodka Sauce (Adapted from Giada De Laurentiis)

3 cups store bought or homemade marinara sauce.
1 cup vodka
1/2 cup heavy cream, at room temperature
1/2 cup grated Parmesan
1 pound penne

Simmer the tomato sauce and vodka in a heavy large skillet over low heat until the mixture reduces by 1/4, stirring often, about 20 minutes. Stir the cream into the tomato and vodka sauce. Simmer over low heat until the sauce is heated through. Stir in the Parmesan cheese until melted and well blended.

Meanwhile, cook the pasta in a large pot of boiling salted water until al dente, tender but still firm to the bite, stirring occasionally, about 8 minutes. Drain the pasta and transfer it to the pan with the sauce, and toss to coat.

Wilted Spinach with Garlic (Adapted from Eating Well)

1 tablespoon extra-virgin olive oil
1 clove garlic, finely chopped
2 T pine nuts
1 pound bagged spinach, washed and stemmed
Salt & freshly ground pepper, to taste

Heat oil in a large skillet over medium-high heat. Add pine nuts and saute 1 minute. Add garlic and stir until golden, about 30 seconds. Add greens in batches, if necessary, and toss until just wilted, 2 to 4 minutes. Season with salt and pepper.

Monday, September 21, 2009

Butternut Squash Lasagna


butnt las, originally uploaded by Kim De.

I love to cook. I was thinking recently about how this happened and how it has evolved. Everybody has some sort of creativity in their soul. Me, I love to write. Not really good at it, but it is something I enjoy. I am realizing the joy of taking good pictures, but I am a major novice with lots to learn. Cooking is my true creative outlet. It feeds me emotionally (no pun intended). It soothes me. It relaxes me. It makes me zen.

And it is the way I show my love to my family and friends.

Why did I share all of this? Because I made this recipe for a birthday lunch for a dear friend.

Butternut Squash Lasagna.

One of the best things I have had in my mouth for a long time. Or as a friend recently said about a soup "too good to swallow"! It was simple to make, but the flavors were complex. It looked pretty on a plate, so it was perfect for company. Oh, and did I mention that the taste was phenomenal?


Sounds strange? Dont be afraid. Try it. It might cause you to wax poetic about your love for cooking. I did.

Butternut Squash Lasagna (Adapted from Giada De Laurentiis)

2 12oz boxes frozen winter squash
Salt and freshly ground black pepper
3 amaretti cookies, crumbled
1/4 cup butter
1/4 cup all-purpose flour
3 1/2 cups whole milk
Pinch nutmeg
3/4 cup (lightly packed) fresh basil leaves
12 whole wheat lasagna noodles, parcooked 5 minutes
2 1/2 cups shredded whole-milk mozzarella cheese

Thaw the squash in the refrigerator then transfer the squash to a food processor. Add the amaretti cookies and blend until smooth. Season the squash puree, to taste, with salt and pepper.

Melt the butter in a heavy medium-size saucepan over medium heat. Add the flour and whisk for 1 minute. Gradually whisk in the milk. Bring to a boil over medium-high heat. Reduce the heat to medium and simmer until the sauce thickens slightly, whisking often, about 5 minutes. Whisk in the nutmeg. Cool slightly. Transfer half of the sauce to a blender*. Add the basil and blend until smooth. Return the basil sauce to the sauce in the pan and stir to blend. Season the sauce with salt and pepper, to taste.

Position the rack in the center of the oven and preheat to 375 degrees F.

Lightly butter a 13 by 9 by 2-inch glass baking dish. Spread 3/4 cup of the sauce over the prepared baking dish. Arrange 3 lasagna noodles on the bottom of the pan. Spread 1/3 of the squash puree over the noodles. Sprinkle with 1/2 cup of mozzarella cheese. Drizzle 1/2 cup of sauce over the noodles. Repeat layering 3 more times.

Tightly cover the baking dish with foil and bake the lasagna for 40 minutes. Sprinkle the remaining mozzarella over the lasagna. Continue baking uncovered until the sauce bubbles and the top is golden, 15 minutes longer. Let the lasagna stand for 15 minutes before serving.

*When blending hot liquids: Remove liquid from the heat and allow to cool for at least 5 minutes. Transfer liquid to a blender or food processor and fill it no more than halfway. If using a blender, release one corner of the lid. This prevents the vacuum effect that creates heat explosions. Place a towel over the top of the machine, pulse a few times then process on high speed until smooth.

Tuesday, August 18, 2009

Pizza on an off night


jal/ranch, originally uploaded by Kim De.

We are out of town part of this week, so we are switching things up a bit. I was craving pizza tonight and I knew the best way to break it to Bo - jalapenos!

I have been looking for a reason to make a pizza with my homemade ranch dressing and spicy jalapenos seemed the perfect contrast for the coolness of the ranch. Oh, one last thing - I grilled it

I started off by pulling our new favorite pizza dough out of the freezer. After it thawed, it was easy to poke and punch it into a slightly round shape. Now this pizza ended up being a collaboration. My plan was to round out the veggies with tomatoes but when Bo suggested red peppers, it made so much sense to roast them to finish things off. A light sprinkling of mozzarella and provolone cheeses held everything together while helping the ranch keep things cool.

We both loved the mix of flavors on this pie and will be using this one again!


Jalapeno Ranch Pizza

Pizza dough pushed or rolled into an 8-inch circle
1/2-1/3 cup of your favorite Ranch Dressing (or to taste)
1/2 large red pepper, roasted, peeled, seeded and julienned
8-10 pickled japapeno slices (or more to taste)
1/2-3/4 cup shredded italian cheeses ( any mix you choose: mozarella, provolone, parmesan)

Prepare or purchase the crust of your choice. Roll the dough into approximately 8 inches and put in the refrigerator on parchment paper or foil with cornmeal to firm up prior to grilling.

Roast the pepper then steam in a paper bag for 15-30 minutes. Rinse under water to remove the peel, then seed and julienne. Blot the pickled jalapeno slices in between paper towels.

Pre-heat the grill on high for at least 15 minutes. Spray with non-stick spray then slide the dough into the hot grates. (Tip: Use a peel coated with cornmeal, or on have on a cookie sheet then flip over on to the grate.) Grill 5-10 minutes or until the underside is light brown. Remove from the grill, flipping over so the grilled side is facing you.

Spoon the ranch dressing over the grilled side of the crust, spreading around. Sprinkle approximately 1/2 cup cheese over the dressing, then place the red peppers on top. Scatter the jalapenos between the pepper slices and finish off with the final 1/4 cup of cheese. Turn the grill down to low and place the pizza back on, long enough to finish the bottom and melt the cheese. Remove and let rest for 5 minutes prior to slicing.

Saturday, August 15, 2009

Kim's Vegetable Tart


tart 1, originally uploaded by Kim De.

Since I made my first tart here, I have been hooked. I have purchased two tart pans and have even gone as far as to combine two recipes to make the tart you see on this page.

Several weeks ago I made Savory Carrot and Tarragon Tart. The flavor was so amazing that I decided to adapt it to a larger tart pan and different vegetables.

I used the original crust recipe, but changed the proportions of ingredients. In place of the tarragon I added fresh chopped basil. Strips of nutty swiss were laid on the crust before the addition of the onions and tomatoes. I shredded a sharp white cheddar right into the yogurt and egg mixture just before pouring into the pre-baked crust. The experiment went well and it was a hit with Bo and our friends.

The changes I would make? I couldnt taste the cheeses - any of them. Next time I will save the calories and leave them out. (If you know me, you know how hard that was to say). I also think the addition of mushrooms to the tomatoes would be amazing. Dont be intimidated by tarts - try one!


Vegetable Tart (Adapted from Eating Well)

For the crust

1 1/2 cup all-purpose flour
3/4 cup whole-wheat flour
1/8 cup fresh basil leaves, chopped
1/2 tsp salt
4 Tbs cold unsalted butter, cut into chunks
1/4 cup extra-virgin olive oil
1/4 cup plain yogurt

For the filling

2 Tbs extra-virgin olive
1 cup chopped red onion
1 lb tomatoes or any vegetable (i.e zucchini, broccoli, mushrooms etc.)
2 Tbs dry sherry, divided
1/8-1/4 cup Dijon mustard
2 large eggs
1/2 cup milk
1/2 cup plain yogurt
1/4 cup fresh basil, chopped
salt and fresh ground black pepper

To prepare the crust:

Preheat oven to 350 degrees.

In a food processor, add flours, basil and 1/2 teaspoon salt - pulse to combine. Add butter, one piece at a time, pulsing once after each addition. Pour in oil and yogurt - pulse just until combined (it should be crumbly). Scoop the crumbles into an 11" tart pan lightly coated with nonstick spray - evenly press the dough over the bottom and up the sides to form a crust. Place into the oven and bake until the crust is just set, but has not taken on any color, about 15 minutes. Remove and place pan on a wire rack to cool

To prepare the filling:

In a large skillet, heat oil over medium. Stir in onions - cook until tender, about 5 minutes. If using zucchini or mushrooms, add with 1 tablespoon sherry - cook, stirring, for 2 minutes. Remove from the heat. If using broccoli, steam until just cooked, about two minutes.

Add mustard onto the bottom of the crust and spread to form a thin layer. Start with 1/8 cup, adding more until your crust is covered. Cover the mustard evenly with the onion and whatever vegetables you used. Tomatoes should be laid down in a large circle around the outside edge, then brought in until crust is covered.

In a medium bowl, whisk together eggs, milk, yogurt, basil and remaining 1 tablespoon sherry - season with salt and fresh ground black pepper. Set tart pan onto a baking sheet - pour the egg mixture over vegetables. Place pan into the oven and bake until the center is set and the edges are golden brown, about 40 to 45 minutes. Remove and place pan on a wire rack to cool for at least 15 minutes before serving.

Friday, August 14, 2009

Pasta night


shrimp pasta, originally uploaded by Kim De.

We love when pasta night comes around. Pasta is one of my favorite things to cook - It lends itself to music and a glass of wine. Tonight it was our newly acquired Born to Run CD (we have tickets to the Boss in November, so this may be a recurring theme!).

I am trying to get more broccoli in our meals and with the shrimp in it for my seafood fanatic, plus the low cal creamy sauce, this recipe seemed to fit the bill.

The most time consuming part of this dish was chopping the fresh broccoli (which could be taken out all together if frozen broccoli was used.). Once the ingredients were laid out, the dish came together in 15 minutes. It was full of flavor, Bo loved it, and it was healthy. Seems like the perfect meal!


Shrimp, Broccoli, and Sun-Dried Tomatoes with Pasta (Adapted from Cooking Light)

1/2 cup sun-dried tomatoes, packed without oil
1/2 cup boiling water
3 cups whole wheat corkscrew pasta
1 1/2 cups chopped broccoli
Cooking spray
1 garlic clove, minced
1 pound large shrimp, peeled and deveined
1/2 cup white wine
1/2 cup (4 ounces) 1/3-less-fat cream cheese
1/4 cup chopped fresh basil
1/4 cup (1 ounce) grated fresh Parmesan cheese
2 teaspoons fresh lemon juice

Place tomatoes and boiling water in a bowl. Cover and let stand 30 minutes or until tender; drain and chop.

While tomatoes steep, cook pasta according to package directions, omitting salt and fat. Drain.

Steam broccoli with a teaspoon of water in the microwave for 2 minutes or until crisp-tender. Set aside.

Heat a large nonstick skillet over medium-high heat. Coat pan with cooking spray. Add garlic to pan; sauté 30 seconds. Add shrimp; cook 4 minutes. Add wine and cream cheese, stirring to combine; bring to a boil. Reduce heat, and simmer 2 minutes. Add tomatoes, broccoli, and basil; stir well. Cook 2 minutes or until thoroughly heated, stirring frequently. Remove from heat. Stir in pasta, Parmesan cheese, and juice. Serve immediately.

Tuesday, July 21, 2009

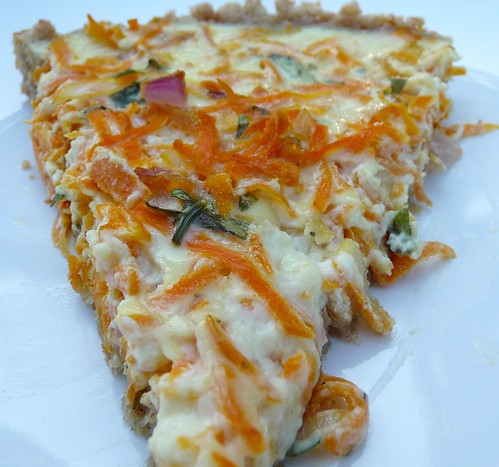
Savory Carrot Tart


Carrot Tart, originally uploaded by Kim De.
There are those times you make something because it sounds interesting, but you are really not sure if you will like it because it it so interesting...this Savory Carrot and Tarragon Tart was one of those dishes.

Carrots - like them raw but not usually a fan cooked. Tarragon - not a fan of licorice flavor. Dijon mustard, love it, but with the other ingredients???

All I can say is WOW! This is one of the best tasting things I have made in awhile. The flavors blend, yet are individual. Are subtle, yet POP in your mouth.

This recipe starts out having you make the crust - a snap with a food processor - then pressing it into a 9-in tart pan. **Note: At this time, I only own an 11-in tart pan, more on this later** The crust is then pre-baked in a 350 oven.


Next a thin layer of dijon mustard is spread on the cooling crust. I used closer to 2T - first of all I love mustard, and second, I had a larger area to work with. I used Sierra Nevada Porter and Spicy Brown mustard.

Next comes a layer of shredded cheese. I had a pre-shredded mexican blend, so I used that. Note to self: Next time make a trip to the store for a sharp cheddar! On top of that the sauteed carrots and onions are added

Lastly is the egg mixture which includes yogurt, milk, dry sherry and more tarragon. The tart pan was placed on a baking sheet, then placed in the oven. With the oven troubles I am having, there was definite concern over whether it would bake evenly!

Luckily eggs are pretty easy to bake and by putting it to the far side of the oven and rotating it mid way through, it set up nicely. I let it cool for a few minutes before pushing the removable bottom of the tart pan up and placing it on a cooling rack. I really would have liked to see beautiful scalloped sides on my lovely crust, but with 2 extra inches of surface space, no such luck. I do see a 9-in pan in my future...

I sliced the tart and served it to Bo and our friend. It was a hit! Add a green salad and a nice beer and you have a meal! Thumbs up! On top of it, this is a good prep-ahead dish, and a good make-ahead dish. I cooked the onions and carrots and mixed the egg mixture ahead of time, waiting to put together until the next day. This tart is also good at room temp and cold, so making it ahead of time is also possible. I also think carrots could be subbed with tomatoes, cheddar with feta, tarragon with basil - really several flavor combinations would work with this particular crust, mustard layer and egg mixture - let your imagination run wild!!


Savory Carrot and Tarragon Tart (Adapted from Eating Well)

For the crust

1 cup all-purpose flour
1/2 cup whole-wheat flour
1 1/2 tsp fresh tarragon leaves
1/2 tsp salt
4 Tbs cold unsalted butter, cut into chunks
1/4 cup extra-virgin olive oil
1/4 cup plain yogurt

For the filling

2 Tbs extra-virgin olive
1 cup thinly sliced red onion
1 1/2 cups grated carrots
2 Tbs dry sherry, divided
1 Tbs Dijon mustard
2 oz (about 1/2 cup) shredded white Cheddar cheese
2 large eggs
1/2 cup milk
1/2 cup plain yogurt
2 tsp finely chopped fresh tarragon leaves
salt and fresh ground black pepper

To prepare the crust:

Preheat oven to 350 degrees.

In a food processor, add flours, tarragon and 1/2 teaspoon salt - pulse to combine. Add butter, one piece at a time, pulsing once after each addition. Pour in oil and yogurt - pulse just until combined (it should be crumbly). Scoop the crumbles into a 9" tart pan lightly coated with nonstick spray - evenly press the dough over the bottom and up the sides to form a crust. Place into the oven and bake until the crust is just set, but has not taken on any color, about 15 minutes. Remove and place pan on a wire rack to cool

To prepare the filling:

In a large skillet, heat oil over medium. Stir in onions - cook until tender, about 5 minutes. Stir in carrots and 1 tablespoon sherry - cook, stirring, for 2 minutes. Remove from the heat.

Add mustard onto the bottom of the crust and spread to form a thin layer. Scatter the top with the Cheddar. Cover the cheese evenly with the carrot and onion mixture.

In a medium bowl, whisk together eggs, milk, yogurt, tarragon and remaining 1 tablespoon sherry - season with salt and fresh ground black pepper. Set tart pan onto a baking sheet - pour the egg mixture over carrots and cheese. Place pan into the oven and bake until the center is set and the edges are golden brown, about 40 to 45 minutes. Remove and place pan on a wire rack to cool for at least 15 minutes before serving.

Monday, July 20, 2009

Soup and Bread Night


Broccoli Soup, originally uploaded by Kim De.

What weather we are having - late September weather in July! High today was 74 with no humidity! The soup making was already planned prior to the weather surprise, but what a night to have it!!

This soup was very good! I used fresh broccoli and carrots, using a bit more of both then called for. After the veggies simmered in the broth, several cups were take out and pureed in the blender. I chose to do it this way to make it a bit thicker. The pureed soup was added back to its chunky counterpart. To it was added sharp cheddar and greek yogurt for tang and creaminess. (I didnt have sour cream, but always have yogurt!)

The taste was amazing! I would have liked for the cheese to melt into a creamy texture, but no such luck. However, despite the fact it didnt look thick and creamy, it tasted thick and creamy! And after all, thats all that matters.

To me, soup doesnt work unless it is served with a crusty bread. I found a recipe from Real Simple magazine that looked, well, real simple and seemed perfect for a Sunday night.

In trying to use mostly whole grains, and the fact that my tastebuds prefer the taste of grainy bread, I did some substituting in the flour department. I used 2 cups of white wheat and 1 1/4 cup of whole wheat in place of the white flour called for. A local IPA was used for the beer, rounded out with basil snipped from my garden. I mixed in my Kitchen Aid, then switched to the dough hook for a quick knead/basil mix. I quickly rounded the dough onto a floured peel and since I wasnt quite ready to bake it, I covered it and set it in a warm spot in case it felt like a rise.

The smell of this bread baking drove me crazy! I didnt wait the full 10 minutes to cool, as I was ready for dinner. It was hearty with deep flavor (which I am sure came from the beer) with the basil adding a nice dimension. I really could not taste the parmesan, possibly because of using whole grains, so next time I think I will leave it out. This bread would also be good with chopped green onions in place of the basil, and I am thinking a bit of grainy mustard would add a great flavor!


All in all, a thumbs up dinner!

Broccoli Chowder (Adapted from Eating Well)

1 Tbs olive oil
1 1/2 cups chopped onion
3/4 - 1 cup diced carrots
2 cloves garlic, minced
1 Tbs all-purpose flour
1/2 tsp dry mustard
1/8 tsp cayenne pepper
4 cups vegetable broth (I ended up added approx 3/4 c water also)
3/4 - 1 lb broccoli crowns, cut into 1-inch pieces,
-- stems and florets separated
4 -5 oz grated sharp white cheddar chees

3/4 cup greek yogurt
salt to taste

1. In a dutch oven, heat oil over medium-high heat. Sauté onion, carrot, stirring often, until onion softens, 5 to 6 minutes. Add garlic and stir for 2 minutes.

2. Stir in flour, dry mustard and cayenne. Cook for 2 minutes, stirring often. Add broth and broccoli stems and bring to a boil. Cover, reduce heat to medium, and simmer for 10 minutes. Stir in florets, cover and cook until until broccoli is tender, about 6-10 minutes more.

3. Transfer 2 cups of the chowder to a food processor and puree. Carefully pour back to
the pan. Stir in cheddar and yogurt and cook over medium heat, stirring, until the cheese is melted and the chowder is heated through. Season with salt.


Basil Beer Bread (Adapted from Real Simple)

2 cups White Wheat Flour

1 1/2 cups Whole Wheat Flour

1 1/4-ounce package instant yeast
1 1/2 tsp kosher salt
1/2 tsp black pepper
3/4 cup(3 ounces) grated Parmesan
1 12-ounce bottle beer, preferably ale
Flour for the work surface

1 cup chopped or torn fresh basil

1. Heat oven to 400° F.

2. In the bowl of a standing mixer on low, or in a large bowl using a spoon, combine the flour, yeast, salt, pepper, and Parmesan. Add the beer and mix just until the dough comes together. Turn the dough onto a lightly floured surface. Sprinkle with the basil (or rosemary if subbing) and knead gently just until incorporated. Shape the dough into a round loaf and transfer to
the prepared sheet. Bake until the loaf is lightly browned and a toothpick inserted in the center comes out clean, 40 to 45 minutes. Turn the loaf onto a wire rack. Let cool for at least 10 minutes before slicing.


Saturday, July 18, 2009

Another "tart" night


Tart, originally uploaded by Kim De.

Notice that "tart" is in " " - the reason being this recipe really turns out like a pizza. I have been wanting to make Rustic Onion Tart with Market Cheese and Walnuts from Deborah Madison ever since I heard the name. A good recipe title can reach out and grab me, and this one did its job!

When I began to plan this meal, I was going to make the crust the recipe called for. However when I discovered I had half a recipe of whole wheat pizza dough in the freezer I decided to use that. After all, I was sure the strong flavors of onions, bleu cheese and walnuts could handle the nutty wheat crust!

When it was time, I shaped the crust with my hands, then rolled it to make sure it was very thin. You may have noticed that I dont make my pizza crust round - I like the look of the free form shapes. To the crust I added the mixture of red and yellow onions I had been caramelizing for the past hour.


The crust and onions were baked for about 7 minutes, then out of the oven it came so the rest of the ingredients could be added. I had sliced and crumbled a soft artisan bleu cheese and chopped a few walnuts. Those were sprinkled around the top of the onions to be baked again for about 6 minutes. The "pizza/tart" was slid back out of the oven and cooled for only a few minutes before I needed to slice and try. The recipe calls for arugula to be added at this time, but since I did not have any, I left it out.

I have always enjoyed the flavors of a strong cheese with walnuts and I wasnt disappointed this time. Add the sweetness of the onions and this was a winner. If you notice, I didnt bake as long as was called for - my crust was much smaller and very thin so I adjusted accordingly.


I felt a special yet simple salad was called for with this main dish. I tore up some greens, added a few slices of granny smith apple and a few red grapes, and to tie things in, a small sprinkle of bleu cheese and walnuts. Homemade ranch dressing was drizzled over top. With this dinner a nice hoppy IPA beer was served.


The verdict? Bo said, "We are never eating pizza out again!"

Rustic Onion Tart with Market Cheese and Walnuts (Adapted from Local Flavors)

Local Flavors Pizza Dough (recipe below)
3 Tbs olive oil
3 lbs onions -- thinly sliced
several thyme sprigs -- leaves plucked and chopped
sea salt and freshly ground black pepper
2 oz local blue cheese or Gorgonzola -- crumbled
4 whole walnuts -- shelled and chopped
1 large handful small arugula leaves

Make the pizza dough. While it's rising, heat the oil in a Dutch oven over medium heat. Add the onions and two thirds of the thyme; toss to coat the onions with the oil. Cover and cook until lightly colored, stirring occasionally so they cook evenly, 30-40 minutes. Season well with salt and pepper.

Twenty minutes before it's time to bake the tart, preheat the oven to 450 degrees. Roll the dough into a thin rectangle just large enough to fill a 12x16" sheet pan or into two 12" rounds. Cover the dough with the onions and bake for 12 minutes. Add the cheese and walnuts, and return the tart to the oven until the crust is crisp and the cheese is melted, about 10 minutes. Remove, add the remaining thyme, and cover with arugula. Cut into squares and serve.


Local Flavors Pizza Dough

1 1/4 cups warm water
1 Tbs active dry yeast
pinch sugar
3 cups all-purpose flour -- (more as needed)
1 tsp sea salt
1 Tbs olive oil

Put the warm water in a mixing bowl and stir in the yeast, sugar, and 1 cup of the flour. Set aside until foamy, 20-30 minutes. Lightly oil a clean bowl from the dough.

Stir in the salt and oil, then start stirring in the flour until the dough is fairly stiff. When too stiff to stir, turn it onto a lightly floured counter and knead until smooth and shiny, about 10 minutes. Add more flour as needed. Put the dough in the oiled bowl, turn once to coat, cover with plastic wrap, and set aside to rise until doubled in bulk, about 1 hour.

Roll out into desired shape, top, and bake.