Showing posts with label bread. Show all posts

Monday, March 15, 2010

Caribbean Cornbread

Southerners Take Note: This is not what YOU would call cornbread! It is moist and somewhat sweet, not dry. I promise, I am not trying to re-invent true cornbread, just offer another alternative!

Now that the disclaimer is out of the way, you MUST try this bread. I will repeat - YOU MUST TRY THIS BREAD! It is sweet from the pineapple and moist from the butter.

Lets talk about the butter. Im not a prude. I eat healthy with a combo or portion control and low cal foods. But this bread - 2 sticks of butter?- overkill. Besides the 'arghhh' factor with the calories, it was a bit greasy to the touch. I don't usually repeat recipes on this blog but in this case, I will be making this again, experimenting with the butter content, and I will blog with the results.

In the meantime, make it for your family. Make it as-is, or attempt to lighten it. If you do, let me know the results!

Caribbean Corn Bread (Adapted from Epicurious)

1 cup all-purpose flour
1 cup cornmeal
2 tablespoons baking powder
1 teaspoon salt
1/2 (2 sticks) unsalted butter, at room temperature
3/4 cup sugar
4 large eggs
1 1/2 cups canned cream corn
1/2 cup canned crushed pineapple, drained

Preheat your oven to 325

Butter and flour a 9-inch square glass cake pan.

In a mixer, cream the butter and the sugar. While the mixer is running, add the eggs one at a time, beating well after each addition. On a low speed, add the dry ingredients, and mix until blended well. Add the corn and pineapple and mix until just combined.

Pour the batter into the prepared pan and bake until a tester stuck in the center comes out clean, about one hour to an hour and fifteen minutes. Do not undercook the cornbread. It should be golden brown on top when done.

Monday, January 11, 2010

Corn Tortillas


corn tortilla, originally uploaded by Kim De.

It is time to begin to chronicle my journey attempting to make homemade tortillas. It has been a long time coming. Good homemade tortillas can't be found here because they are all mass produced in a factory "somewhere" and sold at the grocery store.

Trust me. If you haven't had a true homemade tortilla, you do not know what you are missing! If you think your local joint is making them homemade, well you MAY be right, but if you ever truly have a fresh made one, you will know the difference! When I lived in Houston, basically every Mexican eatery in town made fresh homemade tortillas every hour, so buying them was a snap. Now...., well I will have to become a master!

So I am trying. It really isn't difficult. Pressing them into the correct thickness is the most challenging part. Mine are a bit too thick, but that is ok. I will just make more, and will take pics of the process. If at first you don't succeed....

Tortillas de Maíz (Corn Tortillas)
(by Rick Bayless, in my mind, the MASTER!)

1 3/4 cups masa harina

Measure powdered masa harina, into a bowl and add 1 cup plus 2 tablespoons hot tap water. Knead with your hand until thoroughly combined. Cover and let stand 15 minutes.

Set a large griddle (one that stretches over 2 burners) or 2 skillets on your stovetop. Heat one end of the griddle (or one skillet) to medium, the other end (or other skillet) to medium-high.

Gently squeeze dough. If it is stiff (it probably will be), knead in water 1 or 2 teaspoons at a time until the dough feels like soft cookie dough—not stiff, but not sticky. Divide into 15 pieces, rolling each into a ball. Cover with plastic.

Cut 2 squares of plastic bag 1 inch larger than your tortilla press. Open the press and lay in one piece of plastic. Lay a dough ball in the center, and gently mash it. Top with the second piece of plastic and close press. Using the press's lever, gently flatten the dough into a 1/8-inch-thick disk. Peel off the top piece of plastic.

Flip the tortilla onto your right hand (if right-handed)—the top of the tortilla should line up with the side of your index finger. Now, gently roll it onto the side of the griddle (or skillet) heated to medium: Let the bottom of the tortilla touch the griddle, then lower your hand slightly and move it away from you—the tortilla will stick to the hot surface so you can roll your hand out from under it as it rolls down flat.

After about 30 seconds, the edges of the tortilla will dry slightly and the tortilla will release from the griddle—before this moment, the tortilla will be stuck. With a metal spatula (or calloused fingers), flip the tortilla onto the hotter side of the griddle (or hotter skillet).

After about 30 seconds, the tortilla should be lightly browned underneath. Flip it over. Cook 30 seconds more—the tortilla should puff in places (or all over—a gentle press with metal spatula or fingers encourages puffing). Transfer to a basket lined with a napkin or towel.

Press and bake the remaining tortillas. Stack each newly baked tortilla on the previously baked ones. Keep the tortillas well wrapped to keep warm.

Tuesday, January 5, 2010

Whole Wheat Chile Bread


chili bread, originally uploaded by Kim De.

Ahhh, the time to make bread. I greatly treasure it. The act of making dough, then forming it into a loaf that will bake to perfection is very calming to me. So much so that when life is out of control busy, like December was, I don't make bread. I never want it to become a chore to me.

So now that life is back to normal, it was time for bread. This recipe has been sitting on my computer for awhile, begging for life. The idea of spicy and flavorful chiles in a bread was very intriguing to me. What would the end result be? Spicy and full of the chile taste I love? Or subtle, hiding the spice in the wheat? I couldn't wait to find out!

I began by doing one of my favorite tasks – roasting chiles! The aroma coming from the ever darkening pepper flesh is intoxicating.


Arent they pretty?


After letting them cool so I could seed and dice, I prepared the rest of the dough ingredients then began the long process of waiting for it to rise, rise again, then bake. Such a frustrating process for the baker who just wants a taste of the finished product!


Look at that beautiful red color! The small amount of chili powder added to the flour makes that color. And see the tiny green poblano pieces dotting the slice? Pure heaven! I have to admit, I committed the cardinal bread-bakers sin. I cut into my bread while still warm. I just couldn't wait!

If you aren't “into” the spice the way I am, don't make this as written. It isn't unbearably hot, but it does contain the slow burn of peppers. Cut down on the chili powder, cut out the reed pepper flakes, or cut back on the amount of poblano used. But please, make this bread!

Whole-Wheat Chile Bread (Flavored Breads-Mark Miller's Coyote Cafe)

1 1/4 cups lukewarm water
2 tablespoons olive oil
2 teaspoons honey
2 1/2 teaspoons active dry yeast
1 cup stone ground whole-wheat flour
1 cup bread flour
1 cup all-purpose flour
2 teaspoons salt
4 teaspoons chile molido (freshly ground pure chili powder)
4 teaspoons chile caribe (red pepper flakes)
1/2 cup roasted, peeled, stemmed, seeded, and diced New Mexico green chile

Combine the water, oil and honey in a bowl of a heavy-duty electric mixer or in a large mixing bowl.

Sprinkle the yeast over the mixture, stir in, and let sit 2 minutes. Add the dry ingredients. Mix with the dough hook (or knead by hand) for 8-10 minutes, or until dough appears silky and resilient. Mix or knead the green chiles into the dough until thoroughly incorporated. Transfer the dough to a lightly oiled bowl and cover with plastic wrap.

Let rise in a warm place for 1 1/2 hours, or until approximately doubled in volume. Punch dough down; re-cover with plastic wrap and let rise in a warm palce for 30 minutes.

Place a baking stone on the middle rack in the oven and preheat to 400 degrees.

Place the dough on a lightly floured surface and cut into 2 equal pieces. Grease two loaf pans or generously dust baking sheet with whole-wheat flour. Shape the dough into oblong loaves. Alternatively, shape int into 2 round loaves or 14 to 16 rolls.

Place the laoves in the prepared pans or on the baking sheet ( or place the rolls on on the baking sheet), cover with lightly oiled plastic wrap, and let rise again in a warm place for 20 minutes.

Uncover the loaves (or rolls) and, using a spray bottle, spritz them with water and lightly dust with whole-wheat flour. Make 2 or 3 diagonal slashes in the tops of the loaves with a serrated knife to allow the dough to expand in the hot oven.

Using the spray bottle, spritz the oven walls with water. Work quickly so the oven does not loose heat. Set the loaf pans or baking sheet on the hot stone.

Bake for 35 to 40 minutes (20 to 25 minutes for rolls). The bread is done when the crust is dark and firm and the loaves sound hollow when tapped on the bottom. Let the bread cool in the pans or on the baking sheet for 10 minutes. Transfer the loaves (or rolls) to a rack and cool before cutting


Saturday, December 19, 2009

Mom's Cranberry Bread


cranberry bread, originally uploaded by Kim De.

No, not my mom. Not really sure WHOSE mom. Like lots of my recipes, this has been floating around the CLBB, highly recommended, for several years.

I mentioned in my last post that I wanted to try more cranberry recipes so when person after person raved about this recipe I knew it was worth a try.

I didnt do much to change the original ingredients, I just subbed mini chocolate chips for the nuts. I was surprised when the chip all floated to the bottom and gathered in a group, but not all surprises are bad!

Be warned, it is sticky sweet. The orange juice makes it quite moist, but also makes for a sweet contrast for the tart cranberry pieces.

And I must tell you, it is beautiful to look at!

Mom's Cranberry Bread (CLBB)

2 cups flour
1 1/2 teaspoons baking powder
1/2 teaspoon baking soda
1/2 teaspoon salt
1 cup sugar
1 cup cranberries -- Fresh or frozen; washed and chopped or halved
1/2 cup mini chocolate chips
1 beaten egg
3 tablespoons oil
1 cup orange juice

Preheat oven to 350 degrees. Sift dry ingredients together. Add cranberries and chocolate chips, tossing gently. Mix eggs, orange juice and oil in a bowl; add to dry ingredients, cranberries and nuts. Mix slightly. Bake in greased loaf pan for one hour.

Monday, November 9, 2009

100% Whole Wheat Bread


PB090736, originally uploaded by Kim De.

I finally got a chance to use my new cookbook, Healthy Bread in Five Minutes a Day. I mixed up dough before we left for our trip on Thursday, then shaped and baked on Sunday.

Now I want to make it clear. This bread is good. It is convenient to make. It is easy. It does not have the same flavor as a bread with lots of hands on, a long rise time etc. However, I find myself using it on busy weeks and it makes a fine sandwich bread.

If you have ever wanted to try bread baking but thought you needed magic hands, try this one!


100% Whole Wheat Bread, Plain and Simple (Healthy Bread in Five Minutes a Day)

This recipe makes enough for four 1-lb loaves. You can easily halve or double.

7 cups whole wheat flour
1 1/2 T yeast (or two packets)
1 T salt
1/4 cup vital wheat gluten
3 3/4 cups lukewarm water.

Mixing and Storing: Whisk together the flour, yeast, salt and gluten in a 5-qt bowl, or lidded (not airtight) food container.

Add the water and mix without kneading, using a spoon, a 14-cup food processor (with dough attachment), or a heavy-duty stand mixer (with paddle). You might need to use wet hands to get the last nit of flour to incorporate if your not using a machine.

Cover (not airtight) and allow the dough to rest at room temperature until it rises and collapses, approximately 2 hours.

The dough can be used immediately after the initial rise, though it is easier to handle when cold. Refrigerate it in a lidded (not airtight) container and use it over the next 10 days.

On Baking Day: Dust the surface of the refrigerated dough with flour and cup off a 1-lb piece. Dust the piece with more flour and quickly shape it into a ball by stretching the surface of the dough around to the bottom on all four sides, rotating the ball a quarter-turn as you go.

Allow the loaf to rest, loosely covered with plastic wrap, on a pizza peel prepared with cornmeal or lined with parchment paper for 90 minutes. (40 if you are using fresh dough) Alternatively you can rest the loaf on a silicone mat and greased cookie sheet without using a pizza peel.

Thirty minutes before baking time, preheat the oven to 450 with a baking stone placed on the middle rack.

Just before baking, use a pastry brush to paint the top with water. Slash the loaf with 1/4 inch deep parallel cuts. Fill a clean spray bottle with warm water.

Slide the loaf directly onto the hot stone, or put the cookie sheet in. Spray the loaf with water and quickly close the oven door. Bake for about 30 minutes until browned and firm, or until 180 on a thermometer.

Allow the bread to cool on a rack.

Wednesday, September 23, 2009

Whole-Wheat Multigrain Sourdough Bread


sourdough, originally uploaded by Kim De.

Today's recipe is bread. I love bread! I enjoy the bread making process. We dont buy bread the grocery store anymore as I choose to make all our bread.

For the past few weeks I have been making "fast" breads from Artisan Bread in Five Minutes a Day. These recipes are good and are very quick and easy to make. They are brilliant on those weeks where I am incredibly busy. But after awhile, I begin to crave a MORE artisan bread - one that takes several hours to craft, and whose flavor reflects that. When I want such a bread, the first place I go is my King Arthur Whole Grain Baking Book. I decided not only did I want grains and seeds, but I wanted a sour bread. This bread fits the bill. It takes several hours to make, but the actual hands on time is minimal. It combines whole wheat and white bread flours, and it calls for sunflower seeds. If you want to venture into this type of crusty bread, this is a good recipe to start with!


Whole-Wheat Multigrain Sourdough Bread (Adapted from King Arthur Flour Whole-Grain Baking)

1/4 cup cracked wheat
1/4 cup cool water
1 cup ripe whole-wheat sourdough starter
1 cup whole-wheat flour
1 cup unbleached bread flour
1 1/2 tsp salt
1 cup water
1/4 cup sunflower seeds


THE NIGHT BEFORE YOU'RE READY TO BAKE, combine the cracked wheat and cool water in a small bowl. Cover and set aside to soak at room temperature until morning. Feed your starter.

THE MORNING OF BAKING DAY, combine the cracked wheat and all its water, the newly measured-out amount of ripe starter, the flours, salt, and HALF of the water in a large mixing bowl NOTE:add the whole amount if needed. Under most conditions the entire amount will probably be needed, but I was baking on a very wet and humid day

Once the ingredients are thoroughly combined, knead the dough, by hand or in the mixer, until the dough is springy and elastic, about 4 minutes. If you're kneading by hand, be sure not to incorporate more flour into the dough

Knead in the sunflower seeds once the dough is soft and elastic.

With the dough in its original bowl cover the bowl and LET IT RISE FOR ONE HOUR.

After an hour, the dough will be somewhat puffy, though not doubled in bulk. Turn it from the bowl onto a well-floured work surface and give it a double fold: pat it lightly into a rectangle with
floured hands, and use a bench scraper to fold both short ends in, just as you would fold a business letter; then fold the other sides in. This folding is comparable to "punching" the dough, but it's much more gentle, and it helps to build the dough's strength, as well as redistribute the carbon dioxide produced by the yeast. Return the dough to its bowl, folded side down, and LET IT RISE FOR ANOTHER HOUR.

While the dough is rising, heavily flour a banneton or a bowl or a colander lined with a linen towel. Remove the dough from the bowl and place it upon a very lightly floured pastry mat or other surface.

Flour your hands well and shape the dough into a round. Place it upside-down (seam side up, that is) in the floured banneton or tea towel; cover it and SET IT ASIDE TO PROOF FOR 2 1/2 HOURS.

ABOUT HALF AN HOUR BEFORE YOU'RE READY TO BAKE preheat your oven and baking stone to 425 degrees. Prepare the oven for steam: (I like to have a spray bottle with warm water to spray the inside of the oven)

When the dough is ready to bake, it will be very soft and will feel bubbly and full, and it will be slow to recover when you press it gently with floured fingers. Flip it from the banneton onto a parchment-lined baking peel. Gently brush away any excess flour with a soft, dry pastry brush

Slash the loaf with a very sharp blade. Use the peel to load the bread, parchment paper and all, onto the hot baking stone. Steam the oven by spraying the water into the oven. Quickly close the oven door.

18. Bake the bread for 35-40 minutes, or until it's browned and stays firm if you give it a gentle press or squeeze. (I like to "take its temperature and take it out at 185) Remove the bread from the oven; place it onto a rack and let it cool completely before slicing. (If you can!)

Tuesday, August 18, 2009

This is going to be a long one...


cam - pre bake, originally uploaded by Kim De.

Once upon a time there women who lived close together and would see each other from time to time. Eventually, some of the women moved away and it was harder for gatherings to take place. (Dont go away, here comes the exciting climax!) One night their schedules allowed them to all gather for dinner. Dinner was had, and then blogged. The End.

Ok, so you may have guessed I had company for dinner Tuesday night. The result? Lots of recipes and reviews for you!!

The top picture you are seeing belongs to the un-baked Cannelloni with Spinach Goat Cheese, Walnuts and Roasted Garlic Tomato Sauce from Field of Greens. I have heard nothing but great things about this recipe, and besides it is from the famed Greens Restaurant in San Francisco, so what could be wrong? Not much! It was pretty good, although I would have liked a but more “umph” in the flavor department. It was a labor intensive dish, but was easily made in sections over a few days, so really didnt seem that difficult!

Next up was Rustic Sourdough Focaccia from Lora Brody. My new obsession with sourdough and bread making led me naturally to this recipe. As written, the dough was very wet (even more because of the rain outside), and it never set up the way it was supposed to (ya know, so you can make dimples in it) The sourdough tang was prominent but it didnt puff up and the crust was chewy, not normal for a focaccia. My guests, however, loved it, so that is what matters to me!


The grand finale was Eating Well's Died and Went to Heaven Cake.

Lemme tell you, the name does not lie. This cake is so dark and moist from the addition of strong brewed coffee. I replaced the frosting in the recipe with a cream cheese frosting, and I think I will continue to do that. This cake was a HUGE hit, as it has been every time I have served it!

It was a great evening with great friends and wonderful recipes!


Cannelloni with Spinash, Goat Cheese, Walnuts and Roasted Garlic-Tomato Sauce (Adapted From Field of Greens)
NOTE: I doubled the sauce on this recipe. Also, I used manicotti shells instead of pasta sheets

Roasted Garlic-Tomato Sauce:
1 head garlic
1 Tablespoon extra virgin olive oil
2 pounds fresh tomatoes, peeled and seeded, about 3 cups, or 3 cups canned tomatoes with juice
1/2 small onion, diced, about 1/2 cup
salt and pepper
1/4 cup dry sherry
1 bay leaf

The Filling:
1 1/2 teaspoons extra virgin olive oil (cooking spray)
1/2 medium red onion, diced, about 1 cup
salt and pepper
4 cloves garlic, finely chopped
1 large bunches of spinach, stems removed and leaves washed, about 16 cups
3/4 teaspoon minced lemon zest
1/3 cup walnut pieces, roasted
1/4 cup chopped fresh herbs, such as marjoram, thyme, chives, and parsley
1/2 pound ricotta cheese, about 2/3 cup (2% cottage cheese)
1 egg, beaten
2 ounces Parmesan cheese, grated, about 2/3 cup (10 TBSP)
2 ounces Montrachet cheese, or other creamy, mild goat cheese
2 fresh pasta sheets, about 10 ounces

THE SAUCE: Preheat the oven to 375. Rub the garlic with a little olive oil, place it on a baking sheet and roast until very soft, 30 to 35 minutes. When garlic is cool, slice off the top of the bulb and squeeze the cloves out of the skin. Puree them with the tomatoes in a blender or food processor.

Heat 1 teaspoon of olive oil in a saucepan and add the onion, 1/2 teaspoon salt, and a few pinches of pepper; saute over medium heat for 5 minutes. When the onion is soft, add the sherry and bay leaf and simmer for 1 or 2 minutes, until pan is nearly dry. Add the tomato-garlic puree and 1/4 teaspoon salt and simmer, uncovered, over low heat for 30 minutes. (TIP: Add up to 1 teaspoon sugar after simmering sauce to balance the flavor if the sauce is acidic).

THE FILLING: Heat 1 tablespoon of the olive oil in a large skillet. Add the onions, 1/2 teaspoon salt, and a few pinches of pepper; saute over medium heat for about 5 minutes, until the onions begin to release their juices. Add half the garlic and saute until the onions are soft, 2 to 3 minutes. Transfer onions to a bowl.

Heat the remaining teaspoon olive oil in a large skillet and quickly wilt the spinach over medium-high heat with 1/2 teaspoon salt, a few pinches of pepper, and the remaining garlic. Remove the spinach from the heat, drain, and cool. Squeeze out the excess moisture a handful at a time, then coarsely chop.

Add the spinach to the onions along with the lemon zest and walnuts. Set aside half the fresh herbs to sprinkle on top after baking and add the rest to the spinach-onion mixture.

Place the ricotta in a bowl and stir in the egg. Set aside half the Parmesan cheese to sprinkle over the cannelloni; add the rest to the ricotta with 1/4 teaspoon salt and 1/8 teaspoon pepper. Combine the spinach and onions with the ricotta mixture, then crumble in the goat cheese. Season with salt and pepper to taste.

ASSEMBLING THE CANNELLONI: Cut the pasta sheets into 12 4-inch squares (or comparable size to accomodate the size of the pasta sheets).

Preheat the oven to 350. Lay the pasta squares on a work surface and spread 1/4 cup of the filling along the edge of each square. Roll loosely; the filling will expand during baking.

Ladle 1 1/2 cups tomato sauce into the bottom of a 9-by-13-inch baking dish. Place the cannelloni close together in the dish, seam side down, and ladle the remaining sauce over them. Use a pastry brush to spread the sauce evenly, particularly on the ends, making sure the pasta is covered with sauce.

Cover and bake for 20-25 minutes. Sprinkle the cannelloni with the reserved Parmesan and fresh herbs just before serving.


Rustic Sourdough Focaccia (Adapted from (Pizza, Focaccia, Flat and Filled Breads from your Bread Machine - Perfect Every Time)
NOTE: I do not own a bread machine, so this was done by hand

For the dough:
1/2 teaspoon yeast
3 cups all-purpose flour -- plus 1 tablespoon
1 1/2 teaspoons coarse salt
1 cup sourdough starter
1 1/2 cups water -- plus up to an additional 1/4 cup if necessary to make a very wet dough that does not form a discrete ball

To finish the focaccia:
2 tablespoons olive oil
1 teaspoon coarse salt

Place all dough ingredients, except the tablespoon of flour, in the machine, program for Dough or Manual and press Start. After the first 3 to 4 minutes of kneading, add more water if necessary to form a very wet dough that barely holds its shape and does not leave the bottom of the pan.

At the end of the final cycle, remove the pan from the machine or remove the dough to a lightly oiled bowl. Sprinkle the top of the dough with the 1 tablespoon flour, cover the top of the pan or bowl with plastic wrap, and place it in the refrigerator. Refrigerate at least 12 hours and up to 18 hours.

Place the dough on a lightly floured work surface. Punch it down and form it into an 11-inch disk, then place it on a baking sheet or pizza pan or wooden paddle that has been lightly sprinkled with cornmeal. Cover the dough with a clean towel and place it back in the refrigerator for 4 hours. At the end of that time, take it out of the refrigerator and leave it, still covered, at room temperature until it rises to almost double in bulk. This may take up to 2 hours.

Preheat the oven to 475 degrees with the rack or a pizza stone or tiles in the center position. Just before baking, lightly press your fingertips into the dough to make gentle indentations in the surface. Drizzle with the olive oil and sprinkle with salt. Slide the pan into the oven, or slide the dough onto the pizza stone and bake for 18-22 minutes, or until the top is crusty and a rich golden brown color. Eat hot, warm, or at room temperature. This focaccia is best eaten the day it is made.


Died-and-Went-to-Heaven Chocolate Cake (Eating Well)


Cake
1 ¾ cups all-purpose white flour
1 cup white sugar
¾ cup unsweetened Dutch-process cocoa powder
1 ½ teaspoons baking soda
1 ½ teaspoons baking powder
1 teaspoon salt
1 ¼ cups buttermilk
1 cup packed light brown sugar
2 large eggs, lightly beaten
¼ cup canola oil
2 teaspoon pure vanilla extract
1 cup hot strong black coffee

Icing
1 cup confectioners' sugar
½ teaspoon pure vanilla extract
1-2 tablespoons buttermilk or low-fat milk

Preheat oven to 350°F. Lightly oil a 12-cup Bundt pan or coat it with nonstick cooking spray. Dust the pan with flour, invert and shake out the excess.

In a large mixing bowl, whisk together flour, white sugar, cocoa powder, baking soda, baking powder and salt. Add buttermilk, brown sugar, eggs, oil and vanilla; beat with an electric mixer on medium speed for 2 minutes. Whisk in hot coffee until completely incorporated. (The batter will be quite thin.)

Pour the batter into the prepared pan. Bake for 45 to 55 minutes, or until a cake tester inserted in the center comes out clean. Cool the cake in the pan on a rack for 10 minutes; remove from the pan and let cool completely.

To make icing: In a small bowl, whisk together confectioners' sugar, vanilla and enough of the buttermilk or milk to make a thick but pourable icing. Set the cake on a serving plate and drizzle the icing over the top.

Monday, August 10, 2009

Rye - Part Deaux


rye, originally uploaded by Kim De.

Fall cravings are in my mouth, and rye bread is what I need. With September comes the promise of crisp cool weather - and beginning in August I start to pretend it is here. Well here we are, almost half way through the humid month, and already on my 2nd rye.

This weekend was busy, with the beginning of the upcoming week even busier. That statement set up my excuse for not making the same rye as last week. It was amazing, it was rich in flavor, it was...a bit time consuming. So, to satisfy our taste buds and my schedule, I made Narsai's Light Rye Bread from The Bread Bible.

Now, I rarely meet a bread I dont like, and this loaf is no exception. But like wines and cheeses, there are subtle differences in quality between every bread recipe. While soft with a subtle taste, it is missing the "kick" and "tang" from the sourdough, and the caraway seeds blended in instead taping you on tongue and saying "here I am!"

Much of the flavor from this loaf comes from the molasses, while the softness comes from the gluten, used to break down the flour. I dont mean to sound as though I am complaining - I am not. I would imagine this will be pulled out again for busy weeks. But for most weeks, when rye is what I crave and I want flavor to dance on my tongue, Marylin's recipe it is!


Narsai's Light Rye Bread (Adapted from The Bread Bible)

NOTE: This recipe is written for a bread machine. I did not use one, instead letting the bread rise until doubled, deflating it, then shaping for a proofing rise before baking at 350 until the internal temperature was 185 (approx 30 minutes)

1 cup water
3 T molasses
2 T vegetable oil
2 cups bread flour
3/4 cup medium rye flour
5 t gluten
1 T caraway seeds
1 t grated orange zest
1 t salt
2 t bread machine yeast

Place the ingredients in the bread machine according to manufacture's instructions. Set crust for light, program for basic bread cycle and press start.

After the baking cycle ends, remove the bread immediately from the machine to the cooling rack. Cool to room temperature before slicing.

Saturday, August 8, 2009

A lovely company dinner


broc, originally uploaded by Kim De.

Last night some friends came for dinner. It was a great time - I LOVE company!!!!

We did a grilled dinner; simple but full of flavor. I rubbed some chicken with a barbeque rub and marinated it in beer and garlic. A sauce was made to compliment this - smoky and a touch spicy - with beer, vinegar, ketchup and brown sugar as well as some spices. My friend brought her famous tomato tart (PLEASE dont retire this Shannnon ;)) and we had a wonderful broccoli salad.

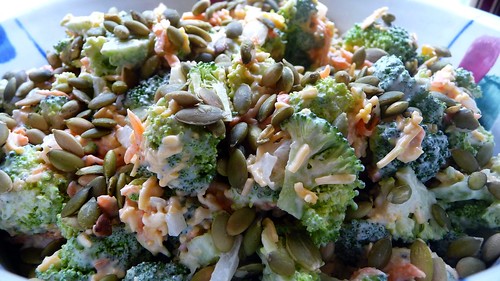
The broccoli salad is the main reason I am here today, since most of my dinner last night didnt involve a true recipe for blogging. This salad, however, deserves its own blog - in fact it deserves a standing ovation!!

I have been playing with broccoli salads all summer trying to find the right mix of vegetables (is it broccoli crowns or broccoli slaw) and the best sauce (is it mayonnaise, vinegar, yogurt, or a combo). Well last night I found it. This is now the base for every other broccoli salad I will make in the future. Ahhhhh now I can rest easy! Shredded carrots, sharp cheddar and toasted pepitas join the florets and dressing in this version. However, take those out and the choices are endless: raisins with crumbled bacon and sunflower seeds; diced tart apple and dried cranberries; add diced chicken for a full meal - really anything that strikes your fancy.


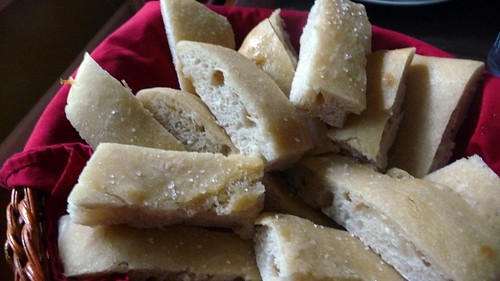
Now that I have raved and salivated all over your computer about the broccoli, I must make a mention about our pre-dinner snack. I put out fruit and cheese with Pumpkin-Walnut Focaccia with Gruyère. This recipe from Cooking Light has been made by many of my friends from their bulletin boards and I read several reviews before deciding to try it. I agree with what I read: This isnt a true focaccia. The texture is that of a fluffy flatbread and was very nice, but the word "focaccia" is misleading.

The addition of pumpkin added a lovely color and a slightly sweet flavor. Based on reviews, I added more cheese to the dough and I still couldnt taste it. If made again , I would leave out "inner" cheese and just add it to the top. The only other change I made was to leave out the walnuts as it was for company and not everyone appreciates nuts. I think it is a nice bread for soup or a snack, but with so many other recipes to try, I'm not sure I will try it again.


Broccoli-Cheddar Salad with Toasted Pepitas (Adapted from Veg Times)

1/2 cup mayonnaise
1/2 cup plain yogurt
2 Tbs apple cider vinegar
1 Tbs granulated sugar
4 cups broccoli florets cut into 1/2" pieces
3/4 cup grated carrots
1/2 cup finely diced red onion
4 oz shredded Cheddar
salt and fresh ground pepper
1/3 cup toasted pepitas

In a large bowl, whisk together mayonnaise, yogurt, vinegar and sugar. In a separate bowl toss together broccoli, carrots, onion and Cheddar. To the veggies add the dressing, mixing well to combine. NOTE: I never like the amount of dressing called for in these recipes. I started by adding only 1/2, letting it sit for a couple of hours, then added more as needed. I probably ended up using 2/3 of this.

Season to taste with salt and fresh ground pepper. Cover the bowl and place in the refrigerator to chill at least 2 to 3 hours, or over night. Scatter the top with the pepitas right before serving.


Pumpkin-Walnut Focaccia with Gruyère(Adapted from CL)

3/4 cup warm water (100° to 110°)
1/3 cup packed brown sugar
1 package dry yeast (about 2 1/4 teaspoons)
3 1/2 cups bread flour, divided (I used closer to 4 cups as it was too sticky)
3 Tbs butter, melted
1 cup mashed pumpkin
1 tsp salt
1/4 tsp ground nutmeg
1 cup grated Gruyère cheese, divided
1/3 cup coarsely chopped walnuts

Combine water, sugar, and yeast in a large bowl; let stand 5 minutes. Lightly spoon flour into dry measuring cups; level with a knife. Add 1 cup flour and butter to yeast mixture; stir just until combined. Cover and let rise in a warm place (85°), free from drafts, 30 minutes.

Add pumpkin, salt, and nutmeg to flour mixture; stir until well combined. Add 2 1/4 cups flour and about 2/3 of cheese; stir until a soft dough forms.

Turn dough out onto a floured surface. Knead until smooth and elastic (about 8 minutes); add enough of remaining flour, to prevent dough from sticking to hands (maybe 1/2-3/4 c- dough will feel tacky).

Place dough in a large bowl coated with cooking spray, turning to coat top. Cover and let rise in a warm place (85°), free from drafts, 1 hour or until doubled in size. (Press two fingers into dough. If indentation remains, dough has risen enough.) Punch dough down; cover and let rest 5 minutes. Divide dough in half; shape each half into an 8-inch circle. Place dough circles on a parchment covered baking sheet. Sprinkle remaining cheese and nuts evenly over dough circles; press lightly to adhere. Lightly coat dough circles with cooking spray; cover and let rise 20 minutes (dough will not double in size).

Preheat oven to 350

Uncover dough; bake at 350° for 30 minutes or until loaves are browned on the bottom and cheese melts (shield loaves with foil to prevent overbrowning, if necessary). Cool on a wire rack.

Tuesday, August 4, 2009

An OMG!!! meal


ale soup, originally uploaded by Kim De.

Sometimes recipes come along that makes you want to eat the entire thing in one setting - both of these recipes fit this profile!

First, the soup. This Butternut Squash and Ale Soup is originally from Food and Drink 2005, with changes made from my friends on the Cooking Light BB. The flavor in this soup is so incredibly intense that is was hard to stick to a proper serving. The nice thing is it isnt hard to make.

It calls for butternut squash, peeled and diced. I purchased some frozen pureed squash, just in case, but also wanted to try it with roasted squash. I bought a squash, sliced it open and roasted it for a hour, let it cool, then cubed it. What I discovered is by the time I added it to the other amazing flavors, the time involved in roasting was lost - so next time frozen stuff it is! I also added sliced carrots, simply because I wanted to boost the vegetable count for more of a one dish meal.

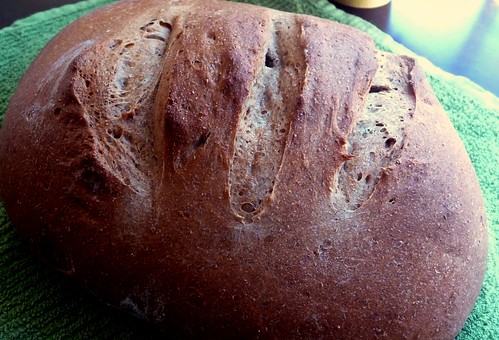
Now to the bread. This is one of the best breads to come out of my kitchen so far. The flavor is deep with the mixture of white, wheat and rye flavors melding together perfectly. The addition of a few caraway seeds reminds you this is a solid rye bread, with the tang from the sourdough pulling you in a different direction. Back and forth your taste buds go until you are in heaven! An amazing bread!

The bread recipe makes quite a lot of dough, so I made one boule and one traditional loaf.

I highly recommend both these recipes and they were given two thumbs and 5 stars by both of us!

Butternut Squash and Ale Soup (Adapted from Food & Drink)

1 Tbs olive oil
1 cup Spanish onions, finely diced
3 cups peeled, seeded, chopped butternut squash, -- pre roasted
3 carrots, sliced
4 cups chicken stock
2/3 cups half and half
3 cups sharp cheddar cheese, shredded
1 bottle Ale (I used an IPA)
Salt, freshly ground black pepper and cayenne

1. Heat oil over medium heat in a heavy-bottomed pot. Add onion and cook for 3 minutes or until transparent. Add butternut squash and carrots and cook for 5 minutes. Add chicken stock and bring to a boil. Let simmer for approximately 20 minutes or until squash and carrots very tender.

2. Puree soup in a blender or food processor until completely smooth. Add cream and return to a boil. Reduce heat to low and then, while whisking, add cheddar cheese and whisk until melted. Add ale to taste. Stir together and season with salt and pepper to taste.

3. Remove from heat and serve.

My Note: Next time use frozen pureed squash. Add green onions as a garnish.
My Note: Great with crusty rye bread and a few drops of tobascco.


Marilyn's Whole Wheat and Rye Sourdough Bread (A King Arthur recipe)

1 Tbs instant yeast
1 3/4 cups lukewarm milk
2 cups sourdough starter
1/4 cup packed dark brown sugar
2 tsp salt
1 Tbs caraway seeds
1 cup white rye flour
1 cup King Arthur Traditional Whole Wheat Flour
3 1/2 cups King Arthur Unbleached All-Purpose Flour

1. Combine the yeast, milk, the sourdough starter, sugar, salt, and seeds. Stir in the rye flour and beat until the batter is smooth. Add the whole wheat flour, then the unbleached all-purpose flour, a cup at a time, stirring well after each addition. When the dough has formed a shaggy mass, turn it out onto a lightly floured counter.

2. Knead the dough and add just as much flour as you need to keep the dough from sticking to the counter. The dough should be a little tacky, but not sticky. Place the dough in a greased bowl. Cover with a damp towel or plastic wrap and let rise until it has doubled in bulk, about 1 1/2 to 2 hours.

3. Gently deflate the dough and place it on a lightly floured counter. Shape as desired; you can make one huge loaf, three normal loaves, four mini loaves, or about 24 rolls. You can also reserve a small amount of dough and roll it into long, thin strips that can be snipped with scissors to form a stalk of wheat to decorate the top of each loaf.

4. Cover the loaves and let them rise for about 45 to 60 minutes, or until they're puffy. Bake them in a preheated 400°F oven for about 25 minutes, or until the bread is nicely browned and sounds hollow when thumped on the bottom. Remove from the oven, and cool on a rack.

Recipe Source: King Arthur

Friday, July 31, 2009

Despite best efforts...


Finished slice, originally uploaded by Kim De.

Ah bread baking. Such an exact science. I am new to the art of artisan bread baking. I have been very lucky so far, most efforts have been successful. This effort, while tastes good, did not "shape up" entirely as the author intended.


Three days ago I launched into Pain de Campagne by making the starter. The flour, water and yeast needed to sit over night to begin its work. The next morning, it was bubbly and smelling fermented. Things looked good!


The next step was to add water and flour. Simple enough. It too sat over night, developing its deep flavor. Yesterday morning all was looking well.


Now, let me say we have had terribly humid weather. I dont know if this wet air contributed to the issues I had next or not... The recipe had me add the remaining flour, along with salt. Then I put the dough in a bowl to rise for an hour or two. Two hours later, I came back and the dough had run over the sides of the bowl. I gathered it up and tried to shape it for its final rise. It was a bit loose and hard to shape. I did my best and left it alone for the final hour, letting the oven preheat while waiting. Just before baking, I tried to shape it into a boule again. It held its shape a bit while also flattening a bit. 45 minutes later, it came out of the oven, a bit flatter than was intended, but certainly no pancake.


Taste, being the true test, came after a time of cooling. While the crust was a bit tough to cut in to, the bread itself was springy and had a nice flavor. I decided it was tasty enough to serve to friends last night, good, since I didnt have three days to make another loaf.

I took notes of my movements, the weather, and the bread's temperament for later. I will be interested to make this again in the fall when cooler/dryer weather provide different baking conditions.

Pain de Campagne by Beth Hensperger

STARTER:
1 Tablespoon (1 package) active dry yeast
1/2 cup whole-wheat flour
1/2 cup lukewarm water (90-100 degrees F)

SPONGE:
2 cups lukewarm water (90-100 degrees F)
1 1/2 cups unbleached all-purpose flour or bread flour
1 1/2 cups whole-wheat flour

DOUGH:
3 1/2 to 4 cups unbleached all-purpose flour or bread flour
4 teaspoons salt

1 large egg, beaten with 2 teaspoons water, for glazing
----

* Day One: To make the starter, place the yeast and whole-wheat flour in a deep bowl or a plastic 4-quart bucket with a lid. Add the water and whisk hard until a smooth batter is formed. Cover and let stand at room temperature until foamy and it begins to ferment, about 24 hours.

* Day Two: To make the sponge, add 2 cups warm water to the starter. Whisk to combine. Add the unbleached and the whole-wheat flours alternately, 1/2 cup at a time, changing to a wooden spoon when necessary, until a smooth batter is formed. The sponge will be very wet. Scrape down the sides of the bowl, cover with plastic wrap, and let rise again at room temperature for about 24 hours.

* Day Three: To make the bread dough, stir down the sponge with a wooden spoon. Add 1 cup of the unbleached flour and the salt. Gradually add most of the remaining flour, 1/2 cup at a time, to make a firm and resilient dough.

* Turn the dough out onto a lightly floured work surface and knead until smooth, slightly tacky, and springy, about 5 to 7 minutes, dusting with flour only 1 tablespoon at a time as needed to prevent sticking. The dough will form little blisters under the surface when ready to rise.

* Place the dough in a greased deep bowl or container. Turn to coat top of the dough once. Cover tightly with plastic wrap. Let rise at room temperature until fully doubled in bulk, 1 1/2 to 2 hours.

* Gently deflate the dough. Turn the dough out onto a lightly floured work surface. Grease or parchment-line a baking sheet. Shape the dough into a tight round (or two tight rounds - use separate pans if making two smaller loaves instead of one large one) and place it on the baking sheet. Cover the dough loosely with plastic wrap and let rise about 1 hour at room temperature.

* Twenty minutes before baking, preheat the oven to 425. Using a serrated knife, slash the loaf decoratively. Brush the entire surface of the loaf with the glaze.

* Place the baking sheet on a rack in the center of the oven and bake for 40 to 45 minutes, or until the loaves are browned, crisp, and sound hollow when tapped with your finger. Transfer the loaves immediately to a cooling rack. Cool completely before slicing.

Monday, July 27, 2009

Not much cooking this weekend...


Kim with Dogfish Head, originally uploaded by Kim De.

...but for good causes!

Saturday I spent a few hours at the Music City Brewersfest with a good friend. It was fun, and a bit hot, so a hot dinner wasnt in the cards. I had made bread and set it to rise while I was gone. When I got home, I got it ready to bake and when dinner time came around, we decided bread, cheese and wine sounded like a nice light dinner.

The bread was nice, fit it's purpose perfectly. I made Saltgrass Steakhouse Shiner Bock Bread (nostalgia from when I lived in Texas). It tasted just like you expect a steakhouse bread to taste- light and airy with a spongy texture, good developed flavor, nothing amazing but great with butter or cheese.


Sunday we also had a light dinner, as we had spent some time at a bar with pizza and beer and thought vegetables were definitely in order! Flank steak was marinated in red wine and crushed garlic then grilled. With it I made Broccoli and Three Cheese Casserole from Cooking Light.


Broccoli Casserole is one of my favorite dishes from childhood. This was similar, with healthier spins. Brown rice replaces the white, absent is cream-of-ANY soup, and there is much more broccoli. Instead of everything being mixed, the rice is mixed with egg to form a "crust" with the other ingredients layered on top. It was fabulous! Nutty fontina cheese adds amazing depth and while it was drier than I am used to, I could really taste the broccoli, which stayed tender-crisp, making me feel healthy! This one will be used again!


Saltgrass Steakhouse Shiner Bock Beer Bread

1 1/2 cups Shiner Bock Beer (flat)
2 1/2 cups whole wheat flour
2 tsp dry active yeast
1/4 cup warm water
1/2 tsp salt
1/4 cup honey
1/4 cup vegetable oil
1 1/2 cups all-purpose flour

1. Dissolve yeast in warm water in a large mixing bowl. Add honey and stir. Mix in wheat flour, salt and all- purpose flour in bowl. Stir in oil and slowly add flat beer. Mix all ingredients together. Place dough on a floured surface and knead for at least 10 to 15 minutes. The dough may need a little more flour added to it if becomes too sticky. The finished dough will feel smooth and spongy and will not stick to your hands.

2. Place dough in a lightly oiled bowl and cover with plastic until it
doubles in size. Do not place dough in a draft or in an overheated area. The dough should be left to rise at room temperature.

3. When dough has doubled, punch down in the middle and let rest for 5 minutes.

4. Divide dough into four equal parts and shape into round loaves. Place loaves on a lightly oiled cookie sheet. Score twice on top of each loaf with a knife two inches apart and about 2 1/2 inches long. Cover loosely with plastic wrap until the loaves have doubled in size. Place in a preheated 350 F oven, and bake for about 30 minutes.


Broccoli and Three-Cheese Casserole (Adapted from CL)

2 cups cooked brown basmati rice
2 oz fresh grated Parmesan cheese, divided
3/4 tsp salt, divided
1/4 tsp dried nutmeg
1/4 tsp dried thyme
1/4 cup Dijon mustard
1/8 tsp crushed red pepper
1 large egg
1 egg white
3 oz shredded fontina cheese
4 cups coarsely chopped broccoli florets
1 tsp olive oil
1 cup finely chopped onion
2 oz shredded sharp white cheddar
2 large eggs
2 egg whites
3/4 cup milk
1/4 tsp black pepper
3/4 cup panko breadcrumbs

1. Preheat oven to 400

2. In a medium bowl, thoroughly combine cooked rice, 1 ounce Parmesan cheese, 1/4 teaspoon salt, tarragon, thyme, parsley, crushed red pepper, 2 T mustard, egg and egg white. Scoop mixture into a 7 x 11" baking dish lightly coated with nonstick spray. Use a fork to press the mixture into the bottom to form a crust. Evenly scatter fontina over the rice.

3. Steam broccoli just until crisp tender.

4. In a large skillet, heat oil over medium. Add onion and cook until
tender, about 4 minutes. Stir in the steamed broccoli. Scoop broccoli
mixture evenly over rice mixture. Scatter the top with the shredded cheddar.

5. In a small bowl, whisk together eggs, egg white, 2 T mustard, milk,
remaining 1/2 teaspoon salt and pepper. Pour this mixture over the broccoli mixture.

6. In a small bowl, toss together panko breadcrumbs and remaining 1 ounce of shredded Parmesan. Scatter the top of the casserole with this mixture.

7. Bake until set and the top is golden - about 24-28 minutes. Remove and set on a wire rack - let sit for about 5-10 minutes before cutting to serve.

Thursday, July 16, 2009

Mmmmm, Bread!


100% Whole Wheat Bread, originally uploaded by Kim De.

Yesterday it was time for more bread. As much as I love making bread, and am loving the learning process of a slow made bread, some weeks you know it just isnt possible. Enter my favorite "quick" bread book Artisan Bread in 5 Minutes a Day.

This book teaches you how to make "no knead" breads; breads where you make the dough, put it in the fridge, and pull it out to cook when ready. Brilliant!!!

This week I made their 100% Whole Wheat Sandwich Bread. This bread is a great whole grain bread. It is soft and great for sandwiches. It has a tight crumb and a slightly sweet taste. And did I mention it is fast to make?

After I mixed the ingredients, the dough was put in the refrigerator to wait until I was ready for it. Yesterday I pulled off half of the dough, shaped it into a ball, and put in my bread pan. After a rest of 1 hour and 40 minutes, it baked for 50 minutes. Cooling bread is my biggest nemesis, but I was a good girl and waited for it to cool completely before slicing off a piece for lunch.

If you are a new bread baker, would like to try baking bread, or are a master bread baker with a busy week, I highly recommend this book! (and to my great excitement, they have a new book, Healthy Bread in 5 Minutes a Day, being released in October!)

100 Percent Whole-Wheat Sandwich Bread

Whole wheat flour has a nutty, slightly bitter flavor, and it caramelizes easily, yielding a rich, brown loaf. Milk and honey are tenderizers, and their sweetness complements the bitter notes. Although we’ve showcased a loaf-pan method here, this dough also makes lovely free-form loaves on a baking stone.

1 1⁄2 tbsp granulated yeast (1 1⁄2 packets)
1 tbsp plus 1 tsp salt
1/2 cup honey
5 tbsp neutral-flavored oil, plus more for greasing the pan
1 1⁄2 cups lukewarm milk
1 1⁄2 cups lukewarm water
6 2⁄3 cups whole wheat flour

1. Mix the yeast, salt, honey, oil, milk and water in a 5-quart bowl or other container.
2. Mix in the flour using a spoon, high-capacity food processor with dough attachment, or a heavy-duty stand mixer with dough hook.
3. Cover loosely, and allow to rest at room temperature until the dough rises and collapses (or flattens on top); about 2 to 3 hours.
4. The dough can be used immediately after the initial rise, though it is easier to handle when cold. Refrigerate in a lidded (not airtight) container and use over the next several days.
5. On baking day, lightly grease a 9-by-4-by-3-inch loaf pan. Using wet hands, scoop out a 11⁄2 pound (cantaloupe-sized) hunk of dough. Keeping your hands wet (it’ll be sticky!), quickly shape it into a ball following the method in Step 5 of The Master Recipe (above).
6. Drop the loaf into the prepared pan. You’ll want enough dough to fill the pan slightly more than half-full.
7. Allow the dough to rest for 1 hour and 40 minutes. Flour the top of the loaf and slash, using the tip of a serrated bread knife.
8. 5 minutes before baking time, preheat the oven to 350 degrees, with an empty broiler tray on another shelf.
9. Place the loaf in the center of the oven. Pour 1 cup of hot water into the broiler tray and quickly close the door. Bake for 50 to 60 minutes, or until deeply browned and firm.
10. Allow to cool completely before slicing in order to cut reasonable sandwich slices.

Makes 3 1 1⁄2 pound loaves.