Wednesday, June 30, 2010

Wild Wendsday - Garlic and Chard Tart


I will be horribly sad when chard season disappears. I have grown quite fond of the beautiful curly leaves flanked by colorful stems of red and sunshine.

This is why my hand reaches out each time I am at the market and why my recent recipes have displayed it prominently.


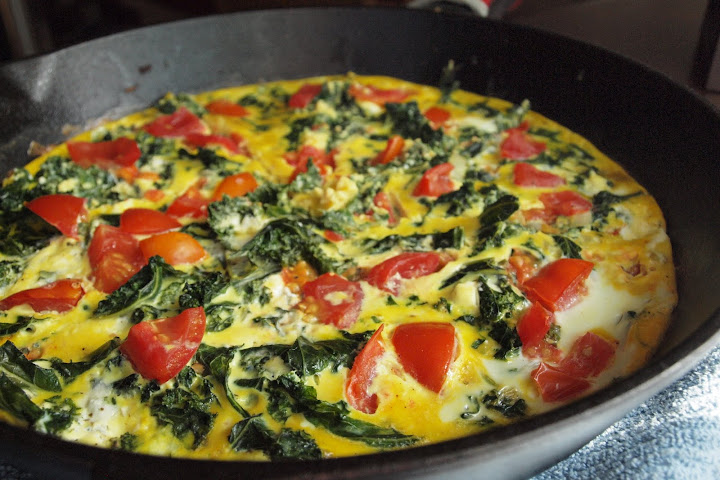
I was waffling between using my most recent haul in a tart or in a pizza.  So I decided to be democratic and compromise.  A tart crust with a pizza filling.  The result is a garlicky-bitter-greeny filling, suspended in a creamy bubble, topped by perfect white disks.  Taste perfection with eye-catching appeal.

If you don't believe me, just look at the pictures!


Garlic and Chard Tart

3/4  cup  all-purpose flour
3/4  cup  whole-wheat flour
1     tsp      salt
4     Tbs  cold unsalted butter, cut into chunks
1/4  cup  extra-virgin olive oil
1/4  cup plain yogurt

1/2  cup sun dried tomatoes
1/2  cup boiling water
6 large garlic cloves, minced
1 T olive oil
4 cups swiss or rainbow chard, stemmed and coarsely chopped
1/2 t salt
2 T dried basil
1 T dry sherry (optional)
1 lg ball fresh mozzarella, sliced into rounds (shredded mozzarella could be substituted)
1 egg
1/4 cup plain yogurt
1/4 c milk

Pour the boiling water over the tomatoes and set aside to soak.

Preheat oven to 350 degrees.

In a food processor, add flours and 1 t of salt - pulse to combine. Add butter, one piece at a time, pulsing once after each addition. Pour in oil and yogurt - pulse just until combined (it should be crumbly). Scoop the crumbles into a 9" tart pan lightly coated with nonstick spray - evenly press the dough over the bottom and up the sides to form a crust. Place into the oven and bake until the crust is just set, but has not taken on any color, about 15 minutes. Remove and place pan on a wire rack to cool

Drain the tomatoes and chop

Heat the oil in the skillet.  Add the garlic and saute until soft, about 2 minutes.   Add the chard and salt and cook until tender an additional 4 minutes.  Finish by adding the basil, sherry and tomatoes cooking an traditional 2-3 minutes.  Remove from the heat

In a small bowl whisk the egg then add the milk and yogurt.  Continue to whisk until combined.

Gently place the chard mixture in the tart crust and spread evenly.  Place the tart pan on a cookie sheet.    Pour the yogurt mixture evenly over the greens then top with the cheese and bake for 30 minutes.

And in case you were worried I had forgotten:

Reason #4 To Buy Local

Local food preserves genetic diversity. Local farms grow a huge number of varieties to provide a long growing season of crops with an army of eye-catching colors and the best flavor. Many of these varieties are passed down from generation to generation and continue to be grown because they taste good.

Monday, June 28, 2010

Outside the Lunch Box


top-chef-dc-episode-702.jpg
 photo from Bravo.com
Feed your child a lunch for $2.60.**

I agree it doesn't sound that tough.  After all, you are a frugal shopper, searching the sale fliers to find the cheapest prices.

Oh, and it needs to be healthy.  Fruits and vegetables and whole grains.  If you read this blog, chances are you don't use as many processed ingredients as the rest of the United States, so no problem.

Now. Do the same thing for 50 kids.  Make sure every taste bud will be pleased. (Oh, I didn't mention that before?)  Make sure they get a protein, a veggie, some whole grains and a fruit. And stay away from fillers like extra sugar and starch to "bulk it up".  Serve it to kids who might not be getting dinner that night, and maybe didn't have breakfast, so the nutrition really counts here. Now do it for a whole school, serving each set of 50 kids 30 minutes apart.

Now does it sound simple?  This is what school cafeterias do every day, and they do it with the subsidized money they receive from the free lunch program.  Did I mention that $2.60 does not all go toward ingredients. A decent percentage is taken out to help pay for the whole cafeteria experience. Like salaries for the cafeteria staff.

OK, now do it.


This was the challenge to the contestants of Bravo's Top Chef this past week in an episode entitled Outside the Lunch Box. The episode supported First Lady Michelle Obama's Let’s Move! campaign to fight childhood obesity and came complete with the White House Chef  Sam Kass as guest judge. Four teams of "cheftestants" were given $130 (a generous allowance) to feed 50 kids.  The food had to taste good to the kids, have vegetables and fruits, and not contain fillers. 

Now granted, then were under an extraordinary deadline, having a time limit for planning and shopping.  After all, it is a tv competition.  A few arguments and egos also came into play.  But unlike the cafeteria staff, these chefs have years of culinary school and creativity to work with. (Plus a desire to win the challenge).

So how did they do?  The winning team had an amazing lunch of Pork Carnita Tacos with homemade oat tortillas, Roasted Corn Salad and Black Beans with sweet potato "curls".  Also given high marks was another team's BBQ Chicken using apple cider as the sweeter and a dessert of Fruit Kebab with a whipped yogurt that faked out as whipped cream.

The losing team served celery with a peanut butter mousse as the only vegetable and the chef that was sent home made banana pudding using 2 lbs of sugar.  Among the other misfires was chicken braised in sherry and a side dish of white rice with a few flecks of vegetables. 

Why am I telling you all of this?  Because it was interesting to watch professional chefs leave the kitchen and touch the issue first hand.  It was wonderful to introduce them and the viewing public to the Let's Move! program, and it was fun to see the kids embrace two of the lunches even though they were devoid of greasy pizza and limp french fries.

And lastly, I hope it will encourage chefs to join the Chefs Move to Schools program.

My friends, it CAN be done!

** I found a variance of numbers for this, but $2.60 seemed to be the most consistent, and the one given on Top Chef

Saturday, June 26, 2010

Peach Ice Cream


Here is is folks.  The moment you all have been waiting for.  The treat that I look forward to all year, my most favorite-est of all (or until the next seasonal treat comes along) and it is....PEACH ICE CREAM!

Sorry,  Didn't meat to shout.  Hope your ears aren't ringing.  But if they are, it will be worth it after you try this recipe.  After you see how amazingly easy it is to make.  After you sink into the creamy custard surrounding the first ripe peach of the season.  And swoon.


Upon first taste, a sweetness envelopes the tip of your tongue.  As it moves back toward its ultimate demise, it brushes the back sides of the tongue, tingling with the tartness that makes a peach so tantalizing.

Let's just call this "Ode to Peach Ice Cream".

Peach Ice Cream (Cooking Light)

3  cups sliced peeled peaches (1 1/2 pounds)
1  cup  half-and-half
1/2  cup sugar
1/2  cup milk, whole
1 tsp vanilla extract

Place the peaches in a blender or food processor; process until finely chopped. Combine peaches and remaining ingredients in a large bowl. Pour peach mixture into the freezer can of an ice-cream freezer; freeze according to manufacturer's instructions. Spoon ice cream into a freezer-safe container; cover and freeze for 2 hours or until firm.

Friday, June 25, 2010

Spring Potato Salad with Crab and Green Beans


I found a half of a pound of crabmeat tucked away in the depths of the freezer!  How did THAT happen?  How did I forget the crabcakes I made resulting in the leftover succulent meat?


Well don't panic.  As soon as it was discovered, a meal was formed around it.  My original thought was a corn and crab salad - doesn't that just sound light and refreshing?  Alas, corn is not yet in season here, so I moved toward some beautiful little potatoes and a light summer dinner was born.


Folks, if you not a potato person never fear.  The remaining ingredients would make a beautiful pasta salad!  Not a green bean fan - that's ok.  You have my permission to use asparagus.  Or peas.  And use shrimp.  Or beans.  Or leave the protein out altogether and it becomes a lovely side dish.

This salad made an amazing dinner with a crisp white wine and cubed fresh pineapple.  I highly recommend it!

As a side note, today is my one year blog-a-versary.  Oh how far I've come since then!

Spring Potato Salad with Crab and Green Beans (Adapted from Cooking Light) 

1 pound fingerling potatoes
1/2 pound green beans, steamed and chilled

A handful of ripe cherry tomatoes, cut into fourths
1/2 teaspoon salt
1/4 cup light mayonnaise

1/4 cup yogurt
1/8-1/4 cup white vinegar (depending on how thin you like the sauce)
1/4 cup finely chopped chive

2  tablespoons capers, drained
2 teaspoons sugar
1 pound lump crabmeat, shell pieces removed, cooked and chilled

Place potatoes in a medium saucepan; cover with water. Bring to a boil. Reduce heat; simmer 10 minutes or until tender. Drain. Chill. Cut potatoes into 1 inch chunks

Cut the green beans into 1 inch slices.  Toss with potatoes, tomatoes and crab.

Combine salt and next 6 ingredients (through sugar) in a small bowl, stirring well with a whisk.  Slowly add to potato mixture, mixing as you go.  Stop when you have enough dressing on the salad.

Wednesday, June 23, 2010

Wild Wednesday - Roast Inc


Ahhhh.  The beauty of morning coffee.  Open the bag - you see beans and think "Mmmmm, coffee beans".  Then you take a whiff.  You do it again just to make sure.  No, you were right.  The fragrance is intoxicating.  Rich.  Bold.  A hint of sweet.  Just enough bitter mixed in. 

The beans are ground while the water gently bubbles to its peak.  Together they dance into the waiting press.  Then it begins.  The time.  Has 4 minutes ever ticked by so slowly?


As the brewing process reaches crescendo the scent rises in the air.  It is familiar and comforting.  Ahhhhh.  Coffee.  Smooth and pleasant.  Rich and full without being burnt or bitter. 

Pretty darn near perfection.

With this amount of passion I must be speaking of a large, well known company!  SURPRISE!  This love goes out to Roast, inc .


I first discovered Brad and Lesa Wood and their beans at the East Nashville Farmers Market, where you can find them every Wednesday.  However my first taste experience was after having the beans delivered to my door.  Yes folks, they deliver! 


And their coffee!  It is all single origin.  Brad and Lesa spend time learning about the beans and the growers before purchasing.  Ask before you buy as they love to share their knowledge with their customers.

Being me, I love the fact that they are believers in slow food and that a minimum of 25% of their profits go back to the country of origin to support charitable causes.  

Soon you will be able to visit with Brad and Lesa away from the markets.  In mid July they will open their roastery and coffee house to the public.  Stop in!  Enjoy coffee by the cup brewed by French Press, Pour Over, Siphon Brewer or Chemex methods.  Sweet, thick espresso will also be available to those needing their fix.

 
While you are there, take the opportunity to roast and learn cupping from them and, of course, purchase fresh beans.  What an exciting opportunity to learn why you experience joy in your morning cup!

If you are in the Nashville area, or will be visiting, I can personally recommend stopping by to see Brad or Lesa.  From one coffee snob to another!

Roast, inc
4825 Trousdale Drive Ste 211
Nashville TN
http://www.roastinc.com/RoastInc/Welcome.html

And while we are on the subject of local foods, here is #3 in Top 10 Reasons to Buy Local

Local food is GMO-free. Although biotechnology companies have been trying to commercialize genetically modified fruits and vegetables, they are currently licensing them only to large factory-style farms. Local farmers don’t have access to genetically modified seed and most of them wouldn’t use it even if they could. A June 2001 survey by ABC News showed that 93% of Americans want labels on genetically modified food – mostly so they can avoid it.

Tuesday, June 22, 2010

Lemon-Spinach Potato Salad


Have a hankering for potato salad?  Are you looking for something different from grandmas mayo-mustard-pickle dressing?

Look no further than this recipe!

Ok - it's confession time.  I LOVE grandmas potato salad.  And I'm telling you with a straight face that my grandma's was the best!  I look forward to spring every year when I can make it for the first time! 

But there are times when an evening calls for something with a bit more class.


Is it a cook out?  Is it a dinner party?  Let's make it both by serving a potato salad with just a touch of sophistication.  I don't mind telling you, I was torn.  I was nervous.  I mean, serving a potato salad that more resembles something a rabbit might eat??!

It was a hit.  My guests liked it.  I liked it.  Bo liked it (but he's pretty easy to please).  Stone ground mustard and sherry vinegar must have been friends in another life because boy do they rock together!  Tang and bite mellowed by a fruity olive oil make this dressing light on the tongue, a perfect compliment to potatoes fresh from the farm.

The original calls for arugula.  The ONLY reason mine features spinach is that arugula was absent from the market.  If you can find it, I beg of you to use it.  If not, fresh spinach will do in a pinch.


Lemon-Spinach Potato Salad (Adapted from Cooking Light) 

2 pounds Yukon gold potatoes, cut into fourths.
7 teaspoons extra-virgin olive oil, divided
1/2 cup finely chopped shallots (about 3 small)
1 1/2 tablespoons sherry vinegar
2 teaspoons stone-ground mustard
1 teaspoon grated lemon rind
1 teaspoon fresh lemon juice
1/2 teaspoon salt
1/4 teaspoon freshly ground black pepper
2 1/2 cups loosely packed spinach.

Place potato pieces in a medium saucepan; cover with cold water to 2 inches above potatoes. Bring to a boil over medium-high heat. Reduce heat to medium, and gently simmer 10 minutes or until potatoes are tender. Drain potatoes and when cooled a bit, cut them into 1-inch cubes.

Heat a small skillet over medium-high heat. Add 1 teaspoon oil to pan; swirl to coat. Add shallots to pan; sauté 3 minutes or until lightly browned, stirring occasionally. Remove from heat. Combine shallots, vinegar, mustard, lemon rind, lemon juice, salt, and black pepper in a small bowl, stirring well with a whisk. Gradually add remaining 2 tablespoons oil, stirring constantly with a whisk until combined. Drizzle dressing over potatoes; toss gently to coat. Cool completely.


NOTE - if you are like me you will not want to use all the dressing, so start adding with a light hand!

Add spinach to potato mixture just before serving and toss gently. 

Monday, June 21, 2010

Dark Chocolate Sorbet

O.M.G.

I'm really not sure how to begin.  I'm at a loss.  Finding the words to properly describe this frozen treat may be an impossibility.

Let's see:  Rich.  Creamy.  Pudding-esque...and all in a sorbet.

Yes my friends, this is a sorbet.  Dark and chocolaty, smooth and creamy, and lower calorie!


I truly believe the key to doing this well is to use very dark chocolate, and to use very good quality chocolate.  I used Ghirladelhi 60% dark caoco chips

I wouldn't go any lighter than this and I don't think I would use a lesser brand.  If you do, you might lose some of the unique fugdy flavor. 
  
Creamy Dark Chocolate Sorbet (From Baking From My Home to Yours)

1      cup         milk
1      cup         water
3/4  cup          sugar
8     oz            bittersweet chocolate, coarsely chopped

Stir all ingredients together in a heavy-bottomed saucepan. Put over medium heat and bring to a boil, stirring frequently. Lower the temperature and boil 5 minutes, stirring occasionally and watching closely - as the potential for boil-overs is high.

Pour mixture into a heatproof bowl and refrigerate until chilled.

Add mixture to your ice cream maker and churn according to maker's directions.

Pack sorbet into a container and freeze at least 2 hours, until firm enough to scoop.

Sunday, June 20, 2010

A Summer Staple - The BLT


There is something poetic about the BLT, don't you think?  Something that speaks of summer.  That twists your mind back to the past.  Lemonade on Grandma's porch.  Homemade ice cream on Sunday.

Something simple yet beautiful.

I can't believe how many years I have abstained from this treat.  It wasn't on purpose, I just think I forgot.  

I'm not sure a recipe is needed here - after all it's a bacon, lettuce and tomato sandwich.  The thought process is minimal. 


I just wanted to remind you of Grandma's porch.


Friday, June 18, 2010

Linguine with Grilled Salmon


Attempt # 10,000 to fall in love with salmon. I'm really not a glutton for punishment.  I know I don't need to love everying in nature, or even everyting I eat.  But salmon is sooooo good for you, and I have a husband who loves it.

So onward I trudge.

One surefire way for me to eat it at least somewhat happily is to hide is amongst other flavors I desire.  Like pasta.  And creamy sauces.

So I made some changes in construction to a recipe that looked promising and came up with this, Linguine with Grilled Salmon.  If possible, have a friend or loved one help you with the last minute details as suddenly its time for everything to happen all at once and you only have two hands.  At least I do.


SO while I slaved over a hot stove boiling the pasta and simmering the sauce, Bo stood over The Egg  grilling salmon to perfection.  A perfectly orchestrated ending brought the salmon in to be sliced as the pasta was being tossed with the sauce.

Flavors melded together beautifully - I do think for all it's health benefits, salmon secretly loves a great cream sauce!  And be careful who you serve it to.  You might discover your two-year old niece loves salmon!

Linguine with Grilled Salmon (Adapted from Cooking Light)

8 ounces uncooked linguine
2 tablespoons butter
1/2 cup finely chopped onion
3 garlic cloves, minced
2 plum tomatoes, chopped
1/2 teaspoon ground red pepper
1/8 teaspoon salt
1/2 cup half-and-half
1/3 cup chopped fresh flat-leaf parsley
1 lb salmon

Cook pasta according to package directions, omitting salt and fat. Drain. Place pasta in a large bowl; keep warm.

Melt butter in a large skillet over medium-high heat. Add onion; sauté 3 minutes, stirring occasionally. Add garlic and tomatoes; sauté 2 minutes, stirring constantly. Stir in half-and-half and simmer for 2 minutes. Gently toss with the warm pasta and continue to keep warm.

Sprinkle the salt and pepper over the salmon.  Prepare a medium grill, or indoor grill pan, and cook the salmon until firm to the touch, 5-8 minutes (this time will depend on how thick your salmon is.)  Slice and place over pasta.  Sprinkle with parley

Thursday, June 17, 2010

Wild Wednesday - Lemon Scented Blueberry Pancakes


 The beauty of lemon and blueberry together makes me wonder why some savvy scientist hasnt found a way to cross polinate these two plants into one super-amazing fruit!  I guess in the meantime I will just have to settle for mixing them myself

With blueberry season in full swing it is easy to pick some up at the Market and today at the East Nashville Farmers Market was no exception!  Farm to Fork had a great recipe for the pancakes so I decided to make them to treat myself since Bo would be gone.

Please excuse the crazy shapes - I am too much of a free spirit to even try to make round pancakes.  I can assure you however that the flavor is outstanding.  I did make one change to the recipe - after all I AM me - and used half wheat flour.  Otherwise they mixed as-is.

Tender and chewy, plump warm blueberries, and a hint of lemon that hits the back of your tongue.  I must confess, I didnt even use syrup on this incarnation choosing instead to eat them as a quick-bread side dish.

The syrup breath comes tomorrow!

And now, the moment you have been waiting for (since I forgot last week)
 
Top Ten Reasons to Buy Local.

#2
Local produce is better for you. Studies showed that fresh produce loses nutrients quickly. Locally grown food, purchased soon after harvest, retains its nutrients.


 Emeril's Lemon Scented Blueberry Pancakes (Adapted from Farm to Fork)

 
1 cup fresh blueberries, picked over for stems
1/2 cup all-purpose flour
1/2 cup wheat flour
1 tablespoon corn flour or finely ground cornmeal
2 tablespoons sugar
3/4 teaspoon baking powder
1/2 teaspoon salt
1/4 teaspoon baking soda
3/4 cup buttermilk
6 tablespoons whole milk
4 tablespoons (1/2 stick) unsalted butter, melted, plus more
butter for cooking and serving
1 egg, lightly whisked
1/2 teaspoon finely grated lemon zest
1/2 teaspoon vanilla extract
Maple syrup, for serving

Combine the blueberries and 2 teaspoons of the flour in a small  bowl, and toss to coat well. Set aside.

Place the remaining flour and the corn flour, sugar, baking powder, salt, and baking soda in a medium mixing bowl, and whisk to combine.

Combine the buttermilk and milk in a separate mixing bowl. In a small bowl, whisk the melted butter and egg until well combined; then stir the egg mixture into the buttermilk mixture. Add the lemon zest and vanilla, and stir well. Add the wet ingredients to the dry ingredients, and stir until just combined; do not overmix. Gently fold the blueberries into the batter, and set it aside to rest while the skillet is heating.

Place a nonstick skillet over medium heat. When a drop of water  dances across the surface, it is ready. Add a small pat of butter  to the skillet, and then add about 1/3 cup batter for each  pancake, fitting in as many as you can while leaving enough room  to turn the pancakes. Cook until they are bubbly around the edges
and the top surface is beginning to look slightly dry, 2 to 3 minutes.

Turn them over and continue to cook until the pancakes are golden on the bottom and just cooked through, 1 to 2 minutes. Place on a warm plate and cover lightly with aluminum foil while you cook the remaining pancakes.

Wednesday, June 16, 2010

Slow Food Movement


Have you heard of the Slow Food Movement?  If not, it is time you were introduced.

Slow Food is a worldwide movement founded in 1989 to "counteract ... the disappearance of local food traditions and people’s dwindling interest in the food they eat..."  


And from Slow Food USA"We reconnect Americans with the people, traditions, plants, animals, fertile soils and waters that produce our food."


I try very hard to "be slow".  Almost everything I make is from scratch, using minimally processed ingredients, grown or produced as close to my home as possibly. I have a passion for good, clean, fresh food.

But I do understand that not everyone has been introduced to this way of eating. 

Slow Food is working very hard to reach those who have no connection to where their food is grown.  Those who think their nourishment comes from boxes and bags.  Who don't know the beauty of a meal served with conversation instead of television pixels. 


For several years I taught school in inner-city Houston.  I watched everyday as my students ate cafeteria food that was originally canned, frozen or boxed.  I watched as mushy vegetables were pushed aside for the other veggie choice, french fries. (not sure I blame them after trying the highly salty, canned, overcooked vegetable).  I watched as "fruit drink" was the liquid of choice over milk.  I saw fresh fruit never being touched.

But then problem doesnt just lie in the cafeteria.

I would beg parents to send their children to school with breakfast in their stomachs.  Several times a week the 10 am headache would appear on a student, only to disappear after lunch.  I would encourage a healthy afternoon snack of fruit or cheese to be sent, only to hear the rustle of a bag (or several bags) of chips or cookies being opened.

Why this lengthy diatribe?  Because I want you to know that Slow Food USA is working hard to educate children and their families about fresh foods and to legislate change on cafeteria lunches.

Slow Food in Schools and Time for Lunch  are two programs set up to educate children to develop a healthy relationship with food.  The thought is this:  If children see where their food comes from; if they are able to have a 'hands on' experience in growing that food; if they learn the importance of sharing food with family and friends, a new generation of healthy eaters will be born. 


Understand this:  No one is completely to blame.  Many schools don't have the money they need to purchase healthier food.  In many urban neighborhoods in the US, access to nourishing  fresh fruits and vegetables is only a dream.  And if these foods are available, the cost can be higher than eating at McDonalds, which is not helpful to poverty stricken families. 

We need to start somewhere, and the Slow Food organization is a great way to get involved.

With chapters all over the US, if you are interested in learning more about the  Slow Food movement in your area, click this link.  Please take a look, as the school program is only one of the many that exist.  It just happens to be an interest of mine.

And thank you for listening!

Tuesday, June 15, 2010

Garlic, Feta and Walnut Dip

I am always on the hunt for new and exciting appetizers to serve when I have company.  I have certain criteria:  It must match the theme of the meal, it must be simple, and it (usually) must be something I haven't made (for that group).

I am having a Mediterranean obsession at the moment.  I had part of a container of ricotta left from this recipe, and one of the party guests was a repeat, so the recipe could not be.

Enter Garlic, Feta and Walnut Dip.  I must confess, my version is a pale replication of the original, but it doesnt bother me if it doesnt bother you!

Having a strong bite from many strong ingredients, I worried it may be too much for the three children in attendance, but no worries.  These children are fed "real" foods at their house so dont have the "chicken tender" buds that many have - and they enjoyed it!

So did the adults!

So grab some crackers or toast some crusty bread and invite the neighbors for some fun!

Garlic, Feta and Walnut Dip (Adapted from Rachel Ray)

4 cloves garlic
1/2 cup walnut halves, toasted
1 cup ricotta cheese
1 cup feta cheese, crumbled
1/4 cup milk, plus more for desired consistency
1 teaspoon dried oregano
1/4 cup flat-leaf parsley, a handful of leaves
Freshly ground black pepper
1/2 teaspoon crushed red pepper flakes
Olive Oil for drizzling

    Combine walnuts, feta, ricotta, milk, oregano, parsley, black pepper, red pepper and garlic cloves in food processor and pulse until spread is smooth. Scrape spread into serving dish with spatula. Add more milk for desired consistency.  Drizzle dip with extra-virgin olive oil and serve.

    Sunday, June 13, 2010

    Spinach Sauteed with Garlic, Dates and Honey


    It happened much sooner than I thought it would.  A new cookbook.  And it happened quite by accident.  I just stumbled across it.  And by a chef I have not had interest in before.


    But when I find out he uses mostly local foods in his restaurants, and that he wrote a cookbook geared toward those foods, I had to take a second look.  I sat down in Borders to browse the contents.  Once I saw the recipe posted below, I knew it was fated that I leave with this book.

    Expect to see more!

    Now for the spinach.  Fresh from the market sauteed with olive oil and garlic, dates and white wine, it was a bitter, sweet taste sensation destined to cross our table again!

    Spinach Sauteed with Garlic, Figs and Honey (Adapted from Farm to Fork)

    2 T olive oil
    2 T thinly sliced garlic
    1/4 cup sliced dried dates
    1/4 cup dry white wine
    1 lb baby spinach, rinsed and spun dry
    1/2 t salt
    1/4 t black pepper
    2 t honey

    Place a medium skillet over medium-high heat.  Heat the oil then add the garlic and cook until lightly toasted, about 30 seconds.  Add the dates and wine and cook until the wine is nearly reduced, 1-2 minutes.  Add the spinach and cook until wilted, about 2 minutes.

    Season with salt and pepper and drizzle with honey just before serving.

    Saturday, June 12, 2010

    Oregano Grilled Calamari and Shrimp

    Seafood.  'Nuff said. 

    To be honest, if you buy good, fresh seafood (or flash frozen if landlocked as I am), it doesn't need much in the way of adornment.  That is why this recipe appealed to me.  Olive oil, lemon, herbs, salt and pepper - and a hot grill.

    Eat it outdoors.  Sip a dry white wine.  Listen to some music.

    And simply eat some seafood. 

    Oregano Grilled Calamari and Shrimp (Adapted from Food Network)

    1 pound calamari tubes
    1 pound large shrimp
    2 tablespoons lemon zest (2 lemons)
    1 lemon, juiced, plus more for serving
    1 clove minced garlic
    6 tablespoons extra-virgin olive oil
    1 teaspoon dried oregano
    2 teaspoons salt
    1 teaspoon pepper
      Shell the shrimp and slit the calamari tubes up 1 side and lightly score 1 side. Place the tubes in a bowl and add the lemon zest, lemon juice, garlic, olive oil, oregano, salt and pepper and toss to combine. Refrigerate for 30 minutes.

      Preheat the grill to medium.

      Remove the calamari and shrimp from the refrigerator and place on the grill  for 2-4 minutes per side, or until the calamari edges begin to crisp and the shrimp turns pink.  Toss with additional lemon juice.

      Friday, June 11, 2010

      Crostini with Chive-Scented Ricotta


      Another winner from Local Flavors by Deborah Madison! It never ceases to amaze me when a few simple ingredients can work in harmony to dance on your tongue.

      And easy! An amazing appetizer, elegant on the plate, crunchy in the mouth, shouts of pleasure floating in the night sky....


      Ok - maybe a bit over the top, but it really tastes good! Use some imagination for versatility. Use as a dip and serve with celery. Basil would be a tasty substitute for the chives. For a Latin kick, chop chipotle peppers into the mix. What a pretty color that would make too.


      With your creativity, they sky's the limit!

      Crostini with Chive-Scented Ricotta (Adapted from Deborah Madison)

      2 cup fresh cow of sheep's milk ricotta
      2 T olive oil (I used much less - more like 1 T)
      sea salt and fresh pepper (the amount of salt you need will depend on how salty your cheese is. Start conservatively then taste and adjust)
      1/4 cup finely snipped chives
      20 slices baguette, ciabatta or nutty, dense whole grain bread

      Mix the ricotta, oil, salt and pepper and chives together. Toast the bread in a 400 oven for 5-8 minutes. Spread the ricotta on top and enjoy!

      Thursday, June 10, 2010

      Wild Wednesday- Kale Frittata


      Kale has been given a bad rap for being a tough, bitter green. And let's face it; if you haven't had it cooked correctly, it IS tough and bitter!

      I have to admit, I haven't been a convert for very long. In fact it was just recently, in the most magical place on earth (no, not Disney), that I ventured a try.

      The magical place you ask? Asheville NC. Everything tastes great in Asheville, so why not try kale there? I immediately came home and made it as a side dish. Another yum!

      So when it was prominently displayed at the market this week, a frittata immediately jumped in my mind as an easy and light meal.

      Don't know what it is, but there is something about bitter greens, pungent garlic and creamy eggs that screams "comfort meal" - you know, the term usually reserved for carby potatoes or pastas.

      See you can have your comfort and protein too!


      Kale Frittata

      One pound kale, stems and ribs removed
      3 cloves garlic, diced
      2 tablespoons olive oil
      8 eggs, beaten
      1/2 cup milk
      1/2 cup creamy goat cheese (lets face it, you can use any cheese you wish!)
      1/3 cup diced tomatoes
      1/2 teaspoon ground nutmeg
      salt and pepper to taste

      If you're using green kale boil it in a pot of salty water for five minutes to tenderize it.

      Preheat the oven to 425 F.

      In a large regular non-nonstick skillet, heat the oil, and garlic together over medium heat until the garlic is lightly toasted 1-2 minutes.

      Add the drained kale and sautee until tender. Add in the nutmeg and salt and pepper to taste.
      Mix the milk and cheese into the eggs then pour over the kale. Sprinkle the eggs on top. Use a spatula to make sure the eggs surround the greens.

      Cook over medium heat for five minutes until the eggs start to set. Remove from burner, and place skillet in oven. Bake in oven until the eggs are completely set and the top is lightly brown - 5-10 minutes.

      Wednesday, June 9, 2010

      Feta Slaw

      If you read this blog regularly at all, you know I love slaw - unique slaws, that is. I'm always on the look-out for a new recipe that blends flavors that are new and exciting.

      For a couple of years now, I have been eating the slaw at Zoe's and dreaming of replicating the taste!

      I think I got it! A mixture of white vinegar and olive oil with a touch of sugar make the dressing sharp with undertones of sweet. Then the addition of green onions and feta send it straight to food nirvana.

      Simplicity at its best!

      Serve it alongside anything, or as Zoe's does, on a turkey sandwich with spicy mustard and swiss. It is a "Gruben" you will never forget!

      Feta Slaw

      1 head of green cabbage (or two packages (8 oz) of slaw)
      5 green onions, chopped
      1/2 cup extra virgin olive oil
      1/4 cup distilled white vinegar
      1/4 cup water
      2 large cloves garlic, minced
      pinch sugar
      1 1/2 teaspoons salt
      2 teaspoons freshly ground black pepper
      8 ounces feta cheese, crumbled

      Shred cabbage and toss with the chopped green onions and feta in a large bowl; set aside.

      In a separate bowl, slowly whisk oil into vinegar. Add water, garlic, sugar, salt, pepper and whisk until well-blended. Slowly add the dressing to the slaw, stirring and tasting as you go. NOTE: I never use all of the dressing as I like my slaw a bit on the drier side.

      Cover, and refrigerate 15 minutes or longer to allow flavors to develop. Serve chilled.

      Monday, June 7, 2010

      Basil Pork Chops and Grilled Corn with Sun-dried Tomato and Basil Spread


      I'm not sure why but each year when Spring arrives, I turn inward to a culinary creativity that I don't have in the heat of summer or the extreme cold of winter.

      Cookbooks disappear into the background a bit while I am inspired by the colors and textures I see at the market.

      Yellows, greens, reds - and if you stop long enough to inhale the aromas, you will be transported to the farm where everything was freshly picked and delivered immediately to your plate.

      Im trying, in a poetic way, to let you know that again there is no specific recipe attached here.

      Just inspiration.

      Picture it. Juicy pork chop grilled to juicy perfection with a hint of basil in each bite. Sweet corn, smoky from the grill, served with an Italian-inspired spread.


      Below I will describe the process I used to make this dinner. I am sure you will find it easy and hope it will find its way to your plate!


      Basil Pork Chops and Grilled Corn with Sun-dried Tomato and Basil Spread

      1 bone-in pork chop
      3-4 fresh basil leaves
      olive oil (it is ok to use the lower quality stuff here)
      salt and pepper
      2 ears sweet corn
      2 T prepared mayonnaise, sour cream or plain yogurt
      1-2 sun-dried tomatoes, rinsed
      2 fresh basil leaves

      Prepared the grill to medium.

      C the corn, rub with oil (if desired) and sprinkle with salt and pepper. Place on the grill next to the pork. Turn every 5-8 minutes as each sides becomes brown and caramelized. This whole process will take 20-30 minutes.

      In the meantime, rub the basil leaves between your fingers slightly to "bruise" them. Rub both sides of the pork with the basil, then discard. Brush oil, salt and pepper on both sides. Place pork on the grill (I recommend using a thermometer to achieve the desired temperature - we like 155). Grill on medium next to the corn, turning half way through. Remove and let sit for 5-10 minutes, covered.

      Chop the sun-dried tomatoes and basil. Mix with the mayonnaise, yogurt or sour cream, adjusting the amount to make it creamy. Add salt and pepper to taste.

      Serve the spread next to the corn instead of butter. You will LOVE the difference!