Saturday, February 27, 2010

Passion for cuisine


I know it is obvious to anyone who reads this blog regularly that I love all flavors Mexican. Rick Bayless and Bobby Flay are frequent guests in my kitchen and between the two of them they represent 7 cookbooks on my shelf. Living for several years in Houston, eating authentic Mexican food and learning the components that are put together to make the food sealed this passion. I will always love to cook and eat Mexican food.

Recently, however, I have been leaning away slightly, wanting to expand what I am comfortable with, to learn about the food of related cultures. It has been an interesting journey of research (I LOVE research!) and kitchen experiment, leading me toward other Latin countries, and even further into the Caribbean. It has been fascinating to discover how intertwined this food is. To see the Spanish influence on native Mexican cooking, learning how attached Cuban cuisine is to that of the Caribbean Islands, and how it points back to African influences has been utterly fascinating.

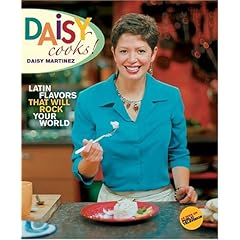
So far in doing this I have only purchased one new cookbook! Daisy Martinez is Puerto Rican and her cookbook Daisy Cooks touches enough of the Latin countries that I havent needed a different book for each one. She has recipes for Cuban, Spanish, Puerto Rican and Peruvan foods to name a few. The best part is she has a new book coming out Tuesday and I plan to own a copy!

It is has been nice to re-discover two other cookbooks that I already owned but hadn't utilized to their full potential. Fiesta on the Grill provides what the name promises - food for a party, whether it be for two or twenty. What the name doesn't tell you is that party definitely spins Latin!

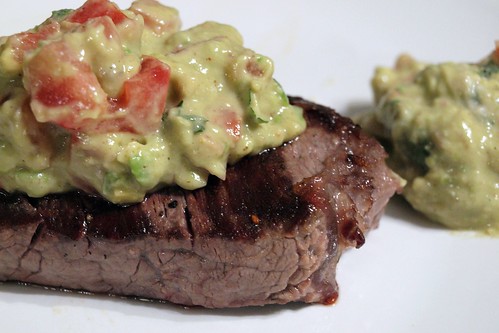
The other book in my current repertoire is Douglas Rodriguez's Latin Flavors on the Grill. As with the previously mentioned book, I have had to adapt for winter cooking, but this hasnt hurt the food one bit! Bold flavors attach themselves to both main and side dishes making everything we have tried so far pure pleasure. I look forward to spring weather to really dig into this book.

The Caribbean Islands will round out my new season of exploration. Although a slight mention is made of these foods in the before mentioned books, a separate book will be required to really make sure we are doing it right. A new cookbook! Makes me smile! I havent found the one I am willing to spend money on as of yet so if anyone has a recommendation, let me know!


Thursday, February 25, 2010

Ready to be pickled!


Ready to be pickled!, originally uploaded by Kim De.

Isn't this a pretty sight? Zesty jalapenos, crunchy carrots and fragrant garlic waiting for their fate to be sealed.

Ever since I left Houston, I have been trying to replicate the tasty pickled jalapenos, carrots and onions on the salsa bar at my favorite restaurant, Taco Milagro. *Sigh* I don't miss much about Houston, but the food I ate while there was top notch!

And while tasty, store bought pickled jalapenos just aren't the same.

So onward I push to replicate the flavor and texture. Some extensive internet research led me to Grady Spears, a cookbook author and restaurant owner in West Texas.

I was excited. As I made the pickling liquid I dreamed of the first fresh bite. Spicy and briny but with a definite crunch. As my nasal passages swam in the scent of vinegar, I dreamed of always having this "delicacy" in the house, of giving them as gifts, of being the toast of Nashville TN (well not the last one - it is harder to find "spice heads" here)

The veggies swam in their brine. They were poured into their new homes - the trusty Ball Jar (a story on that in a moment) and put in the fridge to "chill". Dinnertime came around and the jars were pulled out. The onions were great! Maybe needed a bit more sugar for balance, but good all the same. However I was (again) disappointed in my jalapeno attempt. They lost their heat. I'm not sure where it went, but it didn't stay where it belonged!

Back to the research!

A note on Ball Jars - The Ball brothers moved their glass company to my hometown of Muncie Indiana in the late 1800's where it remained until 1998. I was born in Ball Hospital. I graduated from Ball State University...you get the picture ;)


Grady Spears' Jose's Jalapenos

30 jalapeno peppers (about 3/4 pound)
25 cloves garlic
2 carrots (about 1/3 pound), peeled and cut on the diagonal
1 red onion, peeled and cut into wedges

*** I did the onions separately, using 6 onions and the same mixture***
3 cups cider vinegar
2 cups pineapple juice
2 tablespoons whole peppercorns
2 teaspoons dried oregano leaves
3 sprigs thyme
2 bay leaves
1 teaspoon kosher salt

Place the jalapenos, garlic, carrots, and onion in a large bowl. Pour the vinegar and pineapple juice into a saucepan and add the peppercorns, oregano, thyme, bay leaves, and salt. Heat the mixture to boiling.

Pour the hot liquid over the jalapenos, stir to combine the ingredients, and place a plate or the pan itself on top of the peppers to keep them submerged in the hot liquid.

Let cool to room temperature. Transfer the minute to a 2-quart with a lid. Set aside in the refrigerator for 24 hours before serving.

Wednesday, February 24, 2010

Grilled Filet with Venezuelan Guasca Sauce


argentinean guasca sauce, originally uploaded by Kim De.

I want to start this post with a hearty thank you to Dona Masita. She has honored me with the Beautiful Blogger Award. She and I share a love of cooking, and the motivation of cooking for love. It is nice to be recognized by fellow bloggers! I will have the pleasure of passing this award along to others in the future.
I don't want to leave this blog without a recipe, though! Pulling out my Latin Flavors on the Grill book, this steak recipe caught my eye. We eat steak once every 1-2 months and although Bo is completely content to eat it seared with simple salt and pepper, I am never fulfilled by this offering. The title states that porterhouse is to be used, but filet is the cut we keep in the freezer and I didn't think it would ruin the dish.

I was right!

The steak was seared simply, with salt and pepper, just as Bo likes it. However the highlight is the guasca sauce. Creamy from the avocado, tangy from the vinegar and a hint of heat from the serranos, it was just the thing to liven up our steak! I also think it would work on pork or chicken, or just make a good dip for some thick tortilla chips!

Grilled Filet with Venezuelan Guasca Sauce (Adapted from Douglas Rodriguez)

Sauce
1 red onion
5 cloves garlic
2 serrano chiles, chopped
4 ripe Hass avocados, peeled and pitted
1/2 cup apple cider vinegar
1 cup pure olive oil
1 T mustard powder
1 T brown mustard
3 T chopped cilantro
1 T prepared horseradish
2 cups peeled and seeded ripe plum tomatoes
Salt

3 (2-lb) steaks, any cut
salt and pepper

To make the sauce, combine the onion, garlic and chile in a mortar and mash into a paste with the pestle. In a blender, combine the avocados, vinegar, oil and mustards and puree. Add the garlic mixture and puree until smooth.

Preheat the oven to 450. Season the steaks with salt and pepper. Sear them in a hot skillet on the first side. Turn them over and place in skillet in the oven for 2-5 minutes.

Transfer to a serving dish and spread the sauce over.

Tuesday, February 23, 2010

Why I Cook


Bo Dec 2009, originally uploaded by Kim De.

This complex question has been posed to food bloggers by Michael Ruhlman. Since I learned of it, I have been mulling my answer, wanting to dig deeper. My standard answer is "to show my love", but since I have had a fascination/love affair with cooking since I was very young, the answer has to go deeper.

I loved cooking when I was small. When my mom would let me go into the kitchen and "cook" cheerios, water, flour and gum. (My first invented recipe). I enjoyed it when I competed for 6 years in 4-H competitions, learning the correct way to make cookies, all the way up to yeast rolls.
Cooking started to be connected to my emotions when I wanted to make "romantic" dinners for my high school boyfriend. I would peruse my mom's cookbooks for "fancy" foods, serving them in our family room on a tablecloth covered card table. And we would wear dress clothes. We were soooo grown up!

As I got older, moved away from the Midwest and began to discover a world of unexplored food, cooking became a way for me to try new cuisines. As I would be exposed to something new, I wanted to learn how to make it. I wanted to learn its historical origins. I wanted to learn the components that meld together to make it a true dish.And, when exploring the depths of my soul, I have discovered I have control issues. When I cook, I plan the menu and make the ultimate decision which flavors hit our mouths. I think I like this!

Also I find cooking:

Fun
Relaxing
A good creative outlet

Plus,

I have met some of my best friends through the love of cooking. Some of them I have never seen in person, yet we share a bond across state and country borders.

And the picture you see at the top? He has re-fueled my passion for all things food. His enthusiasm for whatever I make provides a "fun" in meal-planning and prep that I had lost for a few years.

So down to the basics?

I cook to show my love.

Sunday, February 21, 2010

Gazpacho


gazpacho, originally uploaded by Kim De.

Have you ever tried gazpacho? It is a chilled tomato based soup with Spanish roots. If done correctly, it is amazing, refreshing and healthy. If done incorrectly....well like anything you wont want to keep putting it in your mouth.

I was spoiled a few years ago when I spent some time in Florida with a friend. We had a gazpacho that tasted of fresh vegetables, fruity olive oil, and I swear you could taste the sun.

Well maybe that part was because we were in Florida.

The recipes I had been trying call for tomato or V-8 juice. That is the problem. Neither taste like the sun! Once I moved away from those recipes, finding this one was a snap!

This was our Valentine's meal starter and the fabulous start to our tapas night. Fresh, fruity and a touch of heat, we may have transported to Florida (or better yet, Spain!)

This was good! I am in the market for more. If you have an authentic recipe from sunny Spain, I'd love to see it!


Spanish Gazpacho (Chef4all.com)

2 lb ripe field grown tomatoes
2 cloves garlic
2 shallots, chopped
1 tsp chopped cilantro
2 limes, juiced
2 Tbs EV olive oil
1 medium cucumber, peeled and seeded
1 green pepper, chopped
1 red bell pepper
1 Tbs red wine vinegar
1/2 tsp chilli flakes
2 tsp Worcestershire sauce
1 cup ice water
salt and pepper to taste.

Core the tomatoes and dip them in boiling water for 1 minute to blanch them, then transfer them in iced water, so the skin can be removed easily. Dice the tomatoes and put them in a food processor.

Set aside 1/3 of the peppers and cucumber. Add the remaining ingredients and blend until smooth. Chop the peppers and cucumber and stir them in the soup. Serve the Gazpacho soup with fresh garlic-herb croutons on top.

Friday, February 19, 2010

Haitian Coleslaw


haitian slaw, originally uploaded by Kim De.

I LOVE COLESLAW!!

Its a strange thing for me to say. I hated it as a kid. Ya know the kind. Limp cabbage. A few tiny carrots. Soupy sauce. Served at every carry-in (at least in the Midwest!).

Oh, and not to get too off subject, but I need to discuss the term "carry-in". That is what we called a pot-luck. Bo thinks it is weird. Anyone else heard that term?

Back to my new love of cabbage. Once I learned to make coleslaw with fresh cabbage (not from a bag) and to become picky about the flavors involved-and-amount of the sauce used, I found its brilliance. Find the right one, make a few adjustments, and it can go with any main dish!

I am now having fun trying out new recipes. Loads of research goes into finding slaw recipes that match the theme of the evening.

Yes, my evenings have themes. We can discuss that later.

This slaw was my least favorite so far. Nothing wrong with it, it just didn't wow me. It did taste better the next day, but still, no taste bud fireworks.

Love them fireworks!

Haitian Coleslaw (Adapted from Bon Appétit)

1/4 cup mayonnaise
1/8 cup olive oil
1/4 cup fresh lime juice
2 tablespoons apple cider vinegar
2 tablespoons Dijon mustard
1 tablespoon sugar
2 small serrano chilies, seeded, minced (about 2 1/2 teaspoons)
1 garlic clove, minced
8 cups (packed) shredded cabbage (about 1 1/4 pounds)
2 cups (packed) shredded carrots (about 2 large)

Whisk mayonnaise, olive oil, lime juice, apple cider vinegar, mustard, sugar, chilies and garlic in medium bowl to blend.

Toss cabbage and carrots in large bowl with enough dressing to coat. Season to taste with salt and pepper. Let flavors meld at room temperature for an hour, or in the refrigerator for four. Serve cold or at room temperature.

Wednesday, February 17, 2010

Green Chili and Cheese Cornbread


green chili cornbread, originally uploaded by Kim De.

Cornbread! One of my favorite foods. Moist or dry, with corn or not, put cornbread in front of me and I will eat it!

Keeping with my Rick Bayless theme these days, I found this at Fronterafiesta.com.

Green Chili and Cheese Cornbread.

Well you know the first thing I got to do was roast peppers! Boy do I love that task! Because I was cooking for company, I left out the jalapeno and just added the poblano for a touch of heat and smoke. The recipe you see below, however, is as written. If you can tolerate a bit of heat, I think you should try it that way!

Another note, and if you know me you will find this a bit strange - I would leave out the cheese the next time. You know, I couldn't taste it or even tell that it was there. So why add the calories?

If you like a sweet bread, this one isn't for you. If you are a "southern purist", you may not like this - it isn't bone dry. But it really is a tasty treat and goes great with chili!


Green Chile and Cheese Cornbread (Rick Bayless)

1 poblano chile

1 jalapeño pepper
1 ¼ cups cornmeal
¾ cup all-purpose flour
2 tablespoons sugar
2 teaspoons baking powder
½ teaspoon each: baking soda, salt
2 large eggs
2/3 cup milk
2/3 cup buttermilk
3 tablespoons melted butter
2 cups shredded Monterey jack cheese

Roast poblano and jalapeno over a gas flame, turning often, until skin is blackened on all sides. Wrap in a towel and let cool. Peel, cut into half, remove seeds and core. Cut poblano into ¼-inch diced. Finely chop the jalapeno.

Heat oven to 425 degrees. Generously grease a 9 by 9-inch baking pan.

Whisk cornmeal, flour, sugar, baking powder, baking soda and salt in a large bowl. Mix eggs, milk and buttermilk in small bowl. Add egg mixture to flour mixture and stir just until moistened. Gently fold in melt butter, poblano, jalapeno and cheese. Do not over mix.

Scrape batter into prepared pan and bake until wooden pick inserted in center comes out clean, about 20 minutes. Serve warm.

Tuesday, February 16, 2010

Mexican Chocolate Streusel Cake


Mexican Choc cake, originally uploaded by Kim De.

Reaching a couple of weeks back I found this cake that hadn't been blogged yet. We definitely don't want to forget about it!

Mexican Chocolate Streusel Cake is a recipe from Rick Bayless at Fronterakitchens.com. Before you think "how different could another chocolate cake be", let me stop you. This cake calls for Mexican chocolate. It is bittersweet, contains cinnamon and a bit of granular sugar. The cinnamon complements the flavor and makes it sing. Suddenly you have a cake rich in flavor that wont break the calorie bank.

Because it is made with cream cheese it stays moist and feels rich on the tongue, making is easier to have a small piece. In my mind, it becomes the perfect vehicle for a touch of strawberry ice cream, after heating the slice, of course!


Mexican Chocolate Streusel Cake (From Rick Bayless)

For the streusel topping:
1 18- or 19-ounce package Mexican chocolate, roughly chopped
1 large egg yolk
Salt
3 1/2 ounces (7 tablespoons) butter, at room temperature
1 cup (4 1/2 ounces) all-purpose flour

For the cake:
1 3/4 cups (8 ounces) all-purpose flour
1 1/4 teaspoons baking powder
8 ounces cream cheese, at room temperature
8 ounces (1 cup) unsalted butter, at room temperature
2/3 cup granulated sugar
4 large eggs, at room temperature
Powdered sugar, for dusting the finished cake


The streusel topping. In a food processor, pulse half of the Mexican chocolate until it is the consistency of coarse crumbs. Remove and set aside for the batter. To the processor, add the second half of the chocolate and process it to the consistency of coarse crumbs. Mix the egg yolk and 1/2 teaspoon salt (if using salted butter, omit the salt) in a small bowl to dissolve the salt. Add to the processor along with the 3 1/2 ounces butter, and the 1cup flour. Pulse the machine just until everything is thoroughly combined—it should look crumbly, not having been processed to a paste.

The cake. Heat the oven to 350 degrees. Butter and flour a 13 x 9-inch baking pan. Sift together the 1 3/4 cups flour and baking powder. In the bowl of an electric mixer on medium speed, combine the cream cheese, the 8 ounces butter and the sugar. Beat until light and fluffy, 2 to 3 minutes. One at a time, add the eggs, beating until one is thoroughly incorporated before adding the next. Add the sifted flour mixture, scrape down the sides of the bowl and beat for 1 minute, just until the flour is incorporated. Lastly, use a large spoon to stir the reserved chopped chocolate into the batter.

Scrape the batter into the prepared pan and smooth. Crumble the streusel topping evenly over the batter, making sure there are no large lumps—lumps may sink during baking.

Bake in the center of the oven until springy (the edges will have just begun to pull away from the sides of the pan) and a toothpick inserted at the center comes out clean, 35 to 40 minutes.

Cool on a wire rack (in my opinion, this cake tastes best when still slightly warm), cut into squares and serve dusted with powdered sugar. Vanilla, caramel or cinnamon-scented ice cream sure goes well with a bite of this pastel

Monday, February 15, 2010

Pre-Valentine's Tapas Night


valentine's tapas, originally uploaded by Kim De.

Friday night we did dinner at home. It was decided in advance that a quiet evening with music and tasty snacks was in order, so enter tapas.

The evening started with Spanish olives and gazpacho, with glasses of Rioja to wash it down. This part was prepped before Bo arrived home and it gave us a chance to sit and talk and listen to some Flamenco music.

When our stomachs felt satisfied, we headed to the kitchen for the teamwork part of the evening. While Bo steamed the Spicy Mussels with White Wine, I made the Calamares A La Plancha and the Ajillo Mushrooms (blogged about here).

Bo thought it important to have a shot of me cooking

This part of the evening was fun, as we don't cook together very often. As you can see from the title picture, it all came to the table with crusty bread for sopping up the mushroom and mussel juices, and of course more of that fantastic Rioja.

Our evening ended with Chocolate-Almond Torte, which I hinted about in this post. As with the rest of the dishes here, more will be said on this recipe later. I can tell you this: Save your calories. It is worth it!

Hope everyone had a great Valentine's Weekend!

Friday, February 12, 2010

Big City Chili


Big City Chili, originally uploaded by Kim De.

As I dash off to a busy afternoon, I wanted to tell you about the chili we had Superbowl Sunday. I made Big City Chili from Frontera Fiesta, a new website from Rick Bayless.

This is great for a party, because you can make it the night before and during the party you slowly re-heat it while you mingle with your guests.

Quick chili! Except, it isn't. The amount of time it took me to cube 3 pounds of meat, well let's say I didn't find it worth the time. During consumption, you can't even tell it was cubed pork shoulder and short ribs. I honestly think a quick brown of some good quality ground beef would produce the same results.

It was tasty and not too spicy, for those of you who prefer it that way. Now, having said that, I won't make this one again. I actually found this chili to have a deeper flavor, from the chocolate and cinnamon, and more of a spicy kick, from the chorizo.

As much as it pains me to admit it, because I love Rick Bayless, I enjoyed the last one better.

But this one was good. It got great reviews from my guests. You should try it!


Big City Chili (Rick Bayless)

2 tablespoons vegetable oil

2 pounds boneless pork shoulder, cut into 1-inch pieces

1 3/4 pounds boneless beef short ribs, cut into 1-inch pieces

Salt

1 large red onion, diced

4 cloves garlic, finely chopped

1 bottle (12 ounces) Bohemia beer

3 jars (16 ounces each) Frontera Guajillo Salsa or Frontera Roasted Tomato Salsa

1 tablespoon chili powder

1 teaspoon dried Mexican oregano, crumbled

1/2 teaspoon ground cumin

2 tablespoons masa harina (corn flour for tortillas) dissolved in 1/4 cup water

2 cans (15 ounces each) white beans, drained

Garnishes:

Crumbled queso anejo or crumbled queso fresco

Sour cream

Chopped onion and fresh cilantro

Crumbled Frontera tortilla chips

Heat oil in large Dutch oven over medium heat. Pat meats dry with paper toweling. Season well with salt. Add meat to hot oil in a single, uncrowded layer. Cook, turning until brown on all sides. Remove to a large plate. Repeat to brown all meat. Add onion to drippings in pan and cook until golden, about 5 minutes. Stir in garlic and cook 1 minute.

Stir in beer and scrape up all the browned bits from the bottom of the pan. Boil to reduce slightly, about 3 minutes. Stir in salsa, chili powder, oregano and cumin. Return meat to pan. Simmer, partially covered and stirring often, until meats are tender and falling apart, about 2 to 2 ½ hours.

Stir in dissolved masa and cook and stir until mixture thickens, about 10 minutes. Stir in beans and season to taste with salt, usually about 1 teaspoon. Simmer a few minutes.

Serve with garnishes.


Wednesday, February 10, 2010

Roasted Poblano Pasta and Cheese


Pob Mac, originally uploaded by Kim De.

I continue my quest for the perfect macaroni and cheese with a hint of heat. Today I decided to combine a few recipes for my own creation.

Enter Roasted Poblano Pasta and Cheese (pasta because you are free to be creative with the shape!)

I got to start with my favorite activity - roasting peppers! Just LOVE that smell!


After steaming them slightly and rubbing the skin free, I diced them and set them aside. Next came the cheese. Most recipes call for shredded. I prefer to cube it. Whichever way you do it, PLEASE dont buy the pre-cut kind. It is worth the effort to do it yourself!

Jumping ahead, the white sauce and pasta are combined with the peppers and placed in a baking dish (or in my case, my trusty 12-inch cast iron skillet).

A hot oven finishes the process by baking to a crunchy crust.

As for the review, the flavor is incredible! A nice level of slow heat that mingles well with the cheese. And if you like baked macaroni and cheese that is also creamy like the stove-top kind, this one is for you. I actually dont yearn for that texture, so the search continues.

I actually think I have an idea as to how to fix this problem. Stay tuned...

Roasted Poblano Pasta and Cheese

3 large fresh poblano chiles
Sea salt
1 lb macaroni or pasta of your choice
8 oz sharp white Cheddar, grated or cubed
1/2 tsp cayenne pepper
1/2 tsp Hungarian paprika
1/2 tsp dry mustard
1/2 tsp Tabasco
3 Tbs unsalted butter
1/3 cup unbleached all-purpose flour
4 cups milk, heated slightly
1/2 tsp sea salt
1/2 tsp grated nutmeg

Preheat oven to 400 degrees. Butter a 9 x 13-inch baking dish or cast iron skillet.

Lay chiles on their sides on a gas burner and turn flame on high. Roast chiles, turning with tongs, until skins are evenly charred, about 10 minutes.

Steam until cool in a closed paper bag, about 15 minutes. Under cold running water, rub off burned peel. Then discard stems, core and devein chiles (scraping away all seeds), and cut into long, thin strips.

Melt 3 tablespoons butter over low heat. Whisk in flour and cook, whisking often, without allowing flour to brown, about 4 minutes. Remove pan from heat and whisk in warm milk. Add salt and nutmeg. Return sauce to medium heat and bring to simmer. Continue to cook, stirring until thickened, about 10 minutes.

Meanwhile, bring a large pot of salted water to a boil. Add pasta and cook until al-dente, about 6 minutes. Drain pasta and transfer to large bowl.

Stir cheese into the white sauce. Add the cayenne, paprika, mustard and Tabasco. Heat, stirring, until cheese just melt and sauce is smooth.

Pour the sauce over the pasta in the bowl. Add the chiles and stir. Spoon into the prepared dish. Bake until pasta is heated through, sauce is bubbling, and top is browned, about 20 minutes.

Remove from oven and let stand on a rack for 5 minutes. Serve.

Monday, February 8, 2010

Jerk Rubbed Chicken Thighs with Mango-Habanero Hot-Sauce


jerk thigh, originally uploaded by Kim De.

With a heavy heart I write this blog. The Colts lost the Superbowl. *Sigh*.

Ok, Back to it.

I decided it was time to try something a bit different. "Caribbean" flavors are something I have enjoyed, but not something I have really tried to cook. I was sure, we would enjoy any recipe I would try, after all we love bold spicy flavors!

Enter recipe-#1 in the Caribbean experiment, Jerk Rubbed Chicken Thighs with Mango-Habanero Hot-Sauce. I saw this recipe on Foodtv made by Bobby Flay.

WHO? I thought he made southwest food? My first reaction too. But if you think about it, there are similarities and really his specialty is food that make your mouth dance. And this did.

There is nothing hard or time consuming about it. Quick rub thrown together and put on thighs, a few ingredients thrown in the blender and *presto*, a sauce. Add rice with a few veggies and you have an amazing meal.

A quick note about the rice. It is supposed to be a rice with beans. Beans are called peas in recipe such as these. However, wanting to have a bit of green on our plates, I decided to actually use peas.

I know it isn't authentic. Don't throw hot peppers!


Jerk Rubbed Chicken Thighs with Home-Made Mango-Habanero Hot Sauce (Bobby Flay)

Jerk Rub: (dont let the list intimidate you, you probably have all this stuff!)
2 Tbs ground coriander
2 Tbs ground ginger
2 Tbs light brown sugar
1 Tbs onion powder
1 Tbs garlic powder
1 Tbs kosher salt
1 Tbs cayenne powder
2 tsp coarse black pepper
2 tsp dry thyme
1 tsp cinnamon
1 tsp allspice
1 tsp ground cloves

8 chicken thighs

Homemade Mango Habanero Sauce:
1 Tbs canola oil
1 small Spanish onion, finely chopped
2 cloves garlic, finely chopped
2 ripe mangoes, peeled, pitted and coarsely chopped
1 habanero, chopped
1 cup white wine vinegar
Salt
Cilantro leaves, for garnish

Combine all spices in a small bowl. Rub the skin side of the chicken with the rub and let rest for 30 minutes. Heat the grill to medium heat and grill the thighs, skin side down for 12 to 15 minutes, or until golden brown. Turn the chicken, close the cover of the grill and move the chicken to the side (or cooler part) of the grill. Continue cooking for 6 to 7 minutes or until completely cooked through. Remove to a platter and let rest 5 minutes before serving.

Serve with Mango-Habanero Hot Sauce. Sprinkle leaves of cilantro on top.

Mango-Habanero Sauce:
Heat oil in medium saucepan over medium heat. Add onions, garlic,
mangoes, habanero and vinegar and cook over low heat for 15 to 20 minutes.

Place the mixture in a blender and blend until smooth. If the mixture is too thick, add a few tablespoons of warm water or vinegar. Season with salt.


Jamaican Rice and Peas (adapted from Bobby Flay)

1 1/2 cups frozen peas, thawed
2 cloves garlic, smashed
1/2 cup unsweetened coconut milk

1 cup water
3 green onions, thinly sliced, plus more for garnish
1 Scotch bonnet pepper, chopped (I used habanero)
3 sprigs fresh thyme
1 1/2 cups long grain rice
Salt and freshly ground pepper

Place garlic and peas in a medium saucepan with a touch of oil and saute 1-2 minutes. Stir in the coconut milk, water, green onions, Scotch bonnet, and thyme, and increase the heat to a boil. Stir in the rice, cover the pot, and cook until the rice is tender and has absorbed most of the liquid. Transfer to a large serving bowl and garnish with sliced green onions.

Saturday, February 6, 2010

Shrimp Ceviche


Ceviche, originally uploaded by Kim De.

It is always a fun yet nerve wracking experience to make something completely new. Especially something you have had and loved in the past.

Enter ceviche. I love this stuff! It's especially good on a hot summer day. Well, here in Middle Tennessee it certainly isn't hot. In fact we are having record breaking snow this winter. But that didn't stop my mouth from craving ceviche.

The first thing I must say is I followed the recipe to the letter. I didn't want to play around with acid-cooking raw shrimp! It was fun to watch the shrimp go from obviously raw

to obviously cooked from the lime juice.


After this phenomena of science was complete, the rest of the recipe was easy. Capers and avocado added tang and creamy texture and the tomato sauce completed the picture with a smoky canvas for the seafood.

We sat down prepared to dig in. I took my first bite. It was an extreme tang of lime. Really. I couldn't even taste the other flavors. All I could taste was lime. The recipe called for "cooking" the shrimp for 6-12 hours. Mine cooked for 11. I think it was too long. What is the right time? I'm not sure yet. Somewhere between raw and waaaay to acid.

Guess I will have to try again!

Veracruz-Style Spicy Shrimp Ceviche (Adapted from Antojitos)

Cooked Tomato Salsa
1 T corn oil
2 cloves garlic
5 plum tomatoes, halved
Leaves from 1/2 bunch Mexican oregano
1 t sugar
Salt and freshly ground black pepper

Ceviche
1 lb medium shrimp, peeled and deveined
About 3 cups freshly squeezed lime juice (about 24 limes)
2 avocados, halved, pitted, peeled and cubed
1/3 cup nonpareil capers, rinsed and drained

Garnishes
1 avocado, halved and pitted
6 sprigs cilantro
1 lime, sliced into 6 rounds

To make the cooked salsa, in a 2-qt saucepan, heat the oil over medium heat. Add the garlic and cook for 1-2 minutes or until softened but not colored. Take care to not overcook.

Add the tomatoes, oregano and sugar and cook, stirring, for about 10 minutes or until mixture has a sauce-like consistency. Remove from heat and let cool slightly.

Transfer the salsa to the blender and process until smooth. Season with salt and pepper. Transfer to a glass or other reactive container and refrigerate for at least 1 hour or until chilled.

To make the ceviche, in a non-reactive bowl, gently mix the shrimp and lime juice. Cover tightly and refrigerate for at least 6 hour or up to 12 to give the shrimp time to "cook" in the lime juice.

Remove the shrimp from the lime juice with a slotted spoon and transfer them to a nonreactive bowl. Add the avocados and capers and mix gently.

To serve, spoon 1/4 cup of the cooked salsa into the bottom of a serving dish. Add about one 6th of the recipe then top it with 1 T cooked salsa. To garnish, add a slice of avocado, a slice of lime and a sprig of cilantro.

Friday, February 5, 2010

Seared Tuna with Zucchini and Toasty Garlic Mojo

I have a plan in place to try to eat more salmon. I know Ahi is high in mercury so eating it every week isn't the best idea. So I am going to work on liking salmon.

But that is for another week. This week I finished the last of the Ahi in the freezer. With a Rick Bayless recipe. What a shock!

I found this in Mexican Everyday. The original called for a flaky fish such as flounder, but I was sure it would also work with my beloved tuna.

Making the base for the zucchini mojo was an absolute pleasure! Slowly sauteing cloves of smashed garlic in fruity olive oil is my idea of happiness! If there was a way I could properly convey the aroma coming from the pan I would share it with you, but I am not that much of a wordsmith. And searing the tuna in the leftover oil and watching it turn brown and crusty, pure heaven!

The mojo would be wonderful on most meats - chicken, pork etc. If it looks good to you, please don't think it is limited to fish. Because of the intense flavors presented with the main dish, I chose a basic white rice. I have also included its recipe.


Enjoy!

Seared Tuna with Zucchini and Toasty Garlic Mojo (Adapted from Mexican Everyday)

1/2 lb tuna steak
2 1/2 tbsp olive oil
8 cloves garlic, peeled and smashed
1/3 cup chicken or vegetable broth
1 large zucchini, diced
1/2 cup cilantro

Warm the olive oil in a large skillet. Add the garlic and cook until soft and lightly browned on all sides, around 4 minutes. Scoop the garlic into a food processor, leaving as much oil behind as possible.

Add the broth to the blender along with 1/2 tsp salt and 1/2 tsp black pepper. Blend until smooth.

Return the skillet to medium-high heat. Season the fish with salt and pepper. Lay the fish in the pan. When it is brown underneath, flip it over with a spatula. Cook it until the fish gives slightly under pressure, about 2 minutes.

Add the zucchini to the skillet and saute until just beginning to soften and slightly browned, about 6 minutes. Add the garlic mixture and cilantro. Stir in the sauce until it comes to a boil. Turn to a simmer and cook until the liquid is almost evaporated, 3-4 minutes. Season to taste.

Arroz Blanco (Mexican White Rice from Rick Bayless)

2 1/2 cups chicken broth or water
salt
2 tablespoons vegetable oil or olive oil
1 1/2 cups white rice, preferably medium-grain
1 small white onion, chopped
2 garlic cloves, peeled and finely chopped
1 tablespoon fresh lime juice

In small saucepan or microwave oven, heat broth or water until steaming.

Stir in about 3/4 teaspoon salt if using salted broth, 1 1/2 teaspoons if using unsalted broth or water.

Cover and keep warm.

In medium (3-quart) saucepan with a tight-fitting lid, heat the oil over medium heat.

When hot, add raw rice and onion and stir regularly until grains have turned from translucent to milky-white, 4-5 minutes.

Add garlic and stir for a few seconds, until fragrant. Do not let grains brown.

Add the warm liquid and lime juice, stir thoroughly, scraping down any grains that are clinging to the side of the pan. (or at this point put rice and liquid in a rice cooker)

Cover and cook over the lowest heat for 15 minutes--temperature should be low enough that only the slightest hint of steam escapes lid.

Remove pan from heat and let stand covered for 5 minutes.

Uncover and test a grain of rice: if still a little hard, re-cover pan and set over low heat for about 5 min.; if rice has absorbed all liquid and is completely dry, sprinkle on 2 tablespoons water before returning to heat.

When rice is done, sprinkle on parsley and gently fluff with fork to release steam and stop the cooking.

Thursday, February 4, 2010

Green Chile Crab Cakes

crabcake, originally uploaded by Kim De.

Rick Bayless has a new website all about partying! It includes lots of great recipes using Frontera Grill Salsas as shortcuts so the host can attend the party too!

I'm all about that!

The party where these were served was a party for two. Sooooooo good - I'm not sure I want to make these for company. We loved them so much that they may have to our little secret!

The other little secret, these were very easy.Against the grain, I basically followed the instructions to the letter, except I used the food processor to mix everything together.

Another plus is the make ahead component. I rolled them into balls and wrapped in plastic wrap. When ready to cook, I pressed them into disks, placed them in the freezer for a few minutes, then fried them up in a minimal amount of oil.

They were light, not greasy, and not at all spicy (for those of you that shy away from the "caliente" flavors).

Now that I have you salivating, I'll let you see the recipe.

Green Chile Crab Cakes with Green Chile Mayo (Rick Bayless)

1 pound crab meat
1 ½ cups panko breadcrumbs
½ cup Frontera Tomatillo Salsa
2 whole large eggs
¼ cup cilantro, chopped
2 TB mayonnaise
1 tsp salt
2 TB olive or vegetable oil for pan-frying
2 limes, cut into wedges for garnish

Green Chile Mayo

1 cup mayonnaise
¼ cup Frontera Tomatillo Salsa
1 TB cilantro, chopped
¼ tsp salt


Combine the crab meat, panko, ½ cup salsa, eggs, cilantro, mayonnaise and salt until well mixed. Form the mixture into 1 ½” patties about ½” thick. Lay them on a plate or tray lined with plastic wrap. To let the patties set a little, place covered in the freezer while making the sauce.

For the sauce, mix all the sauce ingredients together until well combined.

In a large skillet (nonstick works well here), heat the oil over medium. Lay the cakes in the hot oil in a single layer and fry until crispy and browned on one side, about 3 minutes. Carefully flip the cakes over with a spatula and brown the other side, about 2 minutes more. It will probably take at least 2 batches to fry all the cakes.

Arrange cakes on serving plate and drizzle with the sauce. Garnish with lime wedges and serve.

Wednesday, February 3, 2010

Hot Pepper 'Za


hot pepper 'za, originally uploaded by Kim De.

Pizza is one of my favorite foods. When I was a single gal, I ate it frequently. My friend, Autumn, shortened it to 'Za and the zippy term has stuck.

Speaking of zippy...


This "'za" was incredibly spicy! It was also amazing on flavor. Don't hesitate to try it, as you can very easily control the amount of heat.

Now the fun thing with this is I made it up so there is no formal recipe. I didn't measure the veggies, just added what I had prepared until it looked like enough.

Doesn't it look good?


It is! So without further ado, I present to you,

Hot Pepper 'Za

One recipe pizza dough (I used this recipe)
Poblano peppers, roasted and cut into strips
Jalapeno pepper, roasted and sliced (optional)
Red bell pepper, roasted and cut into strips
Red onion, sliced thin and pre-cooked (I sauteed with salt until soft)
Good quality white cheese, Monterey Jack, Sharp Provolone, etc, shredded


Roast the vegetables over a gas flame, or place on a baking sheet and broil, turning frequently, until all sides are charred. Place in a paper bag to steam for 5-15 minutes. Rub gently under cold water to "skin" most of the black pepper parts.

Preheat the oven to 550.

Press the pizza dough into the shape you wish to use. Slide it onto a cornmeal covered pizza peel or onto parchment paper. Let it rest about 5 minutes then press more until it is the desired size. (We make ours to a 8-9 inch round)

Sprinkle a small amount of cheese onto the dough. Begin to lay the poblano peppers in a pin-wheel shape around the dough. Lay the red bell peppers down next to them. Add as much or as little as looks good to you.

Sprinkle the red onion around the crust then lay the jalapeno slices over the top. Sprinkle with more cheese then place in the oven for 6-10 minutes (depending how hot your oven is). The cheese will be bubbly and the crust a light brown. Carefully remove and loet cool for 5-10 minutes before slicing.

Enjoy!

Monday, February 1, 2010

Have you begun to plan for Valentine's Day?


February. It has arrived. It is the month of amore. The time to show your loved ones how much you care.

Blah, blah, blah!

Now that I have properly described the Hallmark version of the month...

I don't actually buy into this concept – I think effort should be put into your relationships all year. But Valentine's Day can serve as a good relationship "check-up", and a good excuse for a special night in.

So think about it. How do you show your love?

On a daily basis, I show my love by cooking. The time I take to carefully plan a meal, chop the vegetables, tear the herbs, prepare a marinade, plate the food and so on, is time I am spending on my husband. It is time I am devoting to caring for him. It is part of how I show him my love.

Now that the mushy stuff is out of the way, lets talk about the fun side of Valentines.

What does it mean to you? Do you like to cook a nice meal for Valentines? Have you thought about what you want to make this year? What about what you will wear during the cooking and serving process?

I found these very cute aprons and thought you might find them perfect for setting the mood during dinner prep and consumption. They can be found at http://susanandveronica.com Maybe they can help spark a plan for your special night.

Whether it is an evening surrounded by candlelight,

or a special breakfast in bed,

if you take the time to plan a meal, every detail should be fun and romantic. I think these aprons could help to set the right mood!

As for my Valentines menu? It is still in the works. I am thinking something chocolate. Here is a recipe I am considering:

Upside-Down Fudge-Almond Tart (Cooking Light January 2010)

Decadent, rich, and intensely chocolaty, this recipe garnered our highest rating for flavor. It's a bit of a splurge, an indulgent way to cap off a Valentine's Day meal. Leftovers keep well in the fridge for up to five days.

Cooking spray
1 cup coarsely chopped almonds, toasted
4 ounces bittersweet chocolate, coarsely chopped
6 tablespoons unsalted butter
2.25 ounces all-purpose flour (about 1/2 cup)
3 tablespoons sifted Dutch process cocoa
1/4 teaspoon salt
2 large eggs
6 tablespoons sugar
2 tablespoons golden cane syrup (such as Lyle's Golden Syrup)
3/4 teaspoon vanilla extract

1. Preheat oven to 350°. Set oven rack to lowest third of oven.

2. Coat a 9-inch round removable-bottom tart pan with cooking spray. Sprinkle almonds in pan.

3. Combine chocolate and butter in the top of a double boiler. Cook over simmering water until chocolate melts, stirring occasionally. Remove from heat; set aside.

4. Weigh or lightly spoon flour into a dry measuring cup; level with a knife. Combine flour, Dutch process cocoa, and salt in a medium bowl, stirring with a whisk.

5. Place eggs in a large bowl; beat with a mixer at medium speed 2 minutes or until thick and pale. Gradually add sugar, 1 tablespoon at a time, beating at medium speed 2 minutes or until sugar dissolves. Add golden cane syrup and vanilla; beat on low speed 1 minute or until blended. Add chocolate mixture; beat 1 minute or until blended. Add flour mixture, and beat on low speed just until combined.

6. Pour batter over nuts into the prepared pan, spreading evenly. Bake in lower third of oven at 350° for 20 minutes or until a wooden pick inserted into the center comes out with a few moist crumbs. Cool tart in pan 20 minutes on wire rack. Invert tart onto serving platter.

Chilaquiles - Yummmmm!


chilaquiles bayless, originally uploaded by Kim De.

Recently I had the occasion to cook a larger amount then usual. I was bringing dinner to a friend and her family and wanted there to be leftovers. My mind immediately went to Chilaquiles for a Crowd from Rick Bayless.

With 12-16 servings it seemed perfect for two dinners for 5, and possibly a lunch. But with nary a vegetable in sight how would I make it a one dish meal?

Mr. Bayless, you've done it again! With a vegetarian version from his book Salsas that Cook it was easy to combine the two for a complete and balanced meal.

Since I was cooking for children, I cut the amount of salsa called for in half, but what you see below is how I would make it for my household.

I must mention, this dish is very easy, very forgiving and very versitle. Make it for company and wow your guests!

Chilaquiles for a Crowd (Adapted from Rick Bayless)

2 tablespoons vegetable oil
1 large onion, diced
3 16-ounce jars of salsa, preferably fire-roasted tomatillo salsa
1 quart chicken broth
12 ounces thick tortilla chips

2 medium zucchini, cut into small dice
4 cups baby spinach, torn
2 to 3 cups (10 ounces to a pound) coarsely shredded cooked chicken - I used a grocery store roasted chicken
½ cup finely grated Mexican queso añejo, Parmesan or Romano, optional
A handful of cilantro leaves, for garnish


In a very large (6-quart) Dutch oven, heat the oil over medium-high. Add the onion and cook, stirring regularly, until richly browned. Add the zucchini and cook 2-3 minutes.

Add the salsa and broth and bring to a boil. When the sauce is at a rolling boil, turn down the heat and stir in the spinach. You may need to add it in batches. Simmer until the spinach is wilted then turn off the heat. Add the tortilla chips. Press the chips down to ensure that nearly all are submerged; a few on the top may still be sticking out.

Strew the chicken over the top, cover and let stand for 3 or 4 minutes. Gently stir everything together, then sprinkle with the optional grated queso anejo and cilantro. Serve without hesitation.