Wednesday, September 29, 2010

Meatloaf and My Perfect Comfort Meal

Mmmmm, Meatloaf.  It is one of those things I want one time each year-and only one time.  It is when it thinks about being autumn weather, and I want it to be with baked macaroni and cheese and green beans.

So I made it.  I have several "fancy" recipes, but this year I wanted a more "traditional" flavor.  So I searched a few recipes to cobble together one that would give me the "old fashioned" feel.  You know the one.  Juicy, with ground beef and ketchup. 

If that is what you also look for, check out the recipe below!

Now for the macaroni and cheese.  I never stray from the recipe.  I use the same traditional one each time because I love it. 

Now this time I used a "multi-colored" macaroni because that was the whole wheat kind the store had.  The kind with spinach and beet noodles.  And it was nice and hearty!  However I prefer the whole wheat kind without the veggie colors. 


Having made this several times I have also already blogged about it, and here is the recipe.  Now look below.  Comfort on a plate!


Old-Fashioned Meatloaf
  • 1 slightly beaten egg
  • 1 cup Heinz Ketchup ®
  • 1 tablespoon vegetable or olive oil
  • 1-1 ½ pounds lean ground beef
  • ½ cup dry bread crumbs
  • ½ cup chopped celery
  • ½ cup chopped green bell pepper
  • ½ cup chopped onion
  • ½ teaspoon salt
  • ¼ teaspoon pepper
In saucepan, cook onion, celery and bell pepper in oil until tender-crisp; stir in ketchup. Combine ½ cup ketchup mixture with ground beef, bread crumbs, egg, salt and pepper. Shape into a loaf (8” x 4”) in shallow baking pan. Bake in 350°F oven for 1 hour. Let stand 5 minutes before slicing. Pour remaining ketchup sauce, cold or heated, over meat loaf. Makes 6 servings.

Monday, September 27, 2010

The best black bean soup redoux


I dont very often repeat a recipe and even more rarely do I re-review it.  However I made an exception with this black bean recipe from Bobby Flay's Mesa Grill Cookbook.

Last time I made it I used canned beans.  Always good in a pinch, but if you have the time, make this (and all other) recipes with dried.  The texture and flavor will great you with a happy hello and at that moment you will never regret the extra time you took.

Black Bean Soup (Adapted from Bobby Flay)

1 lb dried black beans
1 tablespoon olive oil
1 medium carrot, peeled and coarsely chopped
1 medium Spanish onion, coarsely chopped
3 garlic cloves, coarsely chopped
1 cup red wine
3 jalapenos, chilies roasted, peeled and seeded
1 poblano chile, chilie roasted, peeled and seeded
4 cups low sodium chicken broth or water
2 tablespoons fresh lime juice
kosher salt
pepper, freshly ground

Heat olive in in a medium saucepan over medium heat. Add carrot, onion and garlic and cook for 5 minutes, or until onion is translucent. Add wine, bring to a boil and cook until reduced by half.

Reduce heat to medium and add beans, chilies and broth. Simmer for 30 minutes.  Remove from heat and add lime juice and salt and pepper to taste.

Using a blender or food processor, puree half of the soup and return it to the pot. Bring back to a simmer before serving.

Top with garnishes such as finely chopped red onion, coarsely chopped avocado, diced tomatoes and sour cream.

Friday, September 24, 2010

What is sustainable food?

  photo by niseag03

Have you ever really thought about the word "sustainable?"  About what it really means?  Recently I was given the chance to give that word some thought.  I was asked to guest blog at The Farm at Green Village about the meaning of sustainability. 

If you are interested in my definition, read my blog post What is Sustainable Food?

Wednesday, September 22, 2010

Classic Spaghetti Carbonara


I just had the most fun!  I got the chance to choose a recipe developed at the culinary school at Baltimore International College, make it, then blog about it.  I chose Spaghetti Carbonara - actually Bo chose it - and I served it to Bo and some friends.  

So for all the press it gets, carbonara isn't hard to make, actually it is kind of fun.  Very un-like me, I followed the recipe directions as written making no substitutions nor lightening it at all.  So it began with the cooking of bacon.  The one exception to the above rule I made was cooking the bacon then crumbling instead of chopping then cooking.

The bacon was the most time consuming part of the recipe.  I had all the other ingredients prepped before I began and I let the pasta cook at the same time, making the total prep time for this dish less than an hour!  

As you read the recipe below and prepare to make it, please please PLEASE promise me you will grate your own parmesan cheese – NEVER use the green can, and really, don't use the pre-grated kind at the deli for this recipe as the parmesan cheese is a key ingredient.  

One other change/substitution I made was to let the eggs sit at room temperature for two hours to help them mix with the pasta without scrambling.

I know, you are wanting to know how it tasted!  Ok, here goes.  I thought it was missing....something.  Now I did go light on the salt because of the bacon.  Once I added a bit more to my serving  it opened up the flavor a bit.  One of my friends thought it could use a touch of white wine and onion that is found in other recipes.  My other friend thought a touch of cream or milk would mix things up a bit. 


Bo, however, found it to be perfect!  I still recommend going light with the salt and allowing each guest to add as they desire.  Otherwise, this recipe was fabulous, rich and tasty, and I know I will be making it again, if for no other reason than to make a happy husband....

Classic Spaghetti Carbonara
Culinary School at Baltimore International College

Ingredients:
1/2 pound bacon, chopped
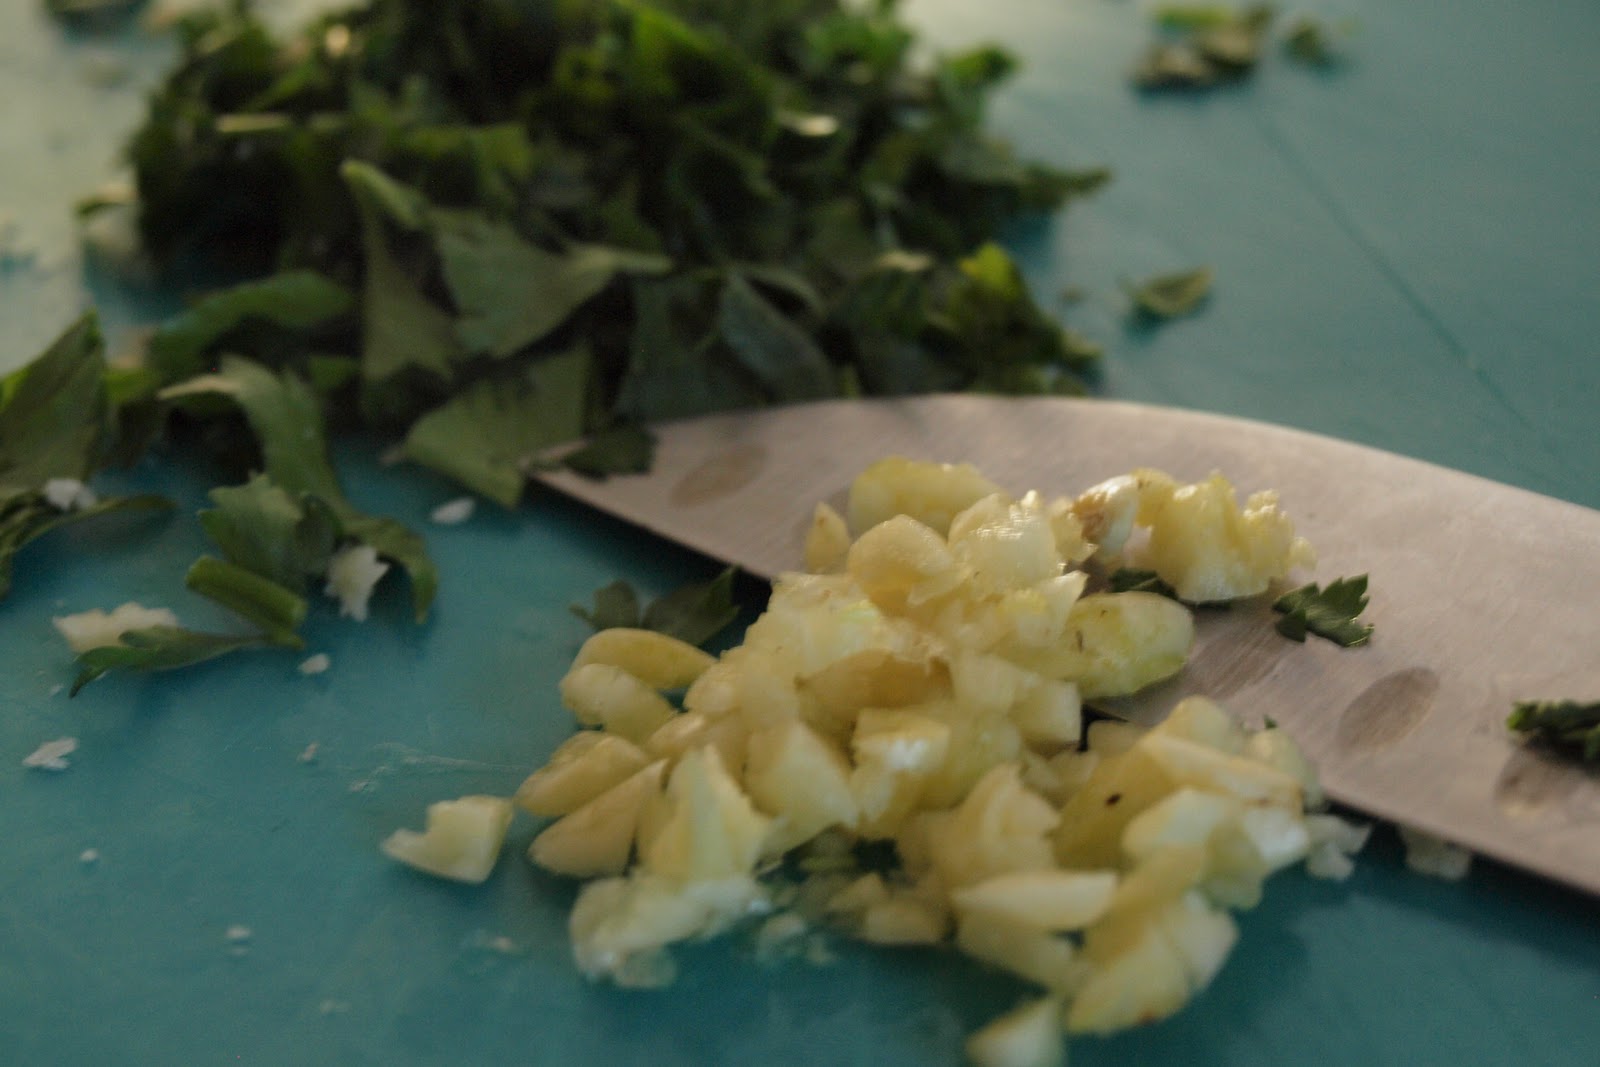
1 tablespoon garlic, chopped
1 pound fresh spaghetti cooked al dente
4 large eggs, beaten
1 cup Parmigiano-Reggiano, fresh, grated
1 tablespoon parsley, fresh, chopped
Salt and pepper to taste

Directions:
1.) In a large sauté pan over medium heat, cook the bacon until crispy, about 6 minutes. Remove the bacon and drain on paper towels.
2.) Pour off all the oil except for 3 tablespoons.
3.) Add the garlic. Season with black pepper. Sauté for 30 seconds.
4.) Add the crispy bacon and the pasta. Saute for 1 minute.
5.) Season the eggs with salt. Remove the pan from the heat and add the eggs, whisking quickly until the eggs thicken, but do not scramble.
6.) Add the cheese and re-season with salt and pepper.
7.) Mound into serving bowls and garnish with parsley.

Monday, September 20, 2010

Cauliflower Cheese & Chili Risotto


I found this recipe on Jamie Oliver's website.  We were both craving risotto and I really wanted to try something new.

First things first.  Could he be any cuter?

Next he cooks the way I like to cook - clean, fresh ingredients, with minimum muss and fuss.  The food comes out tasting of simplicity yet is robust.

Finally I love his commitment trying to help children, families and schools see a healthier way of living life.  His Food Revolution.  The philosophy is to learn to enjoy everything in a modest way.

Sounds simple, huh?


One final gush, the Food Revolution show that was filmed and broadcast here in the U.S. won an Emmy award for Outstanding Reality Program.

Ok now for the recipe.  Fabulous.  Outstanding.  The texture was soft yet chewy and with the vegetable being cauliflower, it didn't overpower the rice, instead it blended perfectly.  A note - I used broca-flower to put s touch of green into the dish while still using the mildness of the cauliflower.


Cauliflower Cheese & Chili Risotto (Recipe by Jamie Oliver)

1 large red onion
2 sticks of celery
Few sprigs of fresh thyme
2 knobs of butter(I discovered a "knob" is kind of like a "pinch" - no real definition but close to 1 T.)
Olive oil
10oz/300g cauliflower
1½pt/800ml chicken stock, preferably organic
1 fresh red chilli
3½oz/100g parmesan cheese
10oz/300g risotto rice
7fl oz/200ml white wine
Sea salt and freshly ground black pepper
  • Preheat the oven to the lowest setting and place your plates in the oven to warm.
  • Place a large saucepan on a low to medium heat. Peel the onion and trim the celery sticks then finely chop or coarsely grate them. Pick the thyme leaves.
  • Add a knob of butter to the hot pan with the onion, celery, thyme, a splash of olive oil, and a splash of water. Cook over a low heat for around 5 minutes, stirring occasionally until soft.
  • Break the cauliflower into florets and finely slice the stem. Bring the stock to the boil in a medium saucepan, then turn the heat down to low and add the cauliflower.
  • Chop the chilli finely (deseed it if you don’t like things too spicy) and put to one side for later. Finely grate the parmesan.
  • Once your vegetables are very soft (but not browned) add the rice.
  • Stir and fry the rice for a minute until translucent, then add the wine and keep stirring until it has all been absorbed by the rice.
  • Turn the heat under the rice up to medium then add a ladleful of hot stock and cauliflower.
  • Stir constantly and continue adding stock, a ladle at a time, waiting for the rice to soak it up before adding the next ladleful.
  • Gently mash the cauliflower into the rice as it cooks. Continue until the rice is cooked and the risotto has a nice oozy consistency. If you run out of stock, use boiling water.
  • Take the pan of risotto off the heat and stir in your remaining knob of butter and half the Parmesan. Taste the risotto and season with a good pinch of salt and pepper. Cover with a lid.
  • This is the perfect time to make your table look respectable so get the cutlery, salt and pepper and drinks set out nicely.
  • Get your plates out of the oven then divide the risotto between them. Top each one with the remaining Parmesan and a sprinkle of chilli.

Sunday, September 19, 2010

Start a Cooking Club


Have you ever wanted to be a part of a cooking club. Ya know the one. Where friends (or strangers who become friends) gather to cook then eat together. Or cook separately then come together to eat the meal.


I was part of one when I live in Houston. In fact I helped found it. A group of people, strangers, who came together out of a love of cooking and food. The group changed some over the years, some came, some went, but it maintained itself as long as I live in Houston, and I assume it had a life long after I left.


We (my group) found each other through the Cooking Light Community. Those of us who read the magazine and participated in the community shared a love of good food, good health and cooking. It was a match made in heaven.


But there are other ways to find your own group. Below is an article I wrote with tips and suggestions. I hope you enjoy it!


Thursday, September 16, 2010

Pork Tinga with Avocado and Fresh Cheese


Like most recipes these days, this was used inspiration then I made changes.


Like leaving out the potatoes.  I have a thing about using potatoes when there is a tortilla involved.

Although Bo pointed out it is no different than pasta with bread or fries with a burger-on-a-bun.

I guess he is right, but my way turned out pretty darned great!  Check it out below, then try it at home!

Pork Tinga with Avocados and Fresh Cheese (Inspired by Rick Bayless)

1 tablespoon vegetable or olive oil
1 pound lean, boneless pork shoulder, trimmed and cut into 1 1/2-inch cubes
1 large white onion, sliced 1/4–inch thick
1 garlic clove, minced
1  28-ounce can diced tomatoes, in juice (preferably fire-roasted)
2 to 3 canned chipotle chiles, en adobo, finely chopped
4 teaspoons chipotle canning sauce
1 tablespoon Worcestershire sauce
1/2 teaspoon dried oregano, preferably Mexican
Salt
About 1/2 cup crumbled Mexican queso fresco or feta cheese (I used feta because I had some.  Turned out great)
1 ripe avocado, pitted, flesh scooped from the skin and diced
Warm corn tortillas

Heat the oil in a stovetop-rated slow cooker liner over medium-high heat.  (If your slow cooker liner isn’t made from a material that can be used on a stovetop, use a very large (12-inch) non-stick skillet.)  Once the oil is very hot, add the pork in an single layer and cook, stirring until the meat has browned, about  6 to 8 minutes.  Turn off the heat and if you’re using a skillet, transfer the meat and its juices into the slow cooker.  Add the onions, garlic, tomatoes, chipotles, adobo sauce, Worcestershire, oregano and 1/2 teaspoon salt to the slow cooker and stir to mix thoroughly.  Cook for 6 hours at the highest temperature. ****  
After six hours, gently stir the tinga.  If the sauce seems too thick, stir in a little water.  Taste, and season with salt if you think the dish needs it.   Scoop into a large bowl, sprinkle with the fresh cheese and diced avocado, and serve with warm tortillas.

*****  I am still fairly new at cooking meat.  I started out as directed, but after two hours at high the pork was done and on the verge of overdone.  If you know more than me, you probably know what to do.  However next time I would cook it on low.

Tuesday, September 14, 2010

Support the Great American Dine Out to wipe out childhood hunger - National Food Reality TV | Examiner.com

The number of children that go to bed hungry each night is staggering. The number I taught who only got food in school is sad. The issue is so out of control that sometimes it is difficult to know what to do.

photo by GADO

Enter the Great American Dine Out a week of dining to end hunger. Next week, September 19-25, restaurants all across America will offer promotions then donate proceeds to Share Our Strength. Share Our Strength is a non-profit whose goal is to end childhood hunger. Great American Dine Out is just one of the great events they hold each year for this important cause.


If you had plans to eat out next week, consider eating at a restaurant that is supporting this cause. The link above is to my article on the event and it contains a search link. Put in your city, state or zip code and get a listing of all the places near you that are participating.

If you don't plan to eat out next, visit the websites of Great American Dine Out or Share Our Strength to find all the other ways you can help!

Monday, September 13, 2010

Pasta with Mustard Sauce


Creativity - its the cornerstone of any good meal.  At least of many of my meals.  When I am feeling creative, that is.

You see, I don't draw.  In fact I can't draw.  Or paint.  I don't scrapbook, knit or cross stitch.  Instead I cook.  I create recipes.  I re-create recipes.  I even use creativity in my menu planning.

Whatever that particular day I pull out of my hat to do, cooking is my creativity.  That being said, I love to create recipes, or take recipes as inspiration and change them up so they are more "mine."  And I really thought a lovely pasta with mustard sauce would be a nice light meal on a hot day.  So I did some research, found a template, and set out to create the recipe you see below.

The picture you see above, it is not of my pasta.  We were ready to eat it and didn't get around to taking a photo.  So I found a pretty photo for you to look at while I talk.  I really enjoyed this sauce.  It was soft and mellow with a back taste of the mustard.  I think it would be wonderful on fish or chicken too!  Let me know if you try it!

Pasta with Mustard Sauce

8 oz fresh spinach, chopped or torn
1 c cherry tomatoes, sliced in half
1/4 cup spicy mustard
2 T champagne vinegar
1/4 cup white wine
2 T olive oil
3 cloves garlic, chopped
2 teaspoons olive oil
1 lb pasta (any type, but a delicate angel hair would be nice with this sauce)
salt and pepper

Slice tomatoes and place them and the spinach into colander.  Place in the sink.  

Whisk mustard, vinegar and wine together.  Add 2 T olive oil and whisk to blend.  Heat 2 t olive oil in a skillet.  Add garlic, salt and pepper and saute until soft, about 2 minutes.  Add mustard mixture and bring to slow simmer.  Simmer until reduced by half.

In the meantime cook the pasta in boiling water until al dente, about 7 minutes.  Drain the pasta into the colander over the spinach and tomatoes.  Put in a large bowl and toss with the mustard sauce.

***  If you want to add meat to this dish, chopped chicken breast or shrimp would work great.  Add 1/2-1 lb meat to the mustard mixture in the skillet and cook through.  Feel free to double the sauce ingredients to make up for the addition of the meat.

Thursday, September 9, 2010

Marinated Flank Steak

Flank steak is one of those cuts of beef you have to be careful with.  Cooked too long, and it becomes like rubber.  However when cooked correctly, it is fabulous, especially sliced on the bias and served over rice or tortillas with a salsa of some sort.  Yes folks, tacos or fajitas!


The other issue one can have with flank steak is full infusing it with a touch of flavor.  Some herbs, garlic, oil and an acid of some sort can work their way into the meat, providing a hint of excitement while also serving to marinate it.

Below is a lose "recipe" of how I marinated the beauty you see above you.  Use this method, or just take it as inspiration for your own recipe.

Ps - If you have a Mexican restaurant in town that makes their own corn tortillas, please buy from them instead of the ones at the grocery store.  It will make ALL the difference!


Marinated Flank Steak
Depending on the size of your steak, mix:
Olive oil, red wine vinegar and red wine together.  This was about 1/2 lb of meat so I used 1 cup wine to 2 T wine vinegar and 2 T olive oil.
Crush 4-5 garlic cloves (we love garlic)
Bruise or lightly chop a few herbs - cilantro is fabulous with this.

Mix the marinade and toss it with the meat in a large bowl of a large freezer bag.  Make sure all of the meat is covered.  Let sit in the refrigerator for at least 2 hours, 4-6 is even better!

Prepare your grill or cast iron skillet for medium heat.  Cook the steak for 4 minutes, then turn for another three.  It is probably close to being done now - you just need to continue to cook it to your desired temperature.  Here is an article I wrote on cooking filet mignon.  The first section is about cooking to the perfect temperature.  I know it is about filet, but the sentiment is the same!

The final, very important step is to let the meat rest, covered by a towel or foil, for at least 10 minutes before cutting.  This will allow the juices to settle inside.  Serve over rice or in warmed corn tortillas with salsa!

Tuesday, September 7, 2010

Planning the Perfect Football Party


Are you ready for some football? I am! I LOVE football season! Spending a cold Sunday on the sofa cheering on the team...


picture by _Jen_

And of course I make special football foods on Sundays! However, if your aren't a party-planning geek like me, chances are parties make you stressed. Don't be. Read my above article on planning the perfect football party and have fun, not frets!

Monday, September 6, 2010

Happy Labor Day

 photo by riacale

Here's hoping you are getting a "labor break" and are enjoying a great cookout with family and friends!

Thursday, September 2, 2010

Jalapeno Chips

HAPPY SEPTEMBER!!!
If you know me personally, you know this is a HUGE deal to me.  I can't stand summer.  I despise the heat.  The fact that Bo's birthday is in July is the only positive I find in either July or August.
I know that on the calendar, fall is about 20 days away.  That's ok.  Because when September 1st hits, I know it is on the way, that the weather could start to turn at any time, and that I can survive! 


Now that that has been said.... on to the food.
One of our favorite snacks from one of our favorite restaurants is jalapeno chips.  Ummmmm, crunchy, tart, spicy - they are amazing.  And of course, fried. 

A few weeks ago I discovered these baked-fried green tomatoes and thought, "Why not?"  So I tried and surprised Bo one night with dinner.  They work!  You can't tell they aren't fried.  Serve with a creamy homemade ranch dressing to add a cooling blend and ice cold beer.  You will have a very happy husband!

Batter'd and Fried Jalapeno Chips

1 cup pickled jalapenos peppers
1 cup milk mixed with 1 T white vinegar
1/2 cup flour
3/4 cup corn meal
Salt and pepper

Preheat the oven to 400.  Heat a baking sheet for 10 minutes prior to baking.

Drain the jalapenos on paper towel and let sit on plate for an hour to dry.

Mix the milk and vinegar in a large bowl and let sit for at least 5 minutes.  Toss the jalapenos in the milk.

In another large bowl mix the flour, corn meal, salt and pepper.  Remove the jalapenos from the milk with a slotted spoon of your hands and add to the flour mixture.

Toss well to coat all of the peppers.  Place the peppers on the oiled pan.  Use your fingers to make sure they are separated.  Cook for 10 minutes, turn and cook for another 5, or until lightly browned.

Serve with creamy ranch dressing.